This article was co-authored by Ashley Adams and by wikiHow staff writer, Amy Bobinger. Ashley Adams is a Licensed Cosmetologist and Hair Stylist in Illinois. She completed her Cosmetology education at John Amico School of Hair Design in 2016.
There are 7 references cited in this article, which can be found at the bottom of the page.
This article has been viewed 328,736 times.
Dyeing just the underside of your hair is a great way to try out a new color without committing all the way. In addition, you can create some really cool effects by pairing different colors, like dyeing the underside of your hair black if it’s platinum blonde, or by adding a bright pop of a rainbow-colored hue. The process is much the same as dyeing all of your hair, except you’ll create a part and separate out the top portion of hair.
Steps
Prepping Your Hair and Workspace
-
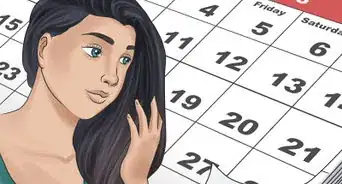
1Wash your hair the day before you color it. Typically, you should avoid washing your hair right before you color it. Your scalp will be healthier if it’s protected from the dye with some of its natural oils, and washing the night before you dye will allow those oils to build back up. In addition, most hair dye brands recommend applying the product to dry hair.[1]
- Some semi-permanent dyes work best on clean hair or even require that you wash your hair right before dyeing it, so read the instructions that came in your box of dye to be sure.
- If your hair is too dirty, the dye might not be able to penetrate your hair evenly, so don’t try to color your hair if it’s been more than 2-3 days since the last time you washed it.
-
2Put on old clothes that you don’t mind staining. Hair dye can be messy, even if you’re careful. Since you’ll be dyeing the hair at the back of your head, it will be even harder to avoid dripping dye. To avoid ruining your nice clothes, put on an old shirt and some shorts or sweatpants. That way, if a little dye does drip onto your clothes, you won’t be worried about it.[2]
- You could also purchase a hairdresser’s cape to wear over your clothing.
Tip: If you have one, consider wearing an old button-down shirt. That way, you won’t have to pull your shirt over your head when it’s time to rinse the dye out of your hair.
Advertisement -
3Prepare your workstation with towels, hair clips, a timer, and a comb. Once your hands (or gloves) are covered in dye, it will be really inconvenient to have to go looking for anything. Set up the area where you want to dye your hair with everything you might need during the process. Spread out towels or newspapers on your floor or counter. Also, keep some towels nearby for easy cleanup if a spill or splatter occurs.[3]
- If your kit didn’t come with gloves, you’ll need those as well.
- The process will be easier if you do it in the bathroom and have 2 mirrors, such as a wall-mounted mirror and a handheld mirror, so you can see the back of your head. Use the sink counter as your work station.
-
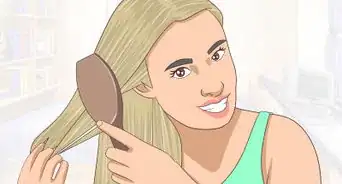
4Comb your hair thoroughly to detangle it. Snags and tangles could cause the dye to saturate your hair unevenly, so take the time to comb it out before you start the dyeing process.[4]
- Also, it will be harder to get a perfectly smooth part if your hair is knotted up.
-
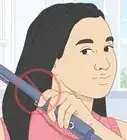
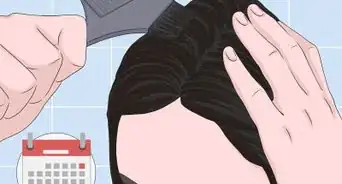
5Use a comb to create a horizontal part just behind each ear. To separate out the underlayer, draw a line that starts behind one ear, then goes around the back of your head and to the other ear, which is the nape area of your neck. Use the 2 mirrors to see this area.[5]
- If you want a little more hair to be colored, move the line a little higher, like to the tops of your ears. If you want to dye less hair, lower the part.
- You can even do a circular part if you want to include the underlayer of your bangs.
-
6Pin the top part of your hair out of the way. Use a hair clip or a ponytail holder to secure the top layer of hair on top of your head. Make sure that you pull it tight enough that the part is clearly visible, but not so tight that it’s uncomfortable.[6]
- If you’d like, you can wrap the top part of your hair in a scarf, but make sure it’s one you don’t mind accidentally staining.
- If you have small pieces of hair near your hairline, pin them out of the way with bobby pins.
-
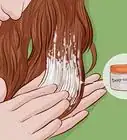
7Apply petroleum jelly along your hairline to keep dye off your skin. Dip your finger in petroleum jelly and scoop up a generous amount. Then, coat all along your hairline at the back of your neck, from one side of the part to the other. This will form a protective barrier that will help protect your skin from discoloration if any of the dye gets on you.[7]
- If you’d like, you can even apply a little petroleum jelly on the hair just above your part. However, do not apply it to the hair you want to dye.
-
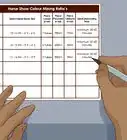
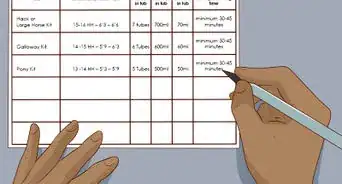
8Bleach your hair first if you’re using bright or pastel dye. Unless your hair is naturally very light, you’ll have to bleach it first if you want to dye your hair a bright or pastel color like teal, pink, or violet. While it’s usually a good idea to visit a salon to have your hair bleached, you can do it yourself by purchasing a bleach kit and carefully following the directions included in the package.
- Consult a stylist before you attempt to bleach hair that’s been previously colored. The bleach can react badly with some dyes, causing severe damage to your hair.


Applying the Dye
-
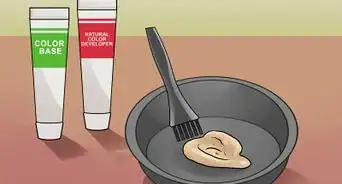
1Mix the dye according to the package instructions. Many brands of permanent hair dye come with a bottle of developer and a bottle of dye. In order to activate them, you need to mix the 2 bottles together. However, make sure you read the instructions very carefully, even if you’ve dyed your hair before, since the exact technique can vary between brands or even product lines within the same brand.[8]
- If you’re using a semi-permanent dye, which includes most rainbow and pastel shades, you may not need to mix anything.
-
2Put on gloves before you apply the dye to your hair. Hair dye can be very irritating to your skin. However, even if you use a product that’s not as harsh, your hands could still be stained if you don’t wear gloves.[9]
- Most commercial hair dye kits come with gloves, but you can buy a pair at a beauty supply store or drug store if yours didn’t come with any. In fact, you might want to buy an extra pair even if your kit came with gloves, in case the first pair get a tear in them.
-
3Apply the dye using the applicator bottle or a bowl and brush. If your kit came with a bottle, you can mix the dye in that, then apply it directly to your hair. However, you’ll have more control over the application if you mix the dye in a bowl first, then brush it on with a dye brush.[10]
- You can buy a dye brush at any beauty supply store, but you can use a sponge brush from a craft store as well.
-
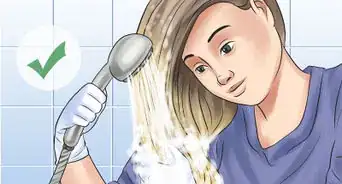
4Apply the dye to your roots and work your way down. Once the dye is mixed and you’re wearing your gloves, you can start the fun part—applying the dye! Saturate the roots of your hair first, since they’ll take the longest for the color to develop. Then, work section by section, coating each piece of hair from the root down to the tips. If you need to, use your fingers to work the dye into your hair.[11]
- Make sure to coat the top and bottom of the underlayer.
- Unless your hair is very long, you probably won’t need to use the whole container of dye since you’re just coloring the underlayer.
Tip: If you want a 2-tone or dip-dyed effect, paint a darker color onto the tips of your hair first, then add a lighter color on the rest of the underlayer, all the way up to your roots. Make sure to blend the area where the 2 colors meet to avoid creating a harsh line between the 2 colors.
-
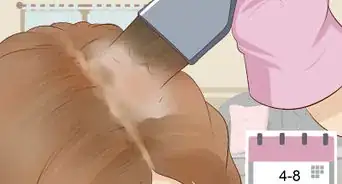
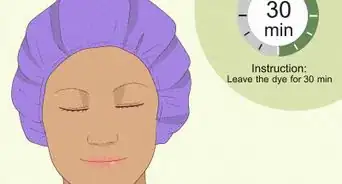
5Wrap a towel around your shoulders and set your timer. Once you’ve finished applying the color to your hair, slip a towel onto your shoulders to protect your skin from the dye. Read the package instructions to find out how long to leave the dye on, then set your timer and wait.[12]
- Don’t pin the colored hair up with the rest of your hair or the dye will transfer.
- Do not leave the dye on your hair longer than the instructions recommend!
- If you’d like, you can use makeup remover to clean up any dye that got on your skin while you're waiting.
-
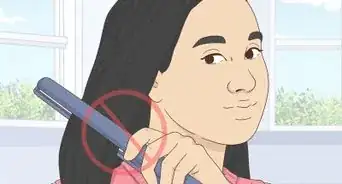
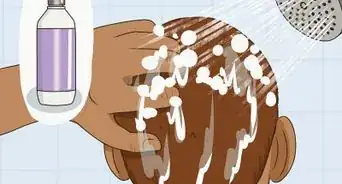
6Rinse the dye out with cool water until the water runs clear. After the timer goes off, rinse your hair in cool water to remove the dye. Work your fingers through your hair to make sure you don’t miss any spots. Continue rinsing until the water runs completely clear and you can’t feel any more dye in your hair.
- Don’t use any shampoo and avoid using hot water, as these can lift the cuticle on your hair and rinse away the dye.
-
7Apply a deep conditioner to your hair. If your kit came with a deep conditioner, apply it to your hair and let it sit for the recommended amount of time. If it didn’t, use your favorite conditioner instead, and leave it on for about 5 minutes before rinsing it away.
- Conditioner will smooth your chemically-treated hair and will help seal the cuticle shut, which could help your dye last longer.[13]


Community Q&A
Did you know you can get answers researched by wikiHow Staff?
Unlock staff-researched answers by supporting wikiHow
-
QuestionWhat is it called when you dye the underside of your hair?
 wikiHow Staff EditorThis answer was written by one of our trained team of researchers who validated it for accuracy and comprehensiveness.
Staff AnswerwikiHow Staff EditorStaff AnswerThis is called the peek-a-boo style, since the hair color is hidden unless you lift or part the upper layers and let it peek out!
Support wikiHow by unlocking this staff-researched answer.
-
QuestionHow much does it cost to dye the underlayer of your hair?wikiHow Staff EditorThis answer was written by one of our trained team of researchers who validated it for accuracy and comprehensiveness.
Staff AnswerwikiHow Staff EditorStaff AnswerAny type of highlights or partial coloring at a salon can get expensive, so you might be looking at something around $100 or more. It will also depend on how long your hair is, how much coverage you want, and so on. You can do it at home for much less, but there’s a greater risk of damaging your hair or getting results you’re not crazy about.Support wikiHow by unlocking this staff-researched answer.
-
QuestionWhen dyeing your hair, do you start at the top or the bottom?wikiHow Staff EditorThis answer was written by one of our trained team of researchers who validated it for accuracy and comprehensiveness.
Staff AnswerwikiHow Staff EditorStaff AnswerStart almost at the top (about half an inch away from the scalp) and work your way down to the tips, but save the roots for last. The hair closest to your head is warmer, which will cause the dye to develop a little faster.Support wikiHow by unlocking this staff-researched answer.
Things You'll Need
- Hair dye
- Old clothes
- Comb
- 2 mirrors
- Hair clip, ponytail holder, etc
- Petroleum jelly
- Bowl and brush or applicator bottle
- Towel
- Timer
- Gloves
- Shower
- Deep conditioner
Warnings
- Do a strand test to see how your hair will react to the dye.⧼thumbs_response⧽
- If you get hair dye in your eyes, flush them with cool water.⧼thumbs_response⧽
- Do not leave dye on your hair longer than recommended.⧼thumbs_response⧽

References
- ↑ https://www.allure.com/gallery/how-to-color-hair
- ↑ https://www.goodhousekeeping.com/beauty/hair/g2754/haircolor-hacks-at-home/
- ↑ https://www.goodhousekeeping.com/beauty/hair/g2754/haircolor-hacks-at-home/
- ↑ https://www.marieclaire.co.uk/beauty/how-to/how-to-dye-your-own-hair-6656
- ↑ https://www.reference.com/beauty-fashion/dye-underside-hair-4ff604d193662288
- ↑ https://www.reference.com/beauty-fashion/dye-underside-hair-4ff604d193662288
- ↑ https://youtu.be/KddE6cB2Pjg?t=76
- ↑ https://www.glamour.com/story/how-to-color-your-hair-at-home
- ↑ https://www.goodhousekeeping.com/beauty/hair/g2754/haircolor-hacks-at-home/
About This Article