This article was medically reviewed by Erik Kramer, DO, MPH and by wikiHow staff writer, Hannah Madden. Dr. Erik Kramer is a Board-Certified Primary Care Physician at the University of Colorado. With over 15 years of experience, his clinical interests include obesity and weight management, diabetes care, and preventive care, as well as embracing a holistic approach to primary care. He received his Doctorate in Osteopathic Medicine (D.O.) from the Touro University Nevada College of Osteopathic Medicine and completed his residency at Central Maine Medical Center. Dr. Kramer is a Diplomate of the American Board of Obesity Medicine.
There are 9 references cited in this article, which can be found at the bottom of the page.
This article has been viewed 19,749 times.
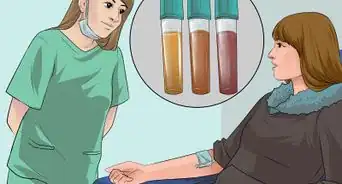
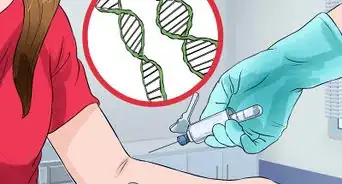
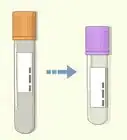
Knowing your blood type is useful in the event of an emergency surgery or a donation shortage. If you want to find out your blood type, you may not want to set up an appointment at your doctor’s office or a lab and have to wait days for the results. Instead, you can find out your blood type at home by purchasing a test kit, pricking your finger and adding the blood to the tester, and reading the results.
Steps
Purchasing a Test Kit and Setting it Up
-
1Find a test kit online for the cheapest option. Most blood type test kits range between $100 to $200 per kit. Look online to see which kits are the most affordable and if they are coming from a reputable source. Try to buy test kits from a medical office so you know they are legitimate.[1]
- Take a look at who is sending out the test kit. If it is a hospital or a lab, it is most likely reputable.
-
2Lay out the kit on a flat surface. Separate all of the contents of your kit and lay them out on a flat surface, like a table or a countertop. Make sure all of the items are within your reach and that you have all of the pieces that should be included with the kit.[2]
- Once you open up your test kit, you must use it within 24 hours or it may not be as accurate.[3]
Tip: A standard kit includes instructions, alcohol swabs, a finger lancet or a small, sharp needle, multiple plastic applicator sticks, a plastic dropper, and a test card.
Advertisement -
3Add a drop of water to each circle on the card. Use 1 of the plastic droppers to collect water from your sink. Add 1 single drop of water to each circle that is provided on the test card. Do not put multiple drops into 1 circle, or you could skew your results.[4]
- The water will help to dilute your blood and let the card read the results better.
-
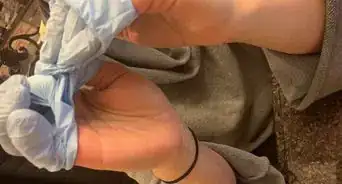
4Wipe your finger with an alcohol wipe. Choose a pointer finger on 1 of your hands that you will prick with the lancet. Use the alcohol swab provided in the kit to disinfect the tip of your finger and the surrounding area.[5]
- Swabbing your finger with alcohol removes any germs or bacteria that could skew your results.


Adding Blood to the Kit
-
1Prick the tip of your finger with the lancet provided in the kit. Place the open end of the lancet on the bottom of the tip of your finger. Hold your finger steady and press the lancet forward so that the needle presses into your skin. You may hear a click as the needle locks into place.[6]
- The needle is small enough that you will only feel a slight pinch.
-
2Squeeze your finger to get a drop of blood on your fingertip. Gently pinch your finger in between your thumb and pointer finger of your other hand just below the area that you pricked. Squeeze your finger until a drop of blood rises to the surface of your finger.[7]
Tip: If you are having trouble getting blood to come out, your hands may be too cold. Try massaging your hands to get the blood flowing.
-
3Use 1 plastic applicator from the kit to transfer the blood to one of the circles. There are 4 plastic applicators provided in your test kit. The applicators look like small plastic sticks with a scoop on the end. Use 1 stick to collect blood from your finger and put it into 1 of the circles.[8]
- Keep your finger close to the test card so that you don’t have to move your applicator very far.
-
4Add blood to each circle on the card using the other applicator sticks. Squeeze more blood from your finger and use the other 3 applicator sticks to apply blood to each circle. Only use 1 applicator stick per circle. Do not reuse the applicator sticks for multiple circles, or you could skew your results.[9]
- Keep the applicators in each circle that they correspond to so that you don’t mix them up.


Getting Your Results
-
1Swirl the blood and the water together using the plastic applicators. Use each applicator that goes with each circle to mix the blood and water droplets together. Do not use 1 applicator for multiple circles, or you could skew your results.[10]
- Keep the blood and water inside of the circles so that they don’t mix together.
-
2Tilt the card from side to side for 10 seconds. Hold the card in the air without touching the blood and water in the circles. Slowly tilt the card away from you until it is vertical and hold it there for 10 seconds. Tilt the card toward you so that it is vertical facing the other way and hold it for another 10 seconds.[11]
- Tilt the card very slowly so that the liquids don’t fall off.
-
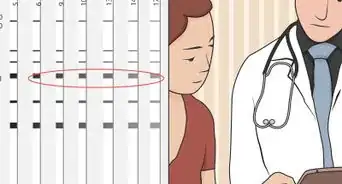
3Compare your results with the key given in the test. Set the key card next to your test card. Look at the circles of blood and find the ones with agglutinations, or small specks, instead of smooth, watery blood. The key card shows options for each blood type and its corresponding agglutination pattern. Match up the patterns to your key card to determine what blood type you have.[12]
Tip: If your blood had agglutinations in the control circle, it means that the test was invalid. Purchase another test or donate blood to find out your blood type. If you donate blood through the Red Cross, they'll tell you your blood type.[13]


References
- ↑ https://www.ncbi.nlm.nih.gov/pubmed/21539170
- ↑ https://www.ncbi.nlm.nih.gov/pubmed/21539170
- ↑ http://craigmedical.com/media/Eldoncard%20insert.pdf
- ↑ https://www.youtube.com/watch?v=XHrEyCItUvU&feature=youtu.be&t=85
- ↑ http://craigmedical.com/media/Eldoncard%20insert.pdf
- ↑ https://www.youtube.com/watch?v=rbh62pJDR5g
- ↑ https://www.youtube.com/watch?v=XHrEyCItUvU&feature=youtu.be&t=126
- ↑ https://www.youtube.com/watch?v=rVs_NMiDIWI
- ↑ https://www.youtube.com/watch?v=rVs_NMiDIWI


Medical Disclaimer
The content of this article is not intended to be a substitute for professional medical advice, examination, diagnosis, or treatment. You should always contact your doctor or other qualified healthcare professional before starting, changing, or stopping any kind of health treatment.
Read More...