This article was co-authored by wikiHow staff writer, Janice Tieperman. Janice is a professional and creative writer who has worked at wikiHow since 2019. With both a B.A. and M.A. in English from East Stroudsburg University, she has a passion for writing a wide variety of content for anyone and everyone. In her free time, you can find her working on a new crochet pattern, listening to true crime podcasts, or tackling a new creative writing project.
There are 8 references cited in this article, which can be found at the bottom of the page.
This article has been viewed 21,952 times.
Learn more...
A Howdens kitchen can be a sleek, modern addition to your home, but it may not seem that way when it’s disassembled in your living space. Not to worry! Howdens offers in-depth instructions and bite-sized video tutorials to help you get the job done. While not a replacement for these official instructions and tutorials, the following questions and answers can help walk you through the project basics.
Things You Should Know
- Howdens cabinets come in preassembled pieces, although you may need to install connecters, brackets, and jigs.
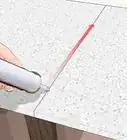
- Attach the worktops to the cabinets before you install the drawers.
- You should hear a clicking sound whenever you correctly connect a bracket, drawer, or worktop to a cabinet.
- You can fit any appliances so long as there’s enough room for them, but Howdens also manufactures appliances of their own if you want to one-stop shop.
Steps


How do I adjust the cabinets after I’ve fitted them?
-
1Adjust the cabinets with the adjustment brackets. These are the tan, rectangular components nestled in the upper left and right hand corners of your cabinets. Search for 2 screws on this bracket—1 will be on the front, and another will be on the bottom.[7]
-
2
-
3


What appliances can I fit in my Howdens kitchen?
-
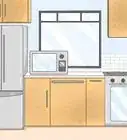
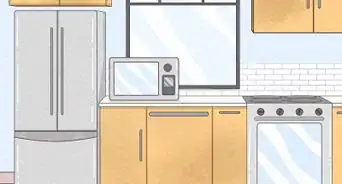
1Ovens and microwaves fit in the kitchen tower. Choose to install a single oven or single microwave, or stack 2 double ovens on top of one another. If you’d like the best of both worlds, install a microwave on top of a single oven.[12]
-
2Dishwashers, refrigerators, and freezers fit under the worktop. Secure these appliances into place with metal rails, which go along the top of your appliances.[13]
-
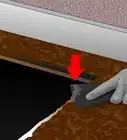
3Install a single oven into the specially vented profile. Howdens calls this a Built Under Oven Housing profile, or BUOH, which includes built-in slots for oven venting. Then, secure the oven in place with 2 long, metal jointing plates, which go along the top of the appliance.[14]


References
- ↑ https://www.omegaplc.co.uk/the-feed/plan/how-long-to-fit-kitchen
- ↑ https://www.howdens.com/-/media/howdens/assets/clh_asset_products/clh_asset_levela_108973/clh_asset_levelb_110531/ass_25388007.pdf
- ↑ https://www.howdens.com/-/media/howdens/assets/clh_asset_products/clh_asset_levela_108973/clh_asset_levelb_110531/ass_25388007.pdf
- ↑ https://www.howdens.com/-/media/howdens/assets/clh_asset_products/clh_asset_levela_108973/clh_asset_levelb_110531/ass_25388007.pdf
- ↑ https://www.howdens.com/-/media/howdens/assets/clh_asset_products/clh_asset_levela_108973/clh_asset_levelb_110531/ass_25388007.pdf
- ↑ https://www.howdens.com/-/media/howdens/assets/clh_asset_products/clh_asset_levela_108973/clh_asset_levelb_110531/ass_25388007.pdf
- ↑ https://m.youtube.com/watch?v=6oe0wh6LukM&t=0m43s
- ↑ https://m.youtube.com/watch?v=6oe0wh6LukM&t=0m56s
- ↑ https://m.youtube.com/watch?v=6oe0wh6LukM&t=0m50s
- ↑ https://m.youtube.com/watch?v=6oe0wh6LukM&t=1m4s
- ↑ https://m.youtube.com/watch?v=6oe0wh6LukM&t=1m7s
- ↑ https://www.howdens.com/-/media/howdens/assets/clh_asset_products/clh_asset_levela_108973/clh_asset_levelb_110531/ass_25388007.pdf
- ↑ https://www.howdens.com/-/media/howdens/assets/clh_asset_products/clh_asset_levela_108973/clh_asset_levelb_110531/ass_25388007.pdf
- ↑ https://www.howdens.com/-/media/howdens/assets/clh_asset_products/clh_asset_levela_108973/clh_asset_levelb_110531/ass_25388007.pdf
- ↑ https://www.howdens.com/-/media/howdens/assets/clh_asset_products/clh_asset_levela_108973/clh_asset_levelb_110531/ass_25388007.pdf
- ↑ https://www.howdens.com/-/media/howdens/assets/clh_asset_products/clh_asset_levela_108973/clh_asset_levelb_110531/ass_25388007.pdf
- ↑ https://www.howdens.com/help-and-advice/buying-from-us/book-a-design-appointment