This article was co-authored by Norman Raverty. Norman Raverty is the owner of San Mateo Handyman, a handyman service in the San Francisco Bay Area. With over 27 years of experience, Norman has expertise in all five of the general building trades (carpentry, ceramic tile, drywall, electrical, plumbing).
This article has been viewed 142,916 times.
Quartz countertops are well known for being a sturdy and fuss-free option for kitchens. Made with a blend of stone and resin, quartz is a hard material like granite but also has an aesthetically pleasing glossy and non-porous surface. In spite of being tough, quartz countertops are not indestructible and may get chipped or cracked due to kitchen accidents. However, in most cases, you can repair the affected area without having to replace the entire slab.
Steps
Repairing Minor Chips with Adhesive
-
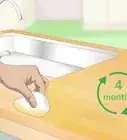
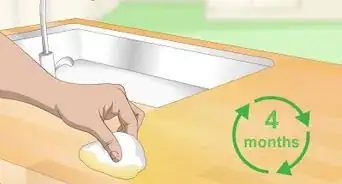
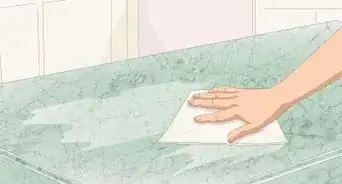
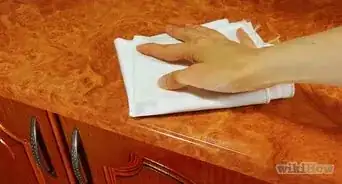
1Clean the counter with an ammonia based cleaner. Before you get started with the repairs, clean the area with a non-abrasive cleaner. Spray the cleaner and wipe the area with a soft damp cloth.
- Wait for it to dry before you begin the repairs.
-
2Stick masking tape around the chip for a better finish and to prevent adhesive stains. Cordon off the chipped portion by sticking strips of masking or painter tape around it. This way it is easier to apply the adhesive only on the chipped part giving you a level and clean finish. It will also prevent unnecessary stains and spills from the adhesive on your counter.Advertisement
-
3Fix cracks on light coloured countertops with superglue. Adhesive filler or super glue is a good option to repair minor chips on lighter coloured surfaces since they are less noticeable. Use a brush or spatula to apply thin coats of the glue on the affected area until the chip is level with the rest of the surface. Leave the glue to cure for at least 24 hours.[1]
- Do not apply too much at one go as it going to extend the curing time.
- Choose superglue with a thin consistency to treat chipped surfaces and a thicker one for chipped edges.
-
4Use pigmented epoxy adhesive for dark or textured counters. If your countertop is textured or is dark coloured, opt for a pigmented epoxy instead of superglue. For the best result, you can mix the epoxy with a dye that is in the closest shade to the surface. Apply this mix to the chipped area in the thin coats till it is level with the rest of the countertop. Let it dry for 24 hours.[2]
- The epoxy mix may shrink a bit while drying, so it's better to over-fill the chip and then sand down the excess later.
-
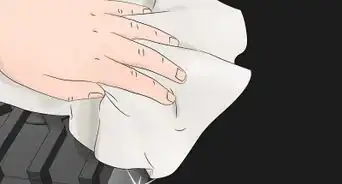
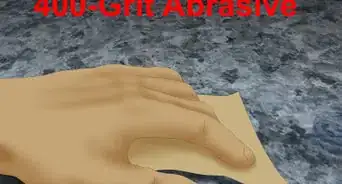
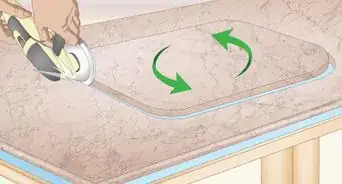
5File the glue patch once it hardens. Use superfine sandpaper with a higher grit of 360 to 600 to smooth over the patch once it hardens. [3]
- You can also use a razor blade to file down a chip on the surface of the countertop. Lightly glide the blade on the affected area from side to side.


Patching Surface Chips with Caulk
-
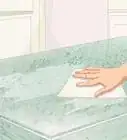
1Clean the cracked area. Use a damp cloth and a non-abrasive cleaner to wipe the area clean before you get started. Make sure to dry it thoroughly.
-
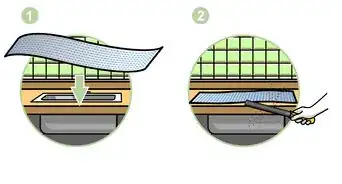
2Stick masking tape around the crack to avoid caulk stains. Working with caulking can get messy. So, stick strips of masking tape around the crack to avoid it from getting on the rest of the countertop. It also helps you get an even line while caulking the crack.
-
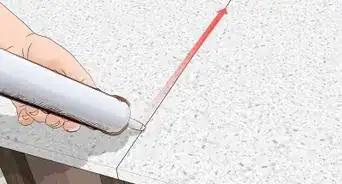
3Pour caulk in the crack. Start by pouring caulk slowly in the biggest part of crack from a caulk tube or gun. Steadily and consistently move through the rest of the crack.
- Use silicone caulk if you can create a smooth line on the first try. Use urethane acrylic caulk if you are less confident; as it's easier to clean up, and you can apply a second layer on top if required.[4]
- Wear rubber gloves while working with silicone caulk.
-
4Level the caulk evenly. Wipe away excess caulk or sealant according to manufacturer’s instructions. Then, using a flat hard material such as plastic or your wet index finger, smoothen and flatten the line of caulk. Repeat the process until the chip is at level with the rest of the countertop.
- Clean up the excess. Excess dried caulk can be scraped off with a utility knife by gently running it sideways over the affected surface.
-
5Remove the masking tape and let it dry. Once you are satisfied with the result, remove the tape and allow the caulk to cure for the amount of time specified by the manufacturer.


Getting Professional Help for Bigger Cracks
-
1Check if you can afford the professional repair. While professional repair makes chips or fissures in your countertop almost unnoticeable, you will surely notice the cost of this service. However, if you are not confident about repairing it yourself, it’s best to seek expert assistance. Otherwise, it may end up costing more if you botch it up.
-
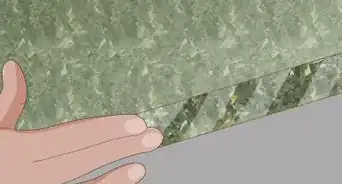
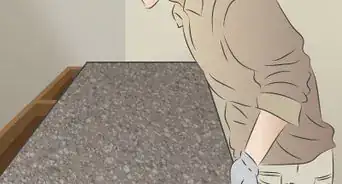
2Ask pros to bevel the edge. If the chipped edge of your countertop is offending you, consider asking the installation company to bevel the edges for a smoother finish and then re-polishing it. You can also ask them if sanding down the chipped edges would be a viable option. [5]
-
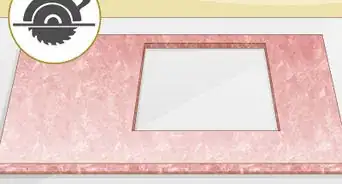
3Saw off the counter edge if the chip is deep. As an extreme measure, for the counter and your pockets, consider discussing with your contractor about ripping the entire length of the chipped off edge and re-polishing. Once the chipped edge is sawed off, the fabricator can suggest an edge design that suits your needs and the countertop's thickness to make sure that the repairs don’t stand out.
- The more complex your edge design, the higher the cost. A square countertop edge or chiseled raw-edge look, or rounded bullnose corner are some of the slightly less expensive custom edge designs in the market.
- This process might be time-consuming and may hike up your final cost.


wikiHow Video: How to Fix a Chip in a Quartz Countertop
Warnings
- Use gloves and mask while using adhesive and caulking.⧼thumbs_response⧽
- Quartz countertops are hard to polish out if the top is damaged.⧼thumbs_response⧽

References
- ↑ https://diy.stackexchange.com/questions/54115/what-to-fill-the-cut-in-quartz-counter-top-with
- ↑ http://kitchenremodelguides.com/countertops/quartz/repair
- ↑ https://www.bobvila.com/articles/2145-quick-tip-choosing-sandpaper/
- ↑ https://www.guildquality.com/question/Best-way-to-caulk-the-seam-between-our-backsplash-and-kitchen-counter
- ↑ https://countertopguides.com/guides/bevel-countertop.html
About This Article

To fix a minor chip in a quartz countertop, first clean the surface around the chip with an ammonia-based cleaner. Once the counter is dry, surround the chip with masking tape to protect the area around it. If your counter is made of light-colored quartz, fill in the chip with a small amount of superglue. For dark or textured countertops, use a pigmented epoxy that matches the color of your counter instead. Apply the glue or epoxy in thin layers with a brush or spatula and give it at least 24 hours to cure before using that part of the counter again. Once the adhesive dries, sand it down with a 360-600 grit sandpaper. For more tips from our DIY co-author, including how to prevent adhesive stains when fixing a chip, read on!