This article was co-authored by Sam Hubbard. Sam Hubbard is a Professional Carpenter and the Owner of Hubbard Carpentry and Remodeling. He has over 19 years of experience in the industry. Sam specializes in kitchen remodels, home woodworking, cabinetry, and handyman services.
This article has been viewed 223,135 times.
Butcher block is a popular type of wooden kitchen counter. If you’re having butcher block counters installed, you’ll need to stain the wood to protect it and enhance it appearance. Also stain your butcher block if you’ve had your counters for several years and the current finish is looking worn or faded. Sand the wood before staining, then select a wood stain and apply at least 2 coats. Then finish the stain with a coat of tung oil or other food-safe sealant.
Steps
Sanding and Conditioning the Surface
-
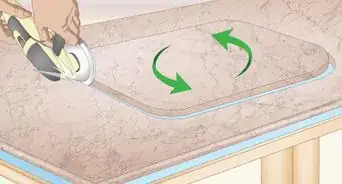
1Sand the wood with coarse 80-grit sandpaper. Coarse sandpaper will remove any prior stains or varnishes from the butcher block, as well as any marks or scratches the wood has on the surface. Sand along the grain of the wood using long strokes.[1]
-
2Sand the wood again with 150-grit sandpaper. As when using the coarse-grit paper, sand the surface using long strokes in the same direction as the wood grain. Fine-grit paper will remove any marks left by the coarse sandpaper and prepare the wood to receive the stain.[2]
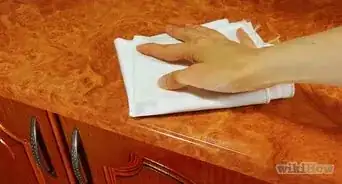
- Use a paper towel or clean rag to wipe off the dust left behind after sanding.
Advertisement -
3Brush on 1 layer of wood conditioner. Use a 3 inches (7.6 cm) paintbrush to apply an even layer of conditioner across the entire surface of butcher block. Paint in long, even strokes that parallel the direction of the wood blocks.[3] Give the conditioner at least 2 hours to dry.
- If you're using a water-based stain, use a water-based conditioner. Likewise, if you plan to use an oil-based stain, buy an oil-based conditioner. You can purchase wood conditioner at your local paint store.
- Butcher block is composed of many pieces of wood, each with their own distinct color. Applying wood conditioner before you stain will help all the pieces of wood take on a similar tone once the stain is applied.
-
4Sand the butcher block a final time with 220-grit sandpaper. Once the conditioner has dried, go over the entire surface of the butcher block with very fine sandpaper. As before, use long strokes in the direction that the blocks are laid. Be sure to remove any splotches or discoloration caused by the conditioner.[4]
- Use a clean rag to wipe off the fine dust left from sanding.
- If you’re tired of sanding by hand, you can rent an electric sander from a local hardware store.


Applying the Stain
-
1Choose a water- or oil-based wood stain in the color you prefer. Oil-based stains are longer lasting and more stain resistant. They also penetrate more deeply into the wood. Water-based stains are generally quicker to apply. Decide which you want to use, then bring home a few color swatches to determine which you prefer.[5]
- Some people prefer a dark, walnut-color stain, while others opt for a reddish cherry-color stain, or a light, pine-colored stain.
- Keep in mind that the color you choose should complement the other wood and cabinets in your kitchen.
-
2Test the stain on a small section of the butcher block. Use a fresh 3 inches (7.6 cm) paintbrush to apply a single coating of stain to an out-of-the-way section of your butcher block. Coat the wood generously, as if you were staining the actual countertop.[6]
- If have any leftover chunks of butcher block that aren’t attached to the counter (e.g., leftover from when it was installed), test the stain on this wood.
-
3Let the stain dry for 2 hours and inspect the color. If the wood has an even, consistent color and the stain brings out the texture of the wood grain, you’re ready to stain the entire counter.[7]
- If the stain looks splotchy or has given the wood different tones, try a different brand or color of stain.
-
4Paint on a layer of stain parallel to the direction of the boards. Dip your paintbrush in the can of stain, and tap it against the side to remove excess stain. Apply stain to every surface of the butcher block: top, sides, and bottom (if any wood overhangs the cabinets below the butcher block). Paint in long strokes that go along with the direction of the wooden slats.[8]
-
5Let the stain dry for at least 8 hours. Give the stain plenty of time to dry before you apply a second layer. Avoid touching or setting any objects on the wet stain during this time.[9]
-
6Apply a second layer of stain to the butcher block. As before, apply the stain with a paintbrush using long strokes that go with the direction of the wood grain. The second coat will further darken the wood, and ensure that the top of the butcher block is protected against scratches. Allow the stain to dry overnight.[10]
- If any excess stain is puddled on the surface after the block dries overnight, use a dry rag to wipe off.
- If you’d like the butcher block to be darker still, apply a third layer of stain.


Sealing the Butcher Block with Oil
-
1Purchase 100% tung oil from a local paint store. To ensure that you’re purchasing pure tung oil, look for the words “100% tung oil” printed somewhere on the container’s packaging. You can find tung oil at a local paint store or hardware store.
- 1 quart (0.95 L) of tung oil or Waterlox will cover about 15 feet (4.6 m) of butcher block.
- If you’d rather apply a longer-lasting product than tung oil, you can seal the butcher block using a more substantial chemical sealant, like Waterlox. Both products are food-safe.
-
2Apply a layer of tung oil to seal the stained butcher block. Dip a clean, dry cotton cloth or rag into the container of tung oil or Waterlox. Then use the cloth to rub the sealant across the surface of the stained butcher block. Work in long, straight strokes that parallel the direction of the boards in the butcher block.[11]
- Give the sealant a full 12 hours to dry.
-
3Apply 4 additional layers of tung oil to the butcher block. Sealing the butcher block is a time-consuming process. It will need several layers of tung oil or Waterlox. Use the same method for each layer: saturate a clean rag with sealant and then rub it along the surface of the butcher block. Use a clean cloth to remove any excess sealant.[12]
- Ensure that each layer has at least 12 hours to dry before applying the subsequent layer.
-
4Give the tung oil a full week to dry. Avoid using the counter for 7 full days so the oil has enough time to fully soak into the wood. Once the week has passed, you can use your stained butcher block counters.
- You can still use your butcher block countertops before a full week passes. However, they’ll be oily and may stain your dishes or clothes.
-
5Put on a new layer of tung oil every 4 months. Tung oil wears off eventually, at which time it needs to be replaced. Every 4 months—or as soon as the surface of the butcher block begins to look faded—apply a layer of tung oil to the wood.
- The additional coats of oil won’t take a full week to dry. To be on the safe side, though, give each layer 3-4 days before using the countertops.


Expert Q&A
-
QuestionCan you restain a butcher block?
 Sam HubbardSam Hubbard is a Professional Carpenter and the Owner of Hubbard Carpentry and Remodeling. He has over 19 years of experience in the industry. Sam specializes in kitchen remodels, home woodworking, cabinetry, and handyman services.
Professional CarpenterSure, but first you must sand it down to bare wood using 120 sandpaper — follow that with 150 grit and work your way up to 180 grit. Remove the dust with a tack cloth and then apply the new stain. -
QuestionHow do you finish a butcher block countertop with polyurethane?Sam HubbardSam Hubbard is a Professional Carpenter and the Owner of Hubbard Carpentry and Remodeling. He has over 19 years of experience in the industry. Sam specializes in kitchen remodels, home woodworking, cabinetry, and handyman services.
Professional CarpenterAfter sanding, remove the dust with a tack cloth and apply three coats of polyurethane finish, sanding between coats with a #00 steel wool. After that, buff the surface with a piece of cardboard.
Things You’ll Need
- Wood stain
- Wood conditioner
- 2 3 inches (7.6 cm) paintbrushes
- 80-grit sandpaper
- 150-grit sandpaper
- 220-grit sandpaper
- Tung oil or Waterlox sealant
- Soft cloths or rags


References
- ↑ https://www.addicted2decorating.com/how-i-stained-sealed-my-ikea-numerar-butcher-block-countertops.html
- ↑ https://www.addicted2decorating.com/how-i-stained-sealed-my-ikea-numerar-butcher-block-countertops.html
- ↑ http://thestillwaterstory.com/2011/06/how-to-stain-butcher-block-countertops/
- ↑ http://thestillwaterstory.com/2011/06/how-to-stain-butcher-block-countertops/
- ↑ http://www.thechroniclesofhome.com/2014/02/how-to-stain-and-seal-butcher-block.html
- ↑ https://www.northstory.ca/adventures-in-staining-butcher-block-what-worked-what-didnt-and-lessons-learned/
- ↑ https://www.northstory.ca/adventures-in-staining-butcher-block-what-worked-what-didnt-and-lessons-learned/
- ↑ http://thestillwaterstory.com/2011/06/how-to-stain-butcher-block-countertops/
- ↑ http://thestillwaterstory.com/2011/06/how-to-stain-butcher-block-countertops/
About This Article

To stain your butcher block, start by sanding the surface with a coarse sandpaper, which will remove any stains or varnishes. Then, sand the block again with a fine-grit paper to remove any marks left by the coarser sandpaper. After you wipe off any dust, brush on 1 layer of wood conditioner. After the conditioner dries, which typically takes 2 hours, sand the block one last time with a very fine sandpaper to remove any splotches or discoloration from the conditioner. Next, paint a layer of stain in long strokes along the direction of the wooden slats. Let the stain dry for 8 hours before applying the next layer. When the stain is completely dry, seal your butcher block by applying 5 layers of tung oil., Allow each layer to dry for a full 12 hours before using a rag to apply the next coat. To learn how to pick the right stain for your butcher block, keep reading!