This article was co-authored by wikiHow Staff. Our trained team of editors and researchers validate articles for accuracy and comprehensiveness. wikiHow's Content Management Team carefully monitors the work from our editorial staff to ensure that each article is backed by trusted research and meets our high quality standards.
This article has been viewed 37,904 times.
Learn more...
If you look through your binoculars and see 2 copies of the same image, then this is probably a problem with your collimation. Collimation is the position of the prisms within the binoculars, and if they’re not centered correctly, then they need adjustment for a proper image. Fixing the collimation is a complicated job, and many manufacturers recommend that you bring your binoculars to a professional for this adjustment. However, if you want to do it yourself, then it’s possible with some patience. Be prepared for some trial and error as you adjust the alignment screws and try to center the image. When you’re done, the double vision should be all gone.
Steps
Locating the Adjustments Screws
-
1Check the user manual to see if it shows where the screws are. Manufacturers usually cover up the adjustment screws with glue or plastic so you don’t knock them out of alignment by accident. However, this also makes finding them very hard. If your binoculars came with a user manual, check it for a diagram that shows the screws. If it does, then the job will be much easier.[1]
- You could also search on the internet for a diagram of your binocular model. The manufacturer may have uploaded this at some point.
- Manufacturers usually recommend that customers don't try to adjust the collimation themselves because it's easy to mess up the calibration of the binoculars. This is why they hide the screws.
-
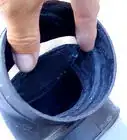
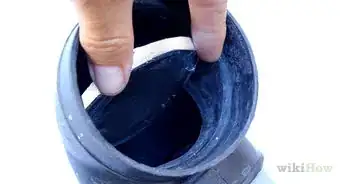
2Remove the plastic casing if your binocular has one. Cheaper pairs of binoculars sometimes have a plastic housing that covers the adjustment screws. Check around the housing for removable screws, and take them out to remove the housing. This might free the adjustment screws underneath.[2]
- If there are no screws to take off the housing, then don’t force it off or you could break the binoculars.
Advertisement -
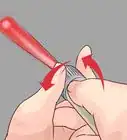
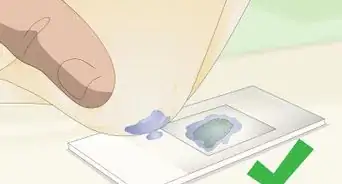
3Peel the adhesive around the eyepieces to locate the horizontal screws. The horizontal adjustment screws are along the back rim of the binoculars, just before the eyepieces. Take a scalpel or razor and shave back the adhesive covering around the rim. Start directly above the eyepiece, then work towards the outside of the binoculars. The screw should be somewhere between the center of the binoculars and the outside corner.[3]
- Be very careful when using a razor. Wear thick gloves to avoid cutting yourself.
- You'll probably scratch the binocular casing while you're peeling the adhesive back, but this is only a cosmetic problem that won't affect the performance. Just make sure to keep the blade away from any lenses.
-
4Scrape back the covering near the focus knob to find the vertical screws. The vertical screws are roughly even with the front of the focus knob in the center of the binoculars. You have to find them the same way that you found the horizontal screws. Peel back the adhesive on either side of the knob to find the vertical screws.[4]


Testing the Collimation
-
1Mount the binoculars on a tripod. To properly adjust the collimation, it’s important that the binoculars remain steady. Attach them to a binocular tripod to keep them still during the adjustment.[5]
- You could make a makeshift tripod by taping the binoculars to a camera or telescope tripod. A stationary piece of wood could also work.
-
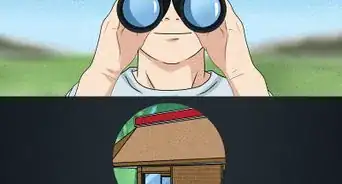
2Take the binoculars outside on a clear night. The night sky provides plenty of targets to help you calibrate your binoculars. Pick a clear night with few clouds and set the tripod on a solid surface where it won’t move while you work.[6]
- It’s possible to do this during the day on other objects besides stars. If you do this, pick a solid, stationary object that’s at least 1 km (0.62 mi) away.[7]
-
3Aim the binoculars at the brightest star you can find. Point your binoculars up and find a bright, prominent star. Focus in on it as well as you can, and make sure the binoculars stay mounted in that position.[8]
- If the collimation is very off, then the star you pick might look like 2 stars. Look away from the binoculars while you’re focusing to make sure you’re looking at 1 star.
- A popular target is Polaris, or the North Star. If you're in the Northern Hemisphere, you should be able to find it on clear nights.
- Don’t use a large object like the moon. This is too large to see the fine adjustments you’ll have to make.
-
4Defocus the right-hand lens. This might sound counterintuitive, but it makes adjusting the collimation much easier. Close your left eye and turn the right lens to the right so the star becomes a larger, unfocused circle. Then open your left eye. You should see one focused and one unfocused star.[9]
-
5Determine if the 2 star images are not centered. If your binoculars are out of collimation, then the 2 images won’t line up. The focused star won’t sit directly in the middle of the unfocused one. This indicates that your collimation needs adjusting. Keep the lens unfocused so it’s easier to make adjustments.[10]
- If the focused star sits right in the middle of the unfocused one, then your collimation is fine. No need to make more adjustments.
- Even if the double-vision is obvious before you defocus the lens, this makes aligning the images much easier.


Making the Collimation Adjustments
-
1Turn each adjustment screw slightly to see how it affects the image. The 4 screws all turn the prisms in different directions, which affects the collimation. Start by getting a feel for how each screw affects the image. Use a small, jewelry-sized flathead screwdriver. Turn 1 of the screws 1/8 of a turn to the right and see what happens, then turn it back. Repeat this for each screw to determine the adjustments you have to make.[11]
- There is a lot of trial and error in adjusting the prisms, so be prepared to turn the screws back and forth multiple times to find the right position. Even professionals need a few tries to get it right.
- Because the binoculars use prisms, turning the screws won’t move the image straight in any direction. Rather, they’ll make the images move diagonally left or right. This makes adjusting the image tricky.
-
2Tighten a horizontal screw until the images are halfway closer. It’s best to start with the horizontal screws, because they fall out of alignment more often then the vertical ones. Using what you learned while adjusting all 4 screws, choose a horizontal one that brings the images closer together. Turn it slowly until the images are about halfway closer than they were.[12]
- It’s important to only adjust halfway because the image quality will fall if you only adjust 1 side. The 2 sides should be equally adjusted to preserve the picture.
-
3Turn the other horizontal screw to bring the images together. Switch over to the other horizontal screw and turn it slowly so the images continue getting closer. Stop when they’re even, or won’t get any closer to each other.[13]
- The binoculars might still need vertical adjustment, meaning the images won’t be centered yet. When the images start getting further from each other again, then you’ve done all the horizontal adjustment you can.
-
4Adjust the vertical screws if the images aren’t centered yet. When you’ve made all the horizontal adjustments you can, switch over to the vertical screws. Turn 1 slightly and see if it brings the images closer. If it does, continue in that direction until the images are halfway closer. Then adjust the other vertical screw until the images are centered.[14]
-
5Refocus the right lens and see if the image is better. When you think the images are on top of each other, then turn the right-hand knob back to its original position and see if the image has improved. If it's clear and the double vision is gone, then your adjustment was a success.[15]
- For a quick test to see if the collimation is better, close your eyes for 5 seconds, then open them again. If the star still looks like a single image, then your collimation is good. If it looks like 2 images that quickly come together, then you still need more adjustment.


Expert Q&A
-
QuestionWhat is the proper way to calibrate binoculars?
 Roger J. Lederer, PhDDr. Roger Lederer is an Ornithologist and the founder of Ornithology.com, an informative website about wild birds. Dr. Lederer has spent over 40 years teaching, studying, and writing about birds. He has traveled to over 100 countries to study birds. Dr. Lederer is an Emeritus Professor of Biological Sciences at California State University, Chico, and has been a Department Chair of Biological Sciences and Dean of the College of Natural Sciences. He has written more than 30 research papers and 10 books on birds and a textbook entitled “Ecology and Field Biology.” Dr. Lederer has consulted the BBC, National Geographic, National Public Radio, ABC News, the Guinness Book of World Records, and numerous other organizations and publications.
OrnithologistTo adjust binoculars to your eyes, close your right eye and focus your left eye on a distant object using the central focus. Then close your left eye and use the focusing ring on the right eyepiece to focus your right eye. This compensates for the difference in the strength of your eyes.
Things You’ll Need
- Razor or scalpel
- Binocular tripod
- Watch-sized flathead screwdriver
Warnings
- Adjusting the binocular collimation is a complicated task, and you could easily ruin the binoculars if you do it incorrectly. If you aren’t sure how to do it, bring your binoculars to a professional⧼thumbs_response⧽
- Some binocular manufacturers will void your warranty if you try to adjust the collimation yourself, so don’t try this with an expensive pair.⧼thumbs_response⧽


References
- ↑ https://www.skyatnightmagazine.com/advice/how-to-collimate-binoculars/
- ↑ https://youtu.be/qc0eac2eFck?t=21
- ↑ https://youtu.be/kygO9VhKxIM?t=154
- ↑ https://youtu.be/kygO9VhKxIM?t=154
- ↑ https://www.skyatnightmagazine.com/advice/how-to-collimate-binoculars/
- ↑ http://binocularsky.com/binoc_collimating.php
- ↑ https://www.skyatnightmagazine.com/advice/how-to-collimate-binoculars/
- ↑ https://www.skyatnightmagazine.com/advice/how-to-collimate-binoculars/
- ↑ https://www.skyatnightmagazine.com/advice/how-to-collimate-binoculars/
- ↑ https://www.skyatnightmagazine.com/advice/how-to-collimate-binoculars/
- ↑ https://www.skyatnightmagazine.com/advice/how-to-collimate-binoculars/
- ↑ https://youtu.be/kygO9VhKxIM?t=508
- ↑ https://youtu.be/kygO9VhKxIM?t=508
- ↑ https://binoscopes.com/how-to-adjust-binoculars-with-double-vision/
- ↑ https://www.skyatnightmagazine.com/advice/how-to-collimate-binoculars/
About This Article