This article was co-authored by Bess Ruff, MA. Bess Ruff is a Geography PhD student at Florida State University. She received her MA in Environmental Science and Management from the University of California, Santa Barbara in 2016. She has conducted survey work for marine spatial planning projects in the Caribbean and provided research support as a graduate fellow for the Sustainable Fisheries Group.
This article has been viewed 114,335 times.
Microscopes vary in type and power, but the most common type uses a combination of lenses to magnify an image. This allows you to see things that you wouldn’t be able to view with your naked eye. If you want to build your own microscope, you only need a few materials. The assembly is easy: just set the lens, make an eyepiece, and attach it all to a sturdy base.
Steps
Setting the Lens
-
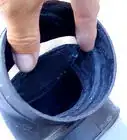
1Find two tubes with different diameters. Look for tubes made of sturdy materials, such as PVC. This will ensure that your microscope will hold up over time. The small tube should be just small enough to slide along the inside walls of the large tube.[1]
- Make each tube approximately 1 inch (2.5 cm) long.
-
2Line the tubes with black paper. The functioning of a microscope will be diminished if light enters through the side of the tube. To improve the microscope’s ability to function, line the sides of the tube with black paper. This will help absorb any excess light.[2]
- If you use a thick, opaque material such as PVC, the black paper is not necessary.
Advertisement -
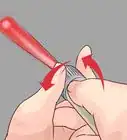
3Fasten a lens to each tube. Super glue a lens on the end of each tube. The diameter of the lens should match the diameter of the tube. Use a moderate amount of glue and make sure not to get it on the inside of the lens. Allow the glue to dry before proceeding.[3]
- Use lenses with short focal lengths. For example, you could reuse the lenses from disposable 35mm cameras to make a microscope. Or you, could order lenses online.
-
4Slide the small tube inside the large tube. Place the open end of the small tube inside the large tube. You now have a lens at both ends and the ability to move them closer to each other. This allows you to view objects and focus on them using your microscope.[4]
- Focusing this type of microscope is done by simply sliding the lenses close together or further apart until a clear image is obtained.
-
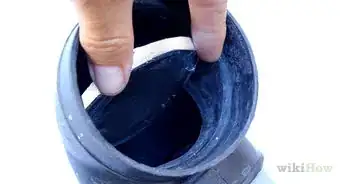
5Cover each end with a rubber disc. Cover the edges of each lens by gluing on a rubber disc. Be sure that the discs do not cover the center of either lens. This creates a buffer between the lens and other objects. It also makes the microscope more aesthetically pleasing.[5]


Creating an Eyepiece
-
1Make a hole in a film canister. An eyepiece is not necessary to see objects, but it helps to keep your eye off of the viewing lens. It can also make viewing more comfortable. Use a drill or sharp object (e.g. scissors) to make a hole in the bottom of a film canister. The hole should be in the center of the canister and large enough to slide the smallest tube through.[6]
-
2Push the lens tube through the hole. Line the smallest tube up with the hole in the canister. Push the tube so that the top (side with the lens) inch is inside the film canister. If the tube will not fit, make the hole larger until it does.[7]
-
3Secure the eyepiece. Use glue or liquid cement to keep the eyepiece in place. This will allow you to look through the eyepiece without it moving. Give the glue time to dry.[8]


Building a Stand
-
1Start with a solid base. Use a square of plywood or plastic to set your base. Use a saw to cut the square to have 4 in (10 cm) sides. You want the base to be approximately 0.75 inches (1.9 cm) thick.[9]
-
2Create a vertical stand. You can use a wooden cylinder to create a vertical stand. PVC pipe is another option. Cut the vertical stand to be 0.5 inches (1.3 cm) tall. Glue the vertical stand to the base plate.[10]
-
3Secure the microscope tube to the vertical stand. The microscope tube should rest just above the base plate. This will allow you to place samples under the microscope lens. The tube can be secured to the vertical stand with glue or zip ties.[11]
-
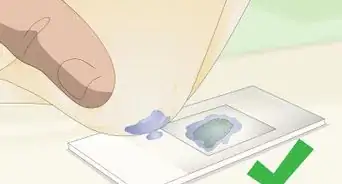
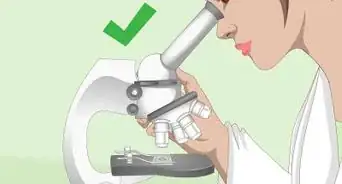
4Test your microscope. Gather a sample and view them under your microscope. You can start by looking at a drop of water, or a piece of hair. You can slide the eyepiece up and down to adjust the focus of the microscope.[12]


Community Q&A
-
QuestionCan I use a magnifying glass instead?
 Trïshïä TärrözäCommunity AnswerIn science, you can't use a magnifying glass to observe a liquid, germ, molecules, etc.
 -
QuestionCan the microscope see a virus?
 HannahCommunity AnswerNo, because the majority of viruses are too small for that. You would need an electron microscope to view them. There are a few so called "giant viruses" (200-400 nm) that could be observed through an optical (light) microscope, but not without laboratory equipment.
 -
QuestionIs part 2 and 3 necessary to complete the microscope? Can't it just work if we have only done part 1?
 DonaganTop AnswererYes, Part 1 is enough to accomplish the basic purpose envisioned in the above article. Parts 2 and 3 are just refinements.
Things You’ll Need
- Tubes
- Black paper
- Lenses
- Super glue
- Rubber disc
- Film canister
- Scissors/knife
- Wood/plastic


References
- ↑ https://www.nasa.gov/pdf/350502main_Optics_Building_a_Microscope.pdf
- ↑ http://www.scienceinschool.org/2012/issue22/microscope
- ↑ https://www.nasa.gov/pdf/350502main_Optics_Building_a_Microscope.pdf
- ↑ https://www.nasa.gov/pdf/350502main_Optics_Building_a_Microscope.pdf
- ↑ http://www.scienceinschool.org/2012/issue22/microscope
- ↑ http://www.scienceinschool.org/2012/issue22/microscope
- ↑ http://www.scienceinschool.org/2012/issue22/microscope
- ↑ https://www.nasa.gov/pdf/350502main_Optics_Building_a_Microscope.pdf
- ↑ http://brunelleschi.imss.fi.it/esplora/microscopio/dswmedia/risorse/how_to_make_microscope.pdf
About This Article

To make a microscope, start by getting a 1 inch long PVC tube, and another tube that’s just small enough to slide along the inside walls of the larger tube. Then, super glue a lens at the end of each tube and slide the smaller tube into the larger one. Next, create the eyepiece by drilling a hole in the bottom of a film canister and pushing the smaller end of the tube into the canister. After that, use PVC pipe to make a vertical stand about 0.5 inches tall, and attach it to a square piece of plywood. Finally, position your microscope tube in the vertical stand. To learn more, like how to test your finished microscope, scroll down!