This article was co-authored by wikiHow staff writer, Eric McClure. Eric McClure is an editing fellow at wikiHow where he has been editing, researching, and creating content since 2019. A former educator and poet, his work has appeared in Carcinogenic Poetry, Shot Glass Journal, Prairie Margins, and The Rusty Nail. His digital chapbook, The Internet, was also published in TL;DR Magazine. He was the winner of the Paul Carroll award for outstanding achievement in creative writing in 2014, and he was a featured reader at the Poetry Foundation’s Open Door Reading Series in 2015. Eric holds a BA in English from the University of Illinois at Chicago, and an MEd in secondary education from DePaul University.
The wikiHow Video Team also followed the article's instructions and verified that they work.
This article has been viewed 20,775 times.
Learn more...
As you walk, your feet put pressure on your shoes. This can pull or push your laces to one side or the other, and may eventually leave you with laces that don’t match at the top of your shoe. Luckily, this isn’t a big deal if the difference is only 1–2 inches (2.5–5.1 cm) since you can normally fix the problem without removing your laces. If the laces are really uneven though, you likely need to take your laces out and redo them.
Steps
Fixing Minor Differences
-
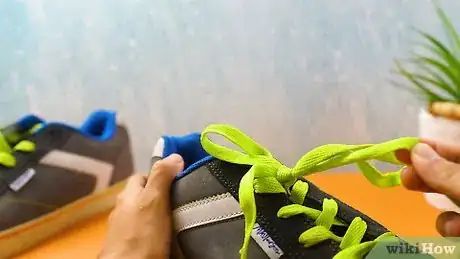
1Tug on the lace that’s shorter. To start, undo the knot if your shoe is tied. Then, tug on the shorter lace to make it taut against the tongue.[1]
-
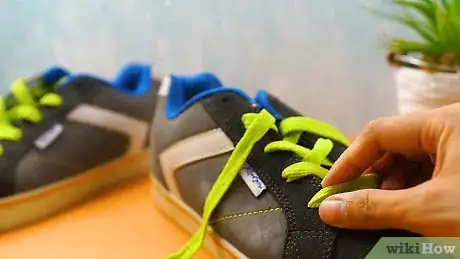
2Track the shorter side of the shoelace down the eyelets. Once the shoelace is taut, it’s easy to follow it all the way down to the base of your shoe. If you can’t quite tell, use your finger to follow the short lace through each eyelet until you get down to the bottom of the shoe.[2]
- The eyelets are the holes that your laces go through.
Advertisement -
3Identify which eyelet is holding the shorter side of the shoelace in place. Once you track the shorter side through all of the eyelets, you’ll figure out which eyelet on the bottom is holding the shorter half in place. By adjusting this bottom lace, you can change the length of your laces at the top.[3]
-
4Pull the longer half of the shoelace out a little to create some slack. On the bottom eyelet, pull the longer half of the shoelace up a little to create some slack. Loosen your shoelace further up if you can’t pull it out at all. Create enough slack to match the discrepancy between the laces at the top.[4]
- In other words, if your laces are off by 1.5 inches (3.8 cm) at the top, create 1.5 inches (3.8 cm) of slack in the bottom eyelets.
-
5Pull the shorter lace through to the top of the shoe. Once you’ve created your slack, pull the short half out away from the shoe until the lace in the bottom eyelets is taut. Then, keep pulling the short half of the lace up towards the top of the shoe to make it longer. Once you get to the top, your laces will now be even![5]
Tip: If you’re off by just a little bit, adjust the slack in the laces near the top until you can pull them tight and make them even.
Re-lacing Your Shoes
-
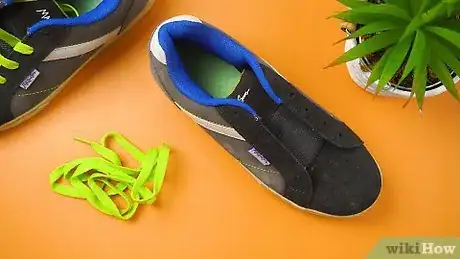
1Take the laces out of your shoes. Take your shoes off if you’re wearing them and undo any knots. Then, starting at the top, pull the laces through every eyelet in your shoe to take them out.[6]
- The eyelets are the little holes that hold your laces in place.
Tip: If your laces are a little old or worn down, this is the perfect time to throw some new laces in!
-
2Thread the lace through the eyelets at the bottom. Take your shoelace and smooth it out with your hand to remove any wrinkles. Then, slide the shoelace through the eyelets at the bottom row. Keep sliding the shoelace through until the middle of the shoelace is in between the eyelets at the bottom of the shoe.[7]
-
3Pull the laces up and adjust them until they’re even. Hold each lace in separate hands. Lift them up at the same time and at the same angle. Hold the tips together. Slide the laces to one side or another until each side is the same length.[8]
- If the laces are even at the bottom, they’ll almost always be even at the top. Unless you lace one side to be much looser than the other, you shouldn’t run into any problems.
-
4Re-lace your shoes by working up the eyelets one at a time. Now it’s time to finish lacing your shoes. You can do a traditional lace by running each lace to the next eyelet on the opposite side, or use some other pattern to lace your shoes. However you’re doing it, be sure to alternate between each side as you lace your shoe. This way, you’ll ensure that each side stays even and equal as you work your way up.[9]
- You can go for the straight lace by running the shoelace through the eyelets on the same side and pulling them straight across. Skip one eyelet on either side to set the laces on different eyelets and alternate between skipping on each side until the laces are at the top.
- You can make a triple X lace by skipping a row of eyelets. Then, pull each side of the shoelace through the eyelet under it before repeating the process. Keep doing this until you have three X shapes in the middle of your shoe.
- To add lattice laces, pull the shoelace through the bottom eyelet. Then, pull each side through the eyelets directly above it on the same side. Skip 3 holes and pull the shoelaces across the center of the shoe. Then, pull each side through the hole above it and pull it diagonally down to the other side. Repeat this process until you fill the 3 holes you skipped and end with the straight laces at the top.
References
- ↑ https://www.fieggen.com/shoelace/tipsforeveryone.htm
- ↑ https://www.fieggen.com/shoelace/tipsforeveryone.htm
- ↑ https://www.fieggen.com/shoelace/tipsforeveryone.htm
- ↑ https://www.fieggen.com/shoelace/tipsforeveryone.htm
- ↑ https://www.fieggen.com/shoelace/tipsforeveryone.htm
- ↑ https://www.businessinsider.com/how-to-lace-up-sneakers#first-make-sure-both-ends-of-the-lace-are-even-1
- ↑ https://www.businessinsider.com/how-to-lace-up-sneakers#first-make-sure-both-ends-of-the-lace-are-even-1
- ↑ https://www.businessinsider.com/how-to-lace-up-sneakers#first-make-sure-both-ends-of-the-lace-are-even-1
- ↑ https://www.businessinsider.com/how-to-lace-up-sneakers#first-make-sure-both-ends-of-the-lace-are-even-1
