wikiHow is a “wiki,” similar to Wikipedia, which means that many of our articles are co-written by multiple authors. To create this article, 11 people, some anonymous, worked to edit and improve it over time.
The wikiHow Video Team also followed the article's instructions and verified that they work.
This article has been viewed 329,057 times.
Learn more...
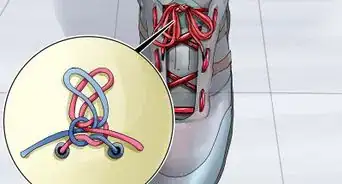
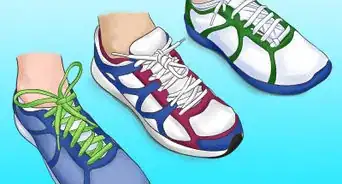
For many people, shoes are an incredibly important part of an outfit. To take it even further, countless creative ways of lacing these shoes have been devised, adding an even more personal spin to an already expressive element of the wardrobe. Figuring out how these complicated but stylish lacing methods have been achieved, however, is no easy task. If you've ever wondered how to recreate the clean look of straight laces, here are a few simple ways to choose from.
Steps
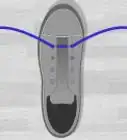
Bar Lacing
-
1Insert shoelace into the first eyelets of your first shoe. Point the toe of the shoe away from you. The holes farthest from you will be called the first eyelets, and will successively count up from there. With the shoelace on the outside of the shoe, insert the ends down into the first eyelets on both sides.
-
2Make sure the shoelace ends are even. Pull both ends of the shoelace to their full length. Tug on whichever side is shortest until they are of an even length.You now have your first bar.Advertisement
-
3Prepare to lace the second bar. Take the right end of the lace in your hand. Run it along the underside of the eyelets and then bring it up through the second eyelet on the right side. Do not skip an eyelet. You should not be able to see the shoelace between the eyelets.
-
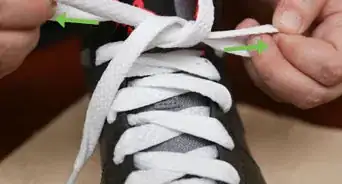
4Lace the second bar. Pull this same right lace straight across the shoe to the left side. Push it down through the second eyelet on the left side and pull it out until taught.
-
5Prepare to lace the third bar. Take the left end of the shoelace and run it along the underside of the eyelets on the right side, skipping the second eyelet (which you have previously laced) until you reach the third eyelet. Bring it up through the third eyelet and pull until taught.
-
6Lace the third bar. Pull the left lace straight across the shoe and push it down through the third eyelet on the right side. Pull until taught. You should now have three bars.
-
7Prepare to lace the fourth bar. Take the lace that is now on the left side and run it along the underside of the eyelets from the second eyelet to the fourth, skipping the third eyelet which you have previously laced. Bring this left lace up through the fourth eyelet on the left side and pull through until taught.
-
8Lace the fourth bar. Pull the left lace straight across the shoe and push it down through the fourth eyelet. Pull it through until taught.
-
9Continue lacing. Repeat steps 5 through 8 until you reach the last eyelets nearest you. Remember:
- each time you run the lace beneath the eyelets you will skip one that has already been laced before you pull it up through one
- when you pull a lace across the shoe it will go down into the eyelet directly parallel to the one it came up through.
-
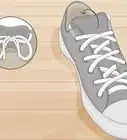
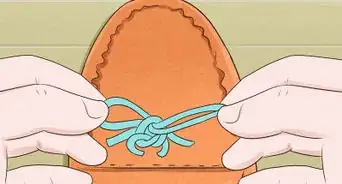
10Finish off the lacing. Once you've reached the last eyelets, once again ensure that they are even. You may have to do a bit of adjusting further down the shoe.
-
11Lace your other shoe. Repeat all of these steps in exactly the same way for your second shoe.

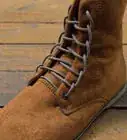
Easy Lacing
-
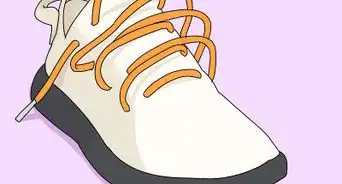
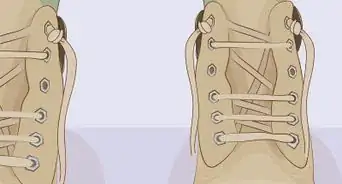
1Insert shoelace into the first eyelets of your first shoe. With the toe of the shoe pointed away from you, the first pair of eyelets is the pair farthest from you. Insert the left end of the shoelace into the left eyelet and the right end into the right eyelet.[1]
-
2Finish right lace. Run your right lace underneath the right row of eyelets toward you, all the way to the last eyelet. Pull it up through the final eyelet.[2]
-
3Adjust the shoelace length. For this technique, the left lace is going to be doing all the work, so you want it to be much longer before you begin. Pull on the left lace until the remaining end of the right lace seems about long enough to tie a knot with when you are done. For now, make a rough estimate as you can adjust it more later.
-
4Prepare to lace the second bar. Run the left lace toward you until you reach the next eyelet on the left side. Pull the lace up through this eyelet.
-
5Lace the second bar. Pull the left lace across the shoe to the right side and push it down through the second eyelet on the right side. Pull the lace until it's taught. We will now refer to this lace as the "working lace."
-
6Prepare to lace the third bar. Run the working lace toward you until you reach the next (third) eyelet on the right side. Pull the lace up through this eyelet.
-
7Lace the third bar. Bring the working lace across the shoe to the left side. Push it down through the third eyelet on the left side. Pull the lace until it's taught.
-
8Continue lacing. Using this same single lace, repeat steps 4 through 7 until you reach the last eyelet.
-
9Adjust the lengths of the laces. Now that you've finished lacing, make sure once more that each lace is of approximately equal length. Pull on your working lace as far down the shoe as you need to go in order to make your non-working lace longer, or vice versa.
-
10Lace your other shoe. Complete all of these steps on your second shoe.

Community Q&A
-
QuestionAre there ways to tie it crisscross?
 Community AnswerYes, you can look up different patterns online. You can have different ones for different reasons. Maybe a tighter one for running, more support for hiking, etc.
Things You'll Need
- Two shoes
- Two shoelaces of appropriate length for the shoes you have


References
About This Article
To straight lace shoes easily, lace the two eyelets at the front of the shoe first. Then, run the right side of the lace under the eyelets and pull it up through the right eyelet closest to the ankle. Next, take the left side of the lace up through the bottom of the second eyelet on the left, and then down through the second eyelet on the right. After that, take the lace up through the next eyelet on the right and repeat the process until the shoe is laced. To learn the other way to straight lace shoes, scroll down!