This article was co-authored by Carroll Kelly. Carroll Kelly is a Shoe Care Specialist and the Owner of Austin Shoe Hospital in Austin, Texas. With over 37 years of experience, Carroll specializes in sustainable shoes, boots, belts, handbags, and luggage repair. Carroll graduated with a Bachelor’s degree from the University of Texas. Austin Shoe Hospital is a family-run business that started over 105 years ago from a single horse-drawn carriage. Today they are the largest and most recognized shoe repair company in the world.
wikiHow marks an article as reader-approved once it receives enough positive feedback. In this case, several readers have written to tell us that this article was helpful to them, earning it our reader-approved status.
This article has been viewed 457,252 times.
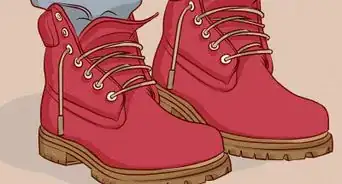
Lacing your boots is similar to lacing shoes, but the extra room allows for some more options when it comes to style and function. Different lacing methods not only give your boots a unique look, but certain styles can make your feet more comfortable, or provide better support.
Steps
Lacing Your Boots in the Diagonal Lace Method
-
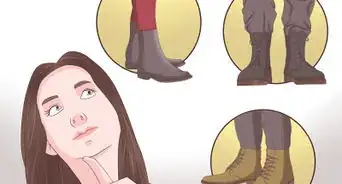
1Select a boot lace. Most likely you have a pair of boots that go at least as high as your ankles. Make sure that you get boot laces that are long enough for your pair of boots.[1]
- Ask a sales clerk for advice or read the packaging to determine the right boot lace length.
- If you are getting new laces, measure the laces that came with your boots.
- The right length depends on a number of factors, including how many eyelet pairs the boot has, the amount of vertical and horizontal spacing between the eyelets, and your desired lacing method.[2] On average, though, you'll need 45 inches (114 cm) for 5-6 eyelet pairs, 54 inches (137 cm) for 6-7 eyelet pairs, 63 inches (160 cm) for 7-8 eyelet pairs, 72 inches (183 cm) for 8-9 eyelet pairs, and 96 inches (244 cm) or more for 10+ eyelet pairs.[3]
-
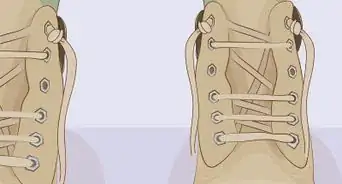
2Start lacing the boot. The standard way for lacing your boots is to lace up your boot in a criss-cross fashion.[4] Starting at the bottom, string the laces through each of the bottom eyelets. Pull the laces up vertically as far as possible and ensure both tips are even.
- Your laces should now be on the outside of your eyelets.
- For a standard criss-cross lacing method, string your laces through the eyelets, not over the top.
Advertisement -
3Cross one end of the lace diagonally over the tongue. Insert the lace into the second eyelet from the bottom. feed the lace through the eyelet and over.
- Once you have strung one lace through the next eyelet, repeat with the other.
- Your laces should now be on the outside of your boot.
-
4Continue lacing. Make sure to always insert one side before the other to keep the pattern uniform until the top of the boot is reached.
- If you crossed from left to right for the first eyelet, keep this pattern consistent.
- If you want your boots to have a symmetrical look, do the opposite for the other boot. If you starting by crossing left over right on one boot, go right over left on the other.
- Staying consistent not only gives your boots a nice, clean look, but it makes tightening the laces easier.
-
5Lace all the way up to the top. If you want a bit more room and extra length in the laces, you can leave the last pair of eyelets empty. At the top, either tie the laces in a bow, or tie off the ends and tuck in.
- Depending on how much extra lace you have, you can also wrap your laces around your boots before tying your knot.


Lacing Your Boots in the Army Method
-
1Grab your laces. For this method, which is how many armed forces lace boots, you can use the laces that came with your boots, or ones of the same length.[5]
- If you have an even number of eyelet pairs, you will start by threading the lace through the bottom eyelets from the inside and pulling the laces out.
- If you have an odd number of eyelet pairs, you will begin by threading the lace straight across the bottom eyelets from the outside in.
-
2Begin lacing your boots. Start with one end of your laces and run it diagonally through the inside of the next eyelet. For the second pair of eyelets closest to the bottom, you will lace the same way you did for the criss-cross lacing. Repeat with the other end of your laces.
- Be sure that your diagonal lace runs under your horizontal lace at the bottom, not on top of it.
- your laces should now have one criss-cross and be on the outside of your boot.
-
3Run your laces vertically through the next eyelet. On each side of your boot, you will now take the lace and run it directly through the eyelet directly above. Do this for both laces.
- Run your laces through the next eyelet by going outside in.
- You will now have one horizontal portion of your laces at the bottom eyelet, one criss-cross above it, and two eyelets with your laces running vertically through both.
- Your laces should be on the inside of your boot now.
-
4Repeat the diagonal and vertical lacing methods until you reach the top. Alternate threading your laces diagonally and the over the top vertically.
- Keep the order in which you thread your laces consistent. If you always go right over left, do that for every diagonal lace, and vice-versa if you start left over right.
-
5Tie your laces in a bow, or tuck the ends in. You will end up with your laces on the inside of your boot. Here you can tie a bow like normal, or tuck the laces inside your boots if you want a cleaner look.
- If you have enough length, you can also wrap your laces around your boot and tie a knot in the front, tucking it behind the tongue.


Lacing Your Boots in the Ladder Lace Method
-
1Get your pair of laces. You want to use laces that are long enough for you boot height. Use the laces that came with your boots or get a pair that is at least as long as your original laces. The Ladder method is also sometimes known as straight across lacing, and is popular among US paratroopers for the security of firm lacing.
- This method works best on higher boots with a lot of eyelets.
-
2Begin by running your laces straight across the bottom eyelets. Start the laces the same way as for diagonal laces, running the laces underneath the bottom eyelet.
- Your laces should now be on the outside of your boots.
-
3Insert your laces through the next eyelet vertically. Now, instead of running your laces diagonally, run each end vertically through the next eyelet up. This time going from outside to in.
- Your laces should now be on the inside of your boots.
-
4Cross the laces over the tongue. Run your lace under the section of lace that is connecting two eyelets vertically.[6]
- You’re not threading your lace through an eyelet for this step as you are running the lace horizontally, not diagonally.
- Instead of threading your lace through an eyelet, thread it through the section of vertical lace on the outside of your boot.
- Do this for both ends of your laces. You should now have your laces on the outside of your boot.
-
5Continue straight up and thread your lace through the next eyelet vertically. bring it up from underneath to the eyelet directly above the one below. Insert the lace from the outside in. Do this on both sides of you boot before bring running the lace horizontally across and under again.
- Always follow the same order you started with. If you laced right over left first, continue in that order.
-
6Continue Inserting the laces outside in, and the bring each end underneath again. Repeat this process until you have reached the top.
- For this method, the only time your laces go through an eyelet is when you are moving to the eyelet vertically and from the outside in.
- Once you are the top, your laces should be facing in, on the inside of your boots.
-
7Tie your boots. Once you’ve laced all the way up, tie your boots in a bow, or a not and stuff the laces behind the tongue.


Community Q&A
-
QuestionDoes this work on shoes?
 Community AnswerYou can look at wikiHow's article on lacing shoes if you want shoe-specific instructions.


References
- ↑ https://www.ironlace.com/lace-length-guide/
- ↑ https://www.fieggen.com/shoelace/shoelacecalc.htm
- ↑ https://www.ironlace.com/lace-length-guide/
- ↑ Carroll Kelly. Shoe Care Specialist. Expert Interview. 17 December 2020.
- ↑ https://www.youtube.com/watch?v=IkNI1azdGo0
- ↑ http://www.fieggen.com/shoelace/ladderlacing.htm
About This Article

To lace boots military style, start by running your lace through the bottom set of eyelets so you have equal lengths of lace on each side. Then, send the right side of the lace through the second eyelet on the right, going from the outside in. Repeat that on the left side. Next, send the laces diagonally across the shoe to the next eyelet up. Keep going diagonally upward until you have laced the whole shoe. To learn how to lace you boots with the ladder method, read on!