This article was co-authored by wikiHow Staff. Our trained team of editors and researchers validate articles for accuracy and comprehensiveness. wikiHow's Content Management Team carefully monitors the work from our editorial staff to ensure that each article is backed by trusted research and meets our high quality standards.
There are 8 references cited in this article, which can be found at the bottom of the page.
This article has been viewed 150,863 times.
Learn more...
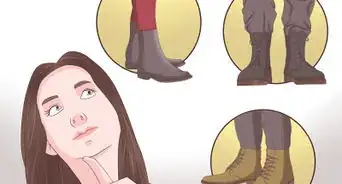
There are several ways that you can lace Timberlands, all of which lend a different style and purpose to the boot. You can lace them with a loose style for a more casual urban look, an army style, or do the traditional criss-cross lacing method if you're working in them. Regardless of which style you choose, lacing your Timberlands is a breeze as long as you set them up properly and follow the proper steps.
Steps
Setting up Your Laces
-
1Thread one side of the lace through the bottom eyelet. The eyelets are the small holes on the front of the boot. You can thread the lace through the eyelet from the outside or push the laces in through the holes from the middle of the shoe. Try both methods to see which style you prefer.[1]
- Threading the laces from the outside lends itself well to the loose and criss-cross styles.
-
2Thread the other side of the lace into the opposite eyelet. If you laced from the outside in, the laces will wrap around the bottom eyelets. If you are lacing from the inside out, the laces will wrap over the leather to the next eyelet up.
- Lace both ends of the shoelace in the same way. For example, if the left side is going from the outside into the center of the shoe, the right side of the lace should do the same thing.
Advertisement -
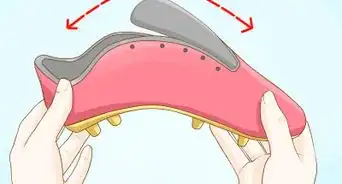
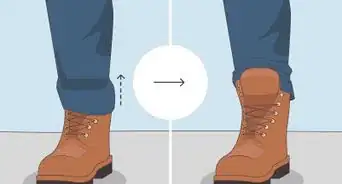
3Match the lace length by pulling both ends of the lace. Pull the ends of the shoelace up so that each side of the shoelace is the same length. This will ensure that your shoelaces aren’t lopsided when you reach the top holes.[2]
-
4Choose a lacing style and lace the rest of your shoes. Now that you've started off your laces, you can choose a style and lace the rest of your shoes. If you need to wear your Timberlands for physical labor, make sure to use the criss-cross or army style to keep your boots tight on your feet. If you're wearing Timberlands for fashion, choose the loose style.


Doing Criss-Cross Lacing
-
1Cross the left lace over and thread it through the opposite hole. Cross the left lace over and thread it through the next highest hole on the right side of the boot. Take the right lace and do the same thing. Pull on both ends of the lace to tighten them. You should see an X.
- Criss-cross lacing is good if you need your shoes to stay securely on your feet.
-
2Repeat the process until you’ve laced your laces through every eyelet. Continue crisscrossing your laces all the way up your shoe until you don’t have any more empty eyelets. After making every cross, remember to pull on both ends of the shoelace to tighten your boot.
-
3Skip the highest holes if you don’t have any more lace. You'll need at least 2 inches (5.1 cm) on each end of the lace in order to tie a knot. If you run out of shoelace, avoid threading the laces through the very top eyelets in your shoes. Not threading the top holes will leave you enough lace so that you can properly tie a knot.[3]
-
4Tie your shoes. Tie a bow with your laces as you normally would to tie your shoes. You can put the bow in front or behind the tongue of the Timberland, depending on whether you want your laces to show. If you're working in your boots, tuck the laces behind the tongue so that they don't come undone and so that you don't trip over them.[4]
- Pull on both ends of the laces to tighten your Timberlands before you tie your knot or bow.


Using an Army Style
-
1Thread the laces through the eyelets immediately above the laces. Instead of crisscrossing over to the other side, as you would in a traditional or criss-cross lacing, take the end of the left lace and push it through the hole or eyelet directly above the one that it’s currently in. Repeat the process on both ends of the lace. You should now see your shoelace run vertically through the holes.[5]
-
2Cross the laces and thread them through the next highest hole. Cross the laces over the center of the shoe and push them through the holes on the opposite side of your shoe. Crisscrossing is necessary to keep the laces tight.[6]
-
3Thread the laces through the holes above them. Repeat what you did earlier and don’t cross the laces. Run them vertically to the next highest eyelet. Your shoelaces should now look like they run vertically on the bottom, cross over, then run vertically again on the third eyelets from the bottom.[7]
- Your laces should then criss-cross through the next holes.
-
4Repeat the pattern until your boots are fully laced. Alternate between crisscrossing and vertical lacing all the way up the shoe. Because you’re using vertical lacing, you should have more shoelace towards the top which will make tying a knot easier.
-
5Tie a knot or bow at the top. Once your boots are tight, tie them as you normally would. Your laces should now look unique while remaining functional.


Doing a Loose Lacing
-
1Use the criss-cross or straight style but skip the fourth hole. Lace your shoes up to the fourth eyelet from the bottom, using either a criss-cross or a straight pattern. Instead of lacing the shoelace through the fourth hole, however, skip the hole and go to the next highest hole, or the fifth eyelet.[8]
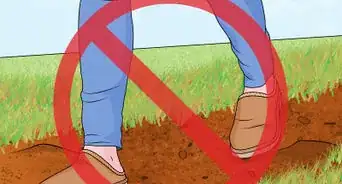
- This style is fashionable but isn't great if you're doing manual labor.
- Skipping holes will give your Timberlands a looser, more casual look.
-
2Thread the laces through the fifth hole. Insert the lace into the fifth hole and pull it. While this may look strange on other shoes, it often doesn’t look weird with Timberlands.[9]
-
3Tie a knot at the top. If you feel like you have too much extra shoelace, you can thread the laces through the sixth, or top hole. Otherwise, tie a knot as you usually would and put it in front or behind the boot’s tongue.
-
4Create individual knots on both sides of the lace. If you want to try for a different look, you can tie a traditional overhand knot on both ends of the shoelace instead of tying them together with a bow or a knot. This will prevent the laces from coming loose while you walk around and is a unique and stylish way to tie your shoes.[10]


Community Q&A
-
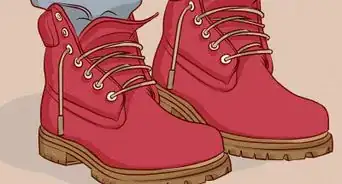
QuestionHow do I buy Timberlands?
 Community AnswerYou can buy Timberlands online using sites like Timberland's website, Amazon, Ebay, etc.


References
- ↑ https://www.gq.com/story/how-to-tie-your-shoes-four-ways
- ↑ https://www.youtube.com/watch?v=0czVvLQRXTs&t=1m4s
- ↑ https://www.youtube.com/watch?v=ItDaOL163vI&t=1m38s
- ↑ https://www.youtube.com/watch?v=ItDaOL163vI&t=1m48s
- ↑ https://www.fieggen.com/shoelace/armylacing.htm
- ↑ https://www.fieggen.com/shoelace/armylacing.htm
- ↑ https://www.fieggen.com/shoelace/armylacing.htm
- ↑ https://www.youtube.com/watch?v=0czVvLQRXTs&t=1m35s
- ↑ https://www.youtube.com/watch?v=0czVvLQRXTs&t=1m45s
About This Article

To lace Timberlands, start by threading the ends of the lace into the eyelets at the bottom of the boot. Next, pull the ends of the lace until the length matches on both sides. If you want to do criss-cross lacing, bring the left lace over and through the right eyelet and the right lace over and through the left eyelet. Repeat this process until you've laced through every eyelet. You can skip the upper holes if you run out of lace. Finish by tying your shoes in a bow. For tips on how to lace your Timberlands in the army style, scroll down.