This article was co-authored by Kai Ng and by wikiHow staff writer, Sophia Latorre. Kai Ng is a USATF and RRCA Certified Running Coach at Run Coach Kai. Kai has competed in over 55 races and over 15 marathons, and has trained with 16x USA and World record holder Patti Catalano Dillonso. He specializes in coaching runners of all levels and showing people that everyone can be a runner. Kai is committed to helping his clients reach their goals by showing them how to run with proper form and holding them accountable to train consistently.
This article has been viewed 2,322,524 times.
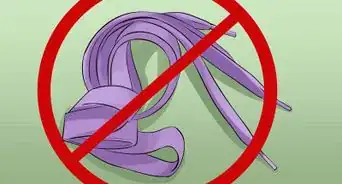
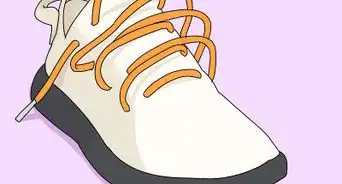
There are many ways to tie your shoes, and some may be easier than others. Whether you are trying to teach a child how to tie their shoes, or you're looking for a new technique, all you’ll need is a pair of patient hands and your favorite pair of shoes. Try the standard knot, or tie your shoes using the “bunny ears,” “circle method,” or “Ian knot” techniques.
Steps
Tying a Basic Knot
-
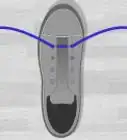
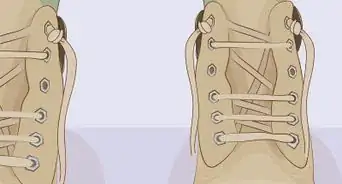
1Place the shoes on a flat surface. Let the laces fall to either side of the shoe.[1]
- If you’re demonstrating this technique to someone, point the toe side of the shoe toward them so they can see your hand movements.
- To make it easier for children, color the bottom of one shoelace brown, the middle part of the lace green, and the top part of the lace brown. This way, when you instruct them to make a loop with the lace, it can look like trying to form a “tree” by always making sure the green part of the lace is at the top of the loop, like the leaves at the top of a tree.[2]
-
2Tie a basic knot. Take both laces and thread one lace over the other and then pull them tight. They should form a knot in the middle of the shoe.[3]Advertisement
-
3Make a loop with one of the laces. You should be holding the lace between your thumb and your first two fingers.[4]
- If you are using the “tree” trick, instruct your child to form a loop with the colored lace so the brown parts of the lace are on top of each other (the trunk of the tree) and the green part sits at the top of the loop (the leaves of the tree).
-
4Use your other hand to wrap the other lace around the loop. You should be holding it over your fingers and around the loop. Wrap the other lace toward you rather than away from you.[5]
- Again, if you are using the “tree” trick, instruct your child to wrap the shoelace with the knot over the “trunk” of the tree.
-
5Pull the shoelace through the hole to form another loop. You should use your free hand to pull the shoelace through. There should now be a hole between the looped shoelace and the wrapped shoelace. Pull the wrapped shoelace through so it comes through this hole.[6]
- Another way to explain this is to have your child poke the knot on the shoelace through the hole to make another loop.
-
6Hold both loops and pull them tight. You should now have a nicely tied shoe.
- You can also instruct your child to pull the knot and the top of the tree trunk to either side, tightly.

Using the "Bunny Ears" Technique
-
1Place the shoes on a flat surface. Let the laces fall to either side of the shoe.[7]
-
2Tie a basic knot. Take both laces and thread one lace over the other and then pull them tight. They should form a knot in the middle of the shoe.
-
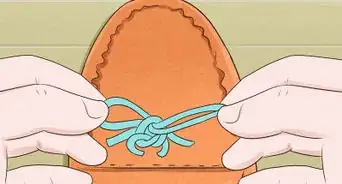
3Make a “bunny ear” loop with one of the laces. You should be holding the lace between your thumb and your first two fingers. The loop should be small and the “tail” should be long.
-
4Make a “bunny ear” loop with the other lace. Hold the lace between your thumb and first two fingers. Make the “tail” long and the loop small.
-
5Tie a basic knot with the “bunny ear” loops. Place one loop over the other, then tuck it behind the other and thread it through the hole that is created.
-
6Pull the “bunny ear” loops tight. Now your shoes are tied nicely.

Using the "Circle" Technique
-
1
-
2Tie a basic knot. Take both laces and thread one lace over the other and then pull them tight. They should form a knot in the middle of the shoe.[9]
-
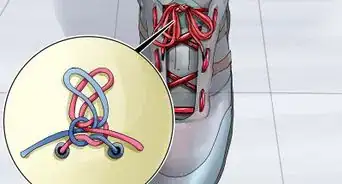
3Tie another knot, but don’t tighten it. Keep the second knot loose. Notice there is a circle shape formed by the knot. Hold the circle shape with your hand and lay it flat against the shoe.[10]
-
4Thread one shoelace into the circle. Make sure it comes up through the circle and over to one side. You can keep it loose, but make sure it does not slide all the way out of circle.[11]
-
5Thread the other shoelace into the circle. It should come up through the circle and over to the other side of the shoe.[12]
- You should now have two loops on either side of the knot in the center of the shoe.
-
6Pull the loops tight. Use your hands to pull the loops tight so they are secure. Now your shoes are tied.[13]

Using the "Magic Fingers" or “Ian Knot” Technique
-
1Place the shoes on a flat surface. Let the laces fall to either side of the shoe.
- If you’re demonstrating this technique to someone, point the toe side of the shoe toward them so they can see your hand movements.
-
2Tie a basic knot. Take both laces and thread one lace over the other and then pull them tight. They should form a knot in the middle of the shoe.
-
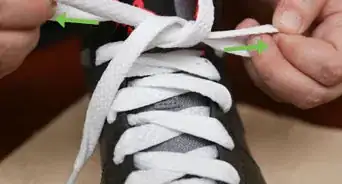
3Grip one of the shoelaces. Use your thumb and forefinger on your right hand to grip one of the shoelaces. Your fingers should be facing toward you.[14]
- Make sure your pinky finger is also gripping the shoelace.
- You should be making a half rectangle shape (or lobster claw shape) with your thumb and forefinger, as you grip the shoelace.[15]
-
4Grip the other shoelace. Use your thumb and forefinger on your left hand to grip the other shoelace. Again, your fingers should be facing toward you.[16]
- Don’t forget about your pinky finger. Make sure it is also gripping the shoelace. You should be making a half rectangle shape (or lobster claw shape) with your thumb and forefinger.
-
5
-
6

Community Q&A
-
QuestionMy shoelaces keep coming untied. Why does this happen? Is there anything wrong with my tying?
 Community AnswerIf you are tying them using the "circle" method, there is a possibility you are pulling the loops too far out, which makes them come undone easier and quicker. Also, you may not be pulling the whole thing in tightly enough. If this persists, try the "bunny ears" method.
 -
QuestionWhat if I still don't know how?Community AnswerHave someone show you personally, watch a YouTube tutorial video, or avoid shoes that require tying.
-
QuestionCan I cut my shoe laces so I don't have to tie them?Community AnswerYou could, but your shoes might feel loose. You could also just buy some shoes that don't require laces.


References
- ↑ https://www.ted.com/talks/terry_moore_how_to_tie_your_shoes#t-136928
- ↑ https://www.youtube.com/watch?v=a9tt7iI0VV8
- ↑ https://www.ted.com/talks/terry_moore_how_to_tie_your_shoes#t-136928
- ↑ https://www.ted.com/talks/terry_moore_how_to_tie_your_shoes#t-136928
- ↑ https://www.ted.com/talks/terry_moore_how_to_tie_your_shoes#t-136928
- ↑ https://www.ted.com/talks/terry_moore_how_to_tie_your_shoes#t-136928
- ↑ https://www.youtube.com/watch?v=a9tt7iI0VV8
- ↑ http://www.huffingtonpost.com/2014/08/14/shoe-tying-trick-_n_5678597.html
- ↑ http://www.huffingtonpost.com/2014/08/14/shoe-tying-trick-_n_5678597.html
- ↑ http://www.huffingtonpost.com/2014/08/14/shoe-tying-trick-_n_5678597.html
- ↑ http://www.huffingtonpost.com/2014/08/14/shoe-tying-trick-_n_5678597.html
- ↑ http://www.huffingtonpost.com/2014/08/14/shoe-tying-trick-_n_5678597.html
- ↑ http://www.huffingtonpost.com/2014/08/14/shoe-tying-trick-_n_5678597.html
- ↑ https://www.fieggen.com/shoelace/ianknot.htm
- ↑ http://www.buzzfeed.com/peggy/youve-been-tying-your-shoes-wrong-your-whole-life#.mkBBBWqD97
- ↑ https://www.fieggen.com/shoelace/ianknot.htm
- ↑ https://www.fieggen.com/shoelace/ianknot.htm
- ↑ http://www.buzzfeed.com/peggy/youve-been-tying-your-shoes-wrong-your-whole-life#.mkBBBWqD97
- ↑ https://www.fieggen.com/shoelace/ianknot.htm
About This Article

To tie your shoes using the bunny ear method, start by cross the laces over each other, and pass one of the laces through the loop. Pull both laces away from each other to tighten the knot. Then, make a bunny-ear-shaped loop with one of the laces, and pinch the base of it with your thumb and index finger so it stays in place. Repeat with the other lace. Once you have 2 bunny ears, cross the ears over each other. Pass one of the bunny ears through the loop. Finish by pulling the bunny ears away from each other to tighten the knot. To tie your shoes the more traditional way, start by crossing one lace over the other. Then, pass one of the laces through the loop underneath where the laces are crossed. Next, pull on the ends of both laces to tighten them. Once you've done that, make a loop with one of the laces, and hold it between your thumb and index finger. From there, wrap the other lace around the loop so it's coming toward you, not away. Now, pull the lace through the hole between both laces to create a second loop, but don't bring the end of the lace through. Finally, hold onto both loops and pull them tight. For more tips, including how to do the "Circle" technique, read on!