This article was co-authored by Lindsay Yoshitomi. Lindsay Yoshitomi is the nail artist behind the blog, Lacquered Lawyer. She was featured as one of Nail It! magazine’s “Bloggers You Should Know,” and has been on the cover of Nail Art Gallery Magazine. She has been practicing nail art for over 15 years.
There are 7 references cited in this article, which can be found at the bottom of the page.
This article has been viewed 41,295 times.
Breaking a fingernail before a big event or date can be quite frustrating, especially if you don’t have the time or money to run to the salon and have it mended. It can also be disappointing to have a nail tear almost completely off after spending months growing your nails to perfection. And if the rip, tear, split or crack extends into your nail bed, it can be very painful. Yet there are ways to repair your nail yourself – temporarily, simply, semi-permanently and safely – until it again grows back to just the length you want.
Steps
Patching Your Nail More Permanently
-
1Remove any nail polish. If your fingernail has any nail polish on it, start by removing it. Use a cotton ball, pad or soft cloth, dampen it with nail polish remover (use acetone remover for dark colors and glitter polishes) and gently wipe over the surface of your nail. Make sure to rub in the direction of the break to prevent further tearing.
-
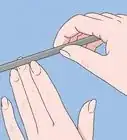
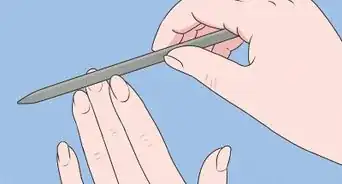
2File and smooth your nail. Use the finer-grit side of a regular emery board or the second-finest grit side of a 4-way buffer to gently even out and smooth the edges of your fingernail, again filing in the direction of the break. Because you will be applying a material, or a patch, to the surface of your nail bed that will be there for quite some time, you want to make sure it’s as smooth as possible. Therefore, use the coarser side of the emery board or the second-coarsest grit side of the buffer and run it along the entire surface of the nail to help buff away any ridges.[1]
- Be careful to not apply too much pressure while you’re buffing, or you’ll damage your nail.
Advertisement -
3Prepare the patch. The material you choose to use as the patch depends upon a variety of factors, such as what you have available, the strength or weakness of your nails and your activity level. You can use silk or fiberglass wraps, fabric or empty tea bags. Initially cut the material into a rectangle about the length and width of your fingernail. If you’re using a tea bag, cut off the top and empty it first. Now a) trim the width down just a bit so it won’t touch the skin on either side of your fingernail and b) trim the length so the material will cover half of your fingernail and extend from the tip of your fingernail about 1/8-1/4 of an inch.
- Silk wraps, which you can buy online or at beauty supply stores, are thin, flexible, become practically invisible once you apply the sealant on top and are best for strong nails.
- Fiberglass wraps, which you can also buy online and at beauty supply stores, are also very natural looking but are better for thin, weak nails.
- Linen wraps, which include fabrics and tea bags, offer a lot of strength and typically last just as long as silk and fiberglass. They are thicker and more opaque, though, so they require more filing to blend and smooth into the nail.
-
4Glue the break in your nail. Using nail glue, put one drop on top of the break and one underneath the break. Never use super glue or any other glue that is not designed for use on human tissue. Use a toothpick or cuticle file to help spread it the length of the break. Hold it in place with either the toothpick or cuticle stick for 30-40 seconds, long enough for it to start setting but not so long that you’ll have trouble when you let go. Both will be fully dry in about 2 minutes.[2]
-
5Adhere the patch to your nail. Apply a layer of clear base coat polish to your nail and immediately position the patch on it. Make sure about 1/8-1/4 of an inch of the material extends beyond the nail tip and that it’s also about halfway down your nail bed. Press down with your fingers to smooth it out and to get rid of air bubbles and wrinkles. Let it dry at least 5-10 minutes. If you’re using a tea bag, one of the most popular materials, it should start to turn translucent.[3]
- Alternatively, you can use nail glue instead of a base coat.
-
6Trim and file the fingernail patch. Take a pair of fingernail clippers or a pair of sewing or nail scissors and cut off the extra material at the tip of your fingernail. Next use the coarser-grit side of the emery board or the second-coarsest side of the buffer to gently even out a) the tip of your fingernail, b) the edges on the sides of your nail bed where the material meets the nail and c) the center ridge where the material is adhered to your nail bed. Then use the finer-grit side of the emery board or the second-finest grit side of the buffer and lightly smooth each area until you feel no bumps or ridges.[4]
- Do your best to buff in the direction of the break as much as you can.
-
7Apply more base coat and finish with nail polish. After you’re done filing and smoothing, wash your finger to get rid of any dust and stray bits of material. Dry it thoroughly with a clean cloth before applying another layer of base coat. Wait two minutes and then apply two layers of fingernail polish. You want to wait two minutes between each layer of polish, too. Finish it off with a clear top coat for extra strength.[5]
- Using a top coat will make your fingernail polish last longer, which is helpful in making the patch last longer. Using a lot of nail polish remover, whether it’s acetone or non-acetone, at one time or using it frequently will shift or remove the patch.
- Nail glue, if that’s what you choose to use, will hold up better to non-acetone nail polish removers, even when used frequently. It won’t fare so well with an acetone remover, though you can minimize damage by using it sparingly.


Fixing Your Nail Temporarily
-
1Remove any nail polish. First remove any nail polish you may be wearing so you can better see the extent of the break and proceed in fixing it. The type of nail polish remover you use will depend upon the kind of nail polish you are wearing. For example, if you’re wearing really dark polish or glitter, you’ll need an acetone remover. Dampen a cotton ball, pad or cloth with the remover and wipe in the direction of the break so it doesn’t snag and get worse.
- A note on acetone nail polish remover: In general, acetone removers should not be used on natural nails because it will dry them out, causing them to break more easily. They also shouldn’t be used on acrylics or other types of artificial nails.
-
2Cut and shape a piece of scotch tape. Use small nail or sewing scissors, if you have them, to cut a piece of scotch tape that is just larger than your nail bed. Now cut that piece into the shape of your nail bed. You might find it easier if you hold the tape with a pair of tweezers. Your shaped piece of tape likely won’t be perfect. It’s better, in fact, for it to be a bit smaller and not touch your cuticle and the skin on the sides of your nail than for it to be too large. It’s also better for it to be a little long and hang over the end of your nail at this point.[6]
-
3Place the tape on your nail. Using either your fingers or a pair of tweezers, place the piece of shaped tape on your nail bed. Use the pad of another finger to press it into place before gently smoothing it out to get rid of any air bubbles or wrinkles.[7]
-
4Tidy up your fingernail tip. Using your scissors or a pair of nail clippers, trim off some of the excess tape at the top of your nail. Next use a nail file with a fine grit and file the top lightly, in the direction of the break, to even out the tape with the tip of your nail. Run your fingernail under cool water to get rid of any excess dust or material and pat dry with a clean cloth.[8]
-
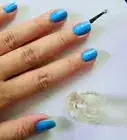
5Apply a layer of polish. This step isn’t necessary but recommended, especially if you don’t plan to do a more permanent nail repair. Apply 1-2 layers of nail polish, nail strengthening polish or a base coat to the nail. Make sure you wait 2 minutes between applications. If the rest of your nails are painted, paint this nail, too. Nails are dry when you can put them to your lips, and they are cool and no longer sticky or tacky.[9]
-
6Remove the scotch tape. When you’re ready to remove your temporary nail "band-aid," soak a cotton ball in acetone fingernail polish remover, stick your finger in it for about a minute so that it soaks into the tape, pull out your finger and gently peel off the tape in the direction of the break. The scotch tape may come off on its own when you take off your nail polish with an acetone remover.


Saving Your Nail Simply
-
1Prep your fingernail. Remove any nail polish by wetting a cotton ball, pad or cloth in nail polish remover and wiping it over your nail in the direction of the break to prevent more tearing. If the polish is very dark or has glitter, use an acetone remover. Next use either the finer-grit side of a regular emery board or the second-finest grit of a 4-way nail buffer and gently smooth the edge of the nail. Again, to avoid more damage, don’t saw back and forth when filing the edges.[10]
-
2Apply nail or super glue to the break. Both are thin glues that spread quickly, so you want to use them sparingly. Holding the break together with another finger, put 1 drop of either super glue or nail glue on top of the break and one beneath it. Use a toothpick or cuticle stick to spread it evenly along the length of the break, on both the top and bottom. Use the toothpick or cuticle stick to hold the nail in place for about 30-40 seconds.[11]
- You need to hold it long enough to help it stick but not so long that you’ll sever the bond that’s forming when you try to remove the cuticle stick or toothpick.
- These glues generally won’t last through numerous acetone nail polish removals, so reapplication will be necessary if you use acetone.
-
3File the glue and nail. Allow the glue to dry until it’s cool to the touch and not sticky or tacky. Because the glue won’t be smooth with the surface of your nail, take the coarser-grit side of the emery board or the second-coarsest side of the 4-way nail buffer and gently file the glue until it is nearly flush with the surface of your nail. Then use the finer-grit side of the emery board or the second-finest grit side of the 4-way buffer until there’s no ridge left.[12]
- Pay close attention to the edges, making sure they’re flush with your skin, too. This will help prevent the break from tearing, and it will make the break less noticeable.
-
4Clean your nail. To remove any super glue around your nail or in other places, take a cotton ball or Q-tip with acetone nail polish remover and dab it directly onto the glue, which will dissolve after it has fully absorbed. Then wipe the area with a clean cloth. If parts are still stuck, don't peel or pick at them. Apply more remover and repeat. To remove nail glue, soften your finger, and other areas if needed, in warm water for 2-3 minutes. Gently remove any glue that is soft but still on your finger. For larger, stubborn clumps, gently file them down. Then use a cotton ball or Q-tip to apply acetone remover to the glue for a few minutes before wiping the area clean.[13]
- Afterward, wash your hands well with soap and warm water.


Removing a Badly Broken Nail Properly
-
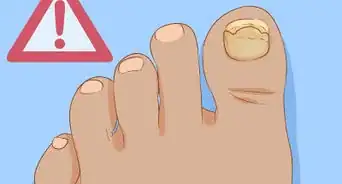
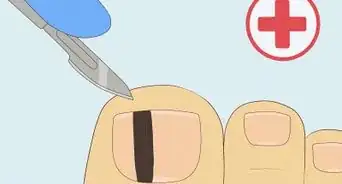
1Clip off the broken nail. When your fingernail has broken almost completely from the nail bed, it is generally necessary to remove the broken part to prevent infection. Use fingernail clippers or a pair of sewing or nail scissors to carefully clip off the nail only to the point at which the break ends. Carefully remove it from the nail bed using either your fingers or tweezers.
-
2Stop any bleeding. If there is any bleeding, apply direct pressure to the area. Use a clean cloth, medical gauze or cotton balls. Press firmly and evenly for several minutes. Try to ensure the cloth, gauze or cotton doesn’t become caught on any rough or jagged edges around the breaking point. If it does, slowly and carefully disentangle it so the nail doesn’t tear more. If it starts bleeding again when you remove the cloth, gauze or cotton ball, repeat the procedure.[14]
-
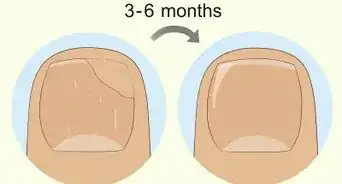
3Trim what’s left of your nail. To avoid more of your fingernail breaking and to help it grow out evenly, trim off any remaining pieces or edges. If the break was more vertical, for instance, and didn’t go the full length of your nail, use fingernail clippers or your scissors to cut the remaining nail closer to the nail bed. Next use the finer-grit side of an emery board or the second-finest grit of a 4-way nail buffer to smooth the now-short tip.
- If, however, the tear went the full length but is still jagged in places, such as in the corners, carefully use either the emery board or buffer to gently even out and smooth the nail so it’s more uniform.
- Additionally, if the break was deep into your nail bed and bled a great deal, don't remove the nail but instead apply pressure to stop the bleeding and see a doctor.
-
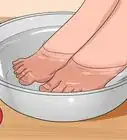
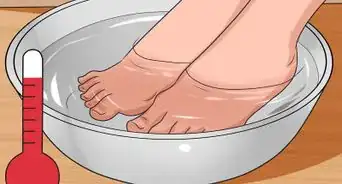
4Soak and clean your finger. Fill a bowl, sink or a large cup with cool, not cold, water. Soak your finger in it for 20 minutes. Afterward, pat it dry using a clean, soft cloth and allow it a few minutes to completely air dry. Apply a pea-sized amount of triple antibiotic ointment to the area, which will help it heal more quickly and reduce the likelihood of infection.
-
5Protect your fingernail and nail bed. After applying the antibiotic ointment, immediately wrap your fingernail and nail bed fairly tightly in a band-aid. Alternatively, you could use gauze pads and medical tape to cover the nail and nail bed. Wear bandages the rest of that day and for the next two days.[15]
-
6Soak your finger in salt water. On day four, you can stop wearing a bandage. Mix 8 ounces of warm water with 1/4 teaspoon of salt. Make sure you stir it briskly so the salt doesn’t settle to the bottom. Soak your finger in the salt water for 20 minutes per day for the next seven days to further prevent the risk of infection. Halfway through each soak, remove your finger for just a minute and again stir the salt water.[16]
- Make sure you keep your finger as clean as possible during this time, washing frequently with an antibacterial soap like Dial. If it becomes extremely dirty, wash it with soap and warm water as soon as you can and dry it with a clean cloth.
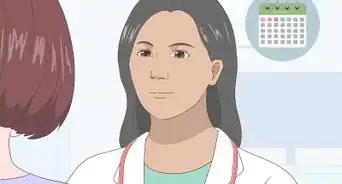
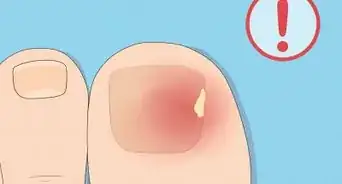
- Monitor your fingernail as it heals. If, after the 7th day of soaking it in salt water, there are signs of infection, such as pus, redness, heat around the nail and swelling, see a physician.
- If you want to have long, healthy nails, avoid putting stress on your nails that can lead to breakage.[17]
- Avoid damaging your nails. You may feel tempted to rip the gel polish off instead of properly soaking it. But picking it off removes some of the top layers of your nails, which weakens them.[18]
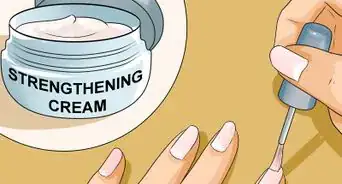
- You can use nail care products like Vitamin E Nail and Cuticle Oil. It helps hydrate cuticles and nails, which helps strengthen them and repair any damage.[19]


References
- ↑ https://www.mottchildren.org/health-library/sig256776
- ↑ https://myhealth.alberta.ca/Health/Pages/conditions.aspx?hwid=sig256776
- ↑ https://myhealth.alberta.ca/Health/Pages/conditions.aspx?hwid=sig256776
- ↑ https://www.mottchildren.org/health-library/sig256776
- ↑ https://www.mayoclinic.org/healthy-lifestyle/adult-health/expert-answers/split-fingernails/faq-20058182
- ↑ https://www.mottchildren.org/health-library/sig256776
- ↑ https://www.mottchildren.org/health-library/sig256776
- ↑ https://myhealth.alberta.ca/Health/Pages/conditions.aspx?hwid=sig256776
- ↑ https://www.mayoclinic.org/healthy-lifestyle/adult-health/expert-answers/split-fingernails/faq-20058182
- ↑ https://medlineplus.gov/ency/patientinstructions/000800.htm
- ↑ https://medlineplus.gov/ency/patientinstructions/000800.htm
- ↑ https://www.mottchildren.org/health-library/sig256776
- ↑ https://www.mayoclinic.org/healthy-lifestyle/adult-health/expert-answers/split-fingernails/faq-20058182
- ↑ https://www.webmd.com/first-aid/nail-injuries-treatment#1-3
- ↑ https://myhealth.alberta.ca/Health/Pages/conditions.aspx?hwid=sig256776
- ↑ https://myhealth.alberta.ca/Health/Pages/conditions.aspx?hwid=sig256776
- ↑ https://www.vogue.in/content/how-to-make-nails-stronger-ask-an-expert
- ↑ https://www.vogue.in/content/how-to-make-nails-stronger-ask-an-expert
- ↑ https://www.vogue.in/content/how-to-make-nails-stronger-ask-an-expert
- Videos provided by Meliney
About This Article