This article was co-authored by wikiHow staff writer, Hannah Madden. Hannah Madden is a writer, editor, and artist currently living in Portland, Oregon. In 2018, she graduated from Portland State University with a B.S. in Environmental Studies. Hannah enjoys writing articles about conservation, sustainability, and eco-friendly products. When she isn’t writing, you can find Hannah working on hand embroidery projects and listening to music.
There are 10 references cited in this article, which can be found at the bottom of the page.
The wikiHow Video Team also followed the article's instructions and verified that they work.
This article has been viewed 52,187 times.
Learn more...
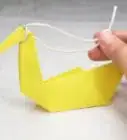
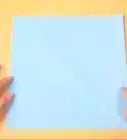
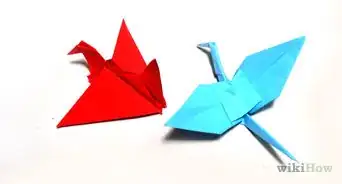
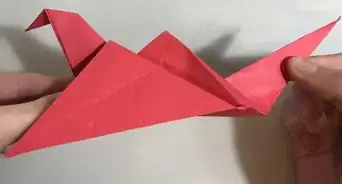
The peacock is a beautiful, feathery bird that looks elegant and regal—and its origami counterpart is much the same. Folding an origami peacock might take a bit of practice, but it’s a great project if you’re just starting out or if you’ve got some practice under your belt. If you want to add a delicate origami peacock to your collection, grab your origami paper and get started!
Steps


Community Q&A
-
QuestionHow can I get my peacock to stand up?
 Community AnswerIf it is having trouble standing, crease the last fold again to increase its strength. If this doesn't work, cut one strip of paper of the same color and glue, tape, or hold it behind the peacock.
References
- ↑ https://www.youtube.com/watch?t=2&v=6khUbMo4lBY&feature=youtu.be
- ↑ https://youtu.be/6khUbMo4lBY?t=6
- ↑ https://www.youtube.com/watch?t=35&v=OP2zoeSw57I&feature=youtu.be
- ↑ https://www.youtube.com/watch?v=c3ucQnylgsg&t=131s
- ↑ https://www.youtube.com/watch?t=98&v=OP2zoeSw57I&feature=youtu.be
- ↑ https://www.youtube.com/watch?v=c3ucQnylgsg&t=170s
- ↑ https://www.youtube.com/watch?v=c3ucQnylgsg&t=295s
- ↑ https://www.youtube.com/watch?t=151&v=OP2zoeSw57I&feature=youtu.be
- ↑ https://www.youtube.com/watch?t=180&v=OP2zoeSw57I&feature=youtu.be
About This Article