This article was co-authored by wikiHow staff writer, Hannah Madden. Hannah Madden is a writer, editor, and artist currently living in Portland, Oregon. In 2018, she graduated from Portland State University with a B.S. in Environmental Studies. Hannah enjoys writing articles about conservation, sustainability, and eco-friendly products. When she isn’t writing, you can find Hannah working on hand embroidery projects and listening to music.
There are 7 references cited in this article, which can be found at the bottom of the page.
The wikiHow Video Team also followed the article's instructions and verified that they work.
This article has been viewed 308,774 times.
Learn more...
If you’re tired of your shorts and you want to try out a new look, don’t head to the store! You can fray and distress your shorts to give them a new life and add a new piece to your wardrobe. If you’re fraying denim and you haven’t made your jeans into shorts yet, check out https://www.wikihow.com/Make-Denim-Cut-off-Shorts before you get started. Otherwise, gather your supplies and get to fraying!
Steps
Before Fraying
-
1Decide whether you want to rip, fray, or distress your shorts. Although the terms are sometimes used interchangeably, they actually mean different things. Ripping means creating a tear or a hole in the fabric of your shorts, distressing means to make the shorts look worn-in, and fraying means to pull the loose threads out of the hems and holes.[1]
- Distressed usually refers to the overall look of the shorts, while frayed usually refers to the ends or the hems.
-
2Choose linen, cotton, or denim shorts. Some fabrics, like polyester and nylon, won’t fray at all. For the best look, go with soft linen, cotton, or denim shorts so you can pull the threads out of the bottom of the shorts.[2]
- Denim is the most common material you’ll see in reference to frayed shorts.
Advertisement -
3Pick the tool to achieve the look that you want. There are multiple ways to fray shorts, and you can use a few different tools based on what you’re going for. You can also use multiple tools if you want a combination of styles on your shorts. Choose between:[3]
- A razor: for scrapes and frays.
- Sandpaper: for an overall distressed look.
- Tweezers: for removing thread from a raw hem.
- A seam ripper: for small cuts and tears.
-
4Fray the pockets and edges, distress the overall shorts. When it’s time to start fraying, you don’t just have to stick to the bottom hem. You can fray the pockets, too, and create small holes or tears in them. Then, you can give your shorts an overall distressed look to match the frayed pockets and edges.[4]
- If you’re working on a small section, like on a pocket, use the end of a bobby pin to pick and scrape at the material.
-
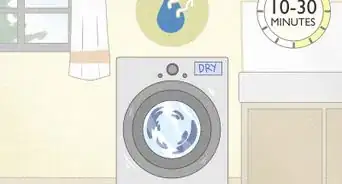
5Wash your shorts before and after your project. Read the label on your shorts and give them a run through the washer and the dryer before you start; this is to avoid shrinkage after you’ve already frayed them. Then, once the project is over, give them another run through the wash cycle to expose more loose threads and distress them just a little bit more.[5]
- The heat of the dryer can really help to pull out loose threads and make the shorts look even better.


Fraying with a Razor
-
1Spread your shorts out on a flat surface. You don’t need to iron your shorts, but make sure they lay mostly flat so you can work on them easily. Try to work on a flat surface, like a table or a countertop, so your shorts don’t roll away.[6]
- If you want to mark the areas that you’d like to fray, you can do that with a permanent marker—but you don’t have to.
-
2Put a piece of cardboard inside your shorts. Find the area that you’d like to start working on, then grab a piece of cardboard and cut it so it fits inside your shorts. Slide the cardboard inside your shorts to protect the other side of the material as you use your razor.[7]
- If you have a rotary mat, you can use that instead.
- As you move to new areas, take the cardboard out and put it back in to protect your shorts the entire time.
-
3Use a straight razor to create holes in the shorts. For small holes, take the sharp end of your razor and carefully cut in a straight line. Press down hard enough to make a clean cut, then rub the edges of the hole with your fingers to fray the loose threads.[8]
- If you have a box cutter, you can use that instead of a loose razor.
- The placement of your cuts is up to you! Go near the bottom hem, the pockets, or just below the butt of your shorts for a cute, distressed look.
-
4Scrape a disposable razor across the hems and edges. To fray the edges of your shorts, grab a disposable shaving razor and place it flat down on your shorts. Rub it quickly back and forth to scuff up the material and make some frays.[9]
- This is an easy way to distress your shorts all over, too.
- Your final look will be frayed jeans with holes all over.

Fraying with Sandpaper
-
1Spread out your shorts and mark the areas where you’d like to cut. If you’re planning on cutting your shorts to make actual holes, use a fabric marker or chalk to draw short lines in all the areas you’d like. Remember to keep the holes near the bottom of the shorts so that they’re still wearable![10]
- Marking your placement will make it much easier to remember where you want to create the holes. Plus, it can avoid disasters like cutting 2 holes too close to each other and creating one mega-hole.
-
2Use scissors to make small cuts in your shorts. If you would like to cut open your jeans, grab a pair of scissors and start snipping. You can cut in a straight line or create a square cutout for a larger hole.[11]
- If you only want to make your shorts look distressed, you don’t have to cut any actual holes.
-
3Rub a piece of sandpaper all over your shorts for a distressed look. To make your shorts feel and look softer, grab a piece of sandpaper and rub it firmly all over your shorts. You can stop and take a look at how it’s working every few minutes to decide if you’d like to keep going or move onto a new section.[12]
- The coarser your sandpaper is, the more likely it is to create holes in your shorts. If you don’t want that, use a fine grain sandpaper.
-
4Use the sandpaper to fray the holes you cut earlier. Grab the same piece of sandpaper and rub it firmly over the holes you cut to pop out the loose threads. This does have the potential to make the holes bigger, so be careful![13]
- The coarser the sandpaper is, the more likely it is to widen the existing holes you’ve already made.
- Again, you can decide when you’re finished here.
- Your final look will be soft, distressed shorts that look lived-in and worn.

Fraying with Tweezers or a Seam Ripper
-
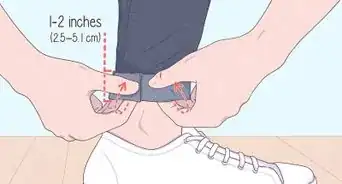
1Work in small sections to avoid holes that are too big. Cutting holes in your jeans will make them fray over time, and picking the threads out with tweezers or a seam ripper speeds up that process. To avoid fraying your shorts too much, try to work in sections about 1 in (2.5 cm) large.[14]
- Unless you’re working on the hem of your shorts, in which case you can go all the way around.
-
2Create a small cut in your shorts with scissors. Since tweezers and seam rippers are mostly for pulling thread, you’ll have to open up your shorts first. Use scissors to make a small cut where you’d like the frayed hole to be.[15]
- If you’re fraying the hem of your shorts, cut off the bottom hem to expose the loose threads.
-
3Use the tweezers or seam rippers to pick out individual threads. Grab a pair of tweezers or seam rippers and use them to pick out loose threads as you see them in your shorts. On denim shorts, the threads are usually lighter than the outside of the jeans, so they’ll be easy to grab. On other materials, you might have to pinch and pull in small sections to fray your cuts.[16]
- You can pull as many or as few threads as you’d like. When you wash your shorts, the areas will become more frayed on their own.
- Your final look will be a slightly frayed area with individual threads sticking out. Your shorts will become more frayed the more you wash them.

Community Q&A
-
QuestionHow do I rip the shorts?
 Community AnswerMake a score with scissors while they're on a hard surface (and off your body). After several scores along the same line, they should be turning white. Using a ruler can help keep them straight if you want. Make a small snip in the middle of the line (away from the seams) and then hook your fingers in and pull. This will take some effort and strength. If you want to remove the leg then you can cut across the seams, as you will not be able to rip them. To rough up the edge pieces that you cut with the scissors, use the inside edge of the scissors to rub them as if you were sanding a piece of wood.
Things You'll Need
Fraying with a Razor
- Straight razor or box cutter
- Disposable shaving razor
Fraying with Sandpaper
- Scissors
- Cardboard or rotary mat
- Sandpaper (fine or coarse grit)
Fraying with Tweezers or a Seam Ripper
- Scissors
- Tweezers or seam ripper

References
- ↑ https://www.stylecraze.com/articles/how-to-make-ripped-jeans/
- ↑ https://blog.treasurie.com/how-to-fray-fabric-edges/
- ↑ https://www.stylecraze.com/articles/how-to-make-ripped-jeans/
- ↑ https://www.cosmopolitan.com/style-beauty/fashion/a58592/5-easy-tricks-for-distressing-your-jeans/
- ↑ https://blog.treasurie.com/how-to-fray-fabric-edges/
- ↑ https://www.cosmopolitan.com/style-beauty/fashion/a58592/5-easy-tricks-for-distressing-your-jeans/
- ↑ https://www.youtube.com/watch?v=0Dt6M2qTNuI&feature=youtu.be&t=551
- ↑ https://www.youtube.com/watch?v=0Dt6M2qTNuI&feature=youtu.be&t=568
- ↑ https://www.cosmopolitan.com/style-beauty/fashion/a58592/5-easy-tricks-for-distressing-your-jeans/
- ↑ https://www.stylecraze.com/articles/how-to-make-ripped-jeans/
- ↑ https://www.stylecraze.com/articles/how-to-make-ripped-jeans/
- ↑ https://www.cosmopolitan.com/style-beauty/fashion/a58592/5-easy-tricks-for-distressing-your-jeans/
- ↑ https://stylecaster.com/how-to-fray-the-hem-of-your-jeans/
- ↑ https://www.stylecraze.com/articles/how-to-make-ripped-jeans/
- ↑ https://www.refinery29.com/en-us/how-to-fray-denim#slide-5
- ↑ https://www.refinery29.com/en-us/how-to-fray-denim#slide-5
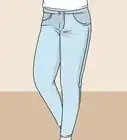
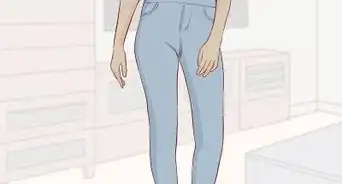
About This Article

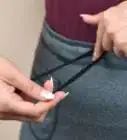
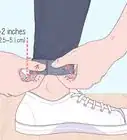
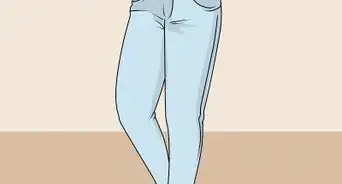
Make your own stylish frayed shorts by cutting them to the right length and distressing them until you get the effect you want. When picking your denim, go 1 size up to ensure a comfortable fit and look for a boxier fit to avoid shorts that are too tight. Once you pick your shorts, put them on in front of a mirror and use chalk to mark exactly where you want to cut them. After marking your shorts, use a ruler to make a straight line about 1 inch below your chalk mark so you leave room for the fraying. Cut along the marked line, then run sandpaper or a razor blade along the cut mark to start the fraying. Wash your shorts 1 to 3 times in the washing machine to give your shorts a more naturally distressed look. To learn how to make your shorts look more distressed, keep reading!