This article was co-authored by wikiHow staff writer, Hannah Madden. Hannah Madden is a writer, editor, and artist currently living in Portland, Oregon. In 2018, she graduated from Portland State University with a B.S. in Environmental Studies. Hannah enjoys writing articles about conservation, sustainability, and eco-friendly products. When she isn’t writing, you can find Hannah working on hand embroidery projects and listening to music.
The wikiHow Culinary Team also followed the article's instructions and verified that they work.
This article has been viewed 12,810 times.
Learn more...
If you find yourself running out of time to make meals in the evening, preparing them ahead of time and freezing them is a great option. Figuring out the best way to freeze your meals can be tricky, especially if you're whipping up lots of different dishes. Fortunately, there are a few basic guidelines you can follow to freeze your cooked meals and store them to enjoy for months on end.
Steps
Cooking and Cooling
-
1Cook large, saucy dishes fully. You can cook soups, stews, casseroles, and braises according to the recipe before freezing them. The liquidy sauce in all these recipes will prevent the veggies and meat from drying out, so you don’t have to worry about ruining the texture when you reheat them.[1]
- Items like these are the most popular dishes to freeze since they require little to no prep besides thawing and reheating.
-
2Make desserts completely before freezing them. Cookies, cakes, muffins, croissants, and scones all keep super well in the freezer. You can cook these according to their recipe and freeze them to save for later.[2]
- You can also make dough, like pie dough, cookie dough, or bread dough, and freeze it to cook later.
Advertisement -
3Cook grains and lentils all the way before freezing them. While grains, lentils, chickpeas, and beans don’t freeze well when they’re raw, you can cook them according to your recipe and then freeze them. It will extend their shelf-life by a lot, and they’ll still taste great![3]
- On the other hand, pasta doesn’t freeze well once it’s fully cooked. You should only cook it partially before freezing it to avoid dry or gooey noodles.
-
4Cook crispy, starch foods partially. Chicken fingers, fish sticks, potatoes, rice, and pasta dishes can all get a little soggy in the freezer. You can either leave these separate from your frozen meals or you can just slightly undercook them so they get soft and tasty during the reheating process.[4]
- Foods that you might overcook, like burgers or stir fries, should be frozen raw to preserve their texture.
- Foods that you assemble, like pizza or dumplings, can be frozen raw. You can thaw them and then cook them for the best taste and texture.
-
5Cool the food until it’s room temperature. The food doesn’t have to be completely cold, but it shouldn’t be piping hot, either. Spread out your food to a depth of 2 in (5.1 cm), then leave it in a dish on a cooling rack for 20 to 30 minutes.[5]
- Spreading the food out will help it cool down faster, so it’s super important!
-
6Chill the food in the fridge for 1 to 2 hours before freezing. Loosely cover your food with a lid, but don’t make it airtight. Put your container of food into the fridge to cool it down even further before freezing.[6]
- Your food will freeze much faster when it’s refrigerator temperature than if it’s still warm.


Freezing
-
1Separate the food into small portions. If you’re cooking for one person, you may want to separate your food into single portions. If you’re cooking for your family, 3 to 4 portions in a container will work![7]
- That way, you won’t have to waste any food by thawing too much at one time.
- If you’re freezing a big meal, like a soup or stew, separate it into a few containers instead of a big pot. It will freeze much faster and keep longer that way.
-
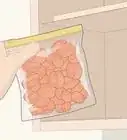
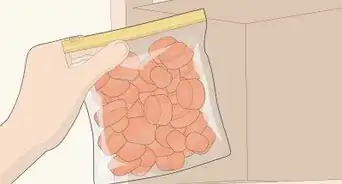
2Transfer the food to plastic bags or containers. If you’re using plastic bags, make sure you’re using freezer bags to prevent freezer burn. If you’re using containers, make sure they can seal up airtight.[8]
- Your food will freeze faster if it’s spread out into a thin layer. If you’re using freezer bags, try to squeeze all the air out and spread the food out as much as possible.
-
3Label your food with a permanent marker. Write what’s inside and the date that you put it in the freezer. That way, you can throw out old or unused food when it goes bad.[9]
- To write on airtight containers, add some freezer tape and label it.
-
4Spread your containers out in one layer in the freezer. This will ensure that your food freezes quickly and evenly. If you can’t spread all your food out into one layer, just spread it out as much as possible in your freezer.[10]
- Full freezers actually freeze more efficiently than empty ones. If your freezer is mostly empty, fill up space with half-full water bottles.
-
5Stack your containers once they’re fully frozen. After 2 to 4 hours, you can head back to your freezer and stack your containers on top of each other to save space. You don’t have to do this, but it can help keep your freezer clear for other items.[11]
- Since your food is fully frozen, the containers won’t heat each other up or thaw each other out anymore.
-
6Keep your freezer at 0 °F (−18 °C). It’s very important that your freezer stays cold the entire time you’re storing your food. Keep an eye on the temperature of your freezer and make sure it doesn’t climb above freezing levels.[12]
- If the power goes out in your freezer, keep the door shut as much as possible. Your food will be okay to eat for up to 24 hours after your power goes out.


Thawing and Reheating
-
1Eat your frozen food within 3 months for the best quality and taste. Frozen food can be stored indefinitely, but the taste and texture starts to decline after a few months. Try to eat your food within about 3 months so it’s still tasty.[13]
- This is why labeling your food is important!
- If your food smells bad or looks rotten, don’t eat it.
-
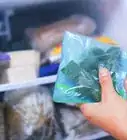
2Thaw your food in the refrigerator for the safest technique. When you’d like to eat your food, keep it in the container and transfer it to the fridge. Every 5 pounds (2.3 kg) of weight needs 1 hour of thawing time, so it could be quite a while before your food is ready.[14]
- It’s a good idea to thaw your meal overnight the day before you plan to eat it.
- If you’re thawing raw meat, place a tray underneath it to catch any drips.
-
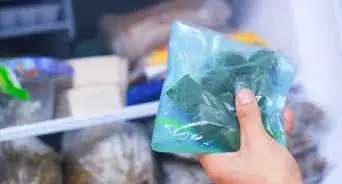
3Soak your food in cold water to speed up the thawing process. If you don’t want to wait for the fridge to thaw your food, fill up a large bowl or your sink with cold water. Place your food container into the water and change the water out every 30 minutes to prevent bacteria.[15]
- This is slightly less safe than the fridge method since you can’t regulate the temperature of the water as much.
-
4Reheat your food in the oven or microwave if it’s fully cooked. Saucy dishes only need a quick reheat until they’re ready to eat. You can pop the food in an oven-safe dish and let it warm up, or you can put smaller portions in the microwave.[16]
- The reheating time depends on what you’re heating up and how much you have. Thicker, saucier dishes will take longer than thinner, smaller ones.
- If you’re reheating a casserole, make sure it reaches 165 °F (74 °C) before you dig in.[17]
-
5Warm up soups and stews on the stovetop. Once your liquids have thawed in the fridge for a few hours, you can pour them into a saucepan. Turn the heat on medium-high and let your soup or stew heat up for 10 to 15 minutes until it’s warm enough to eat.[18]
- If the stovetop is too much, you can also heat up one bowl at a time in the microwave.
-
6Cook your food if you left it underdone or raw. If you froze anything raw or you left it slightly underdone, you can start and finish the cooking process once it’s thawed. Use your oven or stovetop to finish up your meal and get it ready to serve.[19]
- You should always thaw your food before cooking it. If you cook it straight from the freezer, it could be underdone.
-
7Refreeze your food if you thawed it in the refrigerator. If you don’t eat all of your food and you want to save it again, just place it back into the container and put it in the freezer. Since it’s already cooked, you don’t have to worry about bacteria.[20]
- If the food was sitting at room temperature for more than 2 hours, throw it away. It may have bacteria.


Warnings
- Don’t eat frozen food if it smells bad or looks rotten.[22]⧼thumbs_response⧽
Things You’ll Need
- Freezer bags or airtight containers
- Permanent marker


References
- ↑ https://www.foodnetwork.com/how-to/packages/help-around-the-kitchen/how-to-make-ahead-and-freeze-meals
- ↑ https://www.foodnetwork.com/how-to/packages/help-around-the-kitchen/how-to-make-ahead-and-freeze-meals
- ↑ https://www.foodnetwork.com/how-to/packages/help-around-the-kitchen/how-to-make-ahead-and-freeze-meals
- ↑ https://www.foodnetwork.com/how-to/packages/help-around-the-kitchen/how-to-make-ahead-and-freeze-meals
- ↑ https://food.unl.edu/freezing-cooked-food-future-meals-freezer-bag-tips
- ↑ https://www.foodnetwork.com/how-to/packages/help-around-the-kitchen/how-to-make-ahead-and-freeze-meals
- ↑ https://www.allrecipes.com/article/make-ahead-meals/
- ↑ https://food.unl.edu/freezing-cooked-food-future-meals-freezer-bag-tips
- ↑ https://www.fsis.usda.gov/wps/portal/fsis/topics/food-safety-education/get-answers/food-safety-fact-sheets/safe-food-handling/freezing-and-food-safety/CT_Index
- ↑ https://food.unl.edu/freezing-cooked-food-future-meals-freezer-bag-tips
- ↑ https://www.allrecipes.com/article/make-ahead-meals/
- ↑ https://www.fsis.usda.gov/wps/portal/fsis/topics/food-safety-education/get-answers/food-safety-fact-sheets/safe-food-handling/freezing-and-food-safety/CT_Index
- ↑ https://www.fsis.usda.gov/wps/portal/fsis/topics/food-safety-education/get-answers/food-safety-fact-sheets/safe-food-handling/freezing-and-food-safety/CT_Index
- ↑ https://www.foodnetwork.com/how-to/packages/help-around-the-kitchen/how-to-make-ahead-and-freeze-meals
- ↑ https://www.fda.gov/media/80676/download
- ↑ https://www.foodnetwork.com/how-to/packages/help-around-the-kitchen/how-to-make-ahead-and-freeze-meals
- ↑ https://www.allrecipes.com/article/freezing-foods-a-real-time-saver/
- ↑ https://www.allrecipes.com/article/freezing-foods-a-real-time-saver/
- ↑ https://www.foodnetwork.com/how-to/packages/help-around-the-kitchen/how-to-make-ahead-and-freeze-meals
- ↑ https://www.fsis.usda.gov/wps/portal/fsis/topics/food-safety-education/get-answers/food-safety-fact-sheets/safe-food-handling/freezing-and-food-safety/CT_Index
- ↑ https://www.fsis.usda.gov/wps/portal/fsis/topics/food-safety-education/get-answers/food-safety-fact-sheets/safe-food-handling/freezing-and-food-safety/CT_Index
- ↑ https://www.fsis.usda.gov/wps/portal/fsis/topics/food-safety-education/get-answers/food-safety-fact-sheets/safe-food-handling/freezing-and-food-safety/CT_Index
About This Article