This article was co-authored by wikiHow Staff. Our trained team of editors and researchers validate articles for accuracy and comprehensiveness. wikiHow's Content Management Team carefully monitors the work from our editorial staff to ensure that each article is backed by trusted research and meets our high quality standards.
The wikiHow Culinary Team also followed the article's instructions and verified that they work.
This article has been viewed 86,408 times.
Learn more...
Root vegetables, like turnips and carrots, provide excellent ingredients for soups and stews. They can be frozen to use easily in recipes throughout the winter months. You should blanch turnips before your freeze them to maintain their nutrients during storage.
Steps
Blanching the Turnips
-
1Choose small to medium turnips for freezing. Larger turnips are tougher and can have a stronger flavor that makes them unappealing when you take them out of storage. Look for small or medium-sized turnips and give them a good squeeze to make sure they’re tender.[1]
- Large turnips are better for storing in your fridge unpeeled in an unsealed plastic bag and will last for up to a month.[2]
- Smaller turnips are usually younger, making them more tender.
-
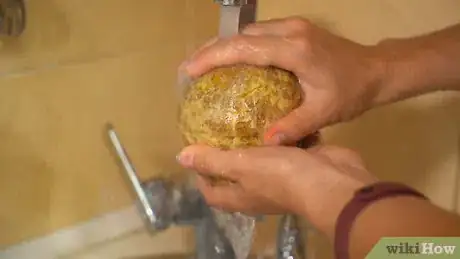
2Rinse the turnips and scrub off any dirt from their surface. Run all of the turnips beneath a faucet to give them a good rinsing. As you rinse them, use your fingers to scrub off dirt and residue that may be stuck on the surface.[3]
- Removing dirt helps reduce potential contaminants that could cause the turnips to spoil more quickly.
Advertisement -
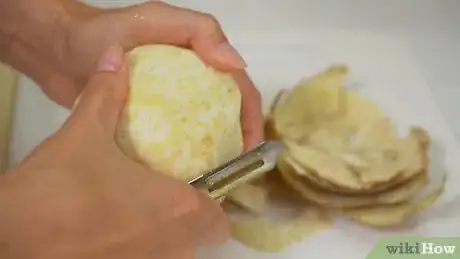
3Peel the skin off of the turnips with a vegetable peeler. Hold 1 turnip in your hand with a firm grip so it doesn’t slip out. Take a vegetable peeler and run it over the surface of the turnips to strip off the peel. Peel all of the turnips so the nice and tender inner flesh is exposed.[4]
- Discard the peels or keep the collected peels to boil and make a vegetable stock with them!
Alternative: If you don’t have a vegetable peeler, you can use a small knife like a paring knife to peel the turnips. But be careful and make sure the blade doesn’t slip so you don’t cut yourself.
-
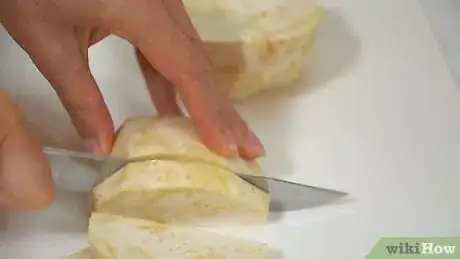
4Dice the turnips into 1⁄2 inch (1.3 cm) cubes with a knife. Place the freshly peeled turnips onto a cutting board or cutting surface. Take a kitchen knife or a sharp paring knife and cut them up into cubes about 1⁄2 inch (1.3 cm) in size so they blanch evenly.[5]
-
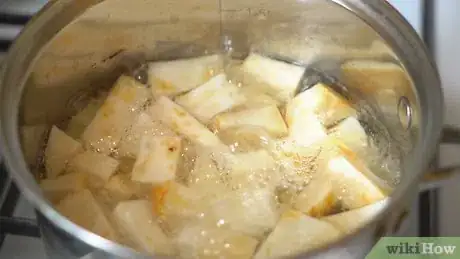
5Add the cubes to boiling water for 2 minutes to blanch them. Fill a pot with water and bring it to a rolling boil on the stove. Once the water is boiling, carefully add the turnips into the pot and set a timer for 2 minutes.[6]
- Blanching is critical to stop enzymes from causing the turnips to lose their flavor, color, and texture, making them perfect for freezing. It’s not meant to cook them.[7]
- The turnips will be sterilized as well, which makes them keep longer in storage.
Storing the Turnips
-
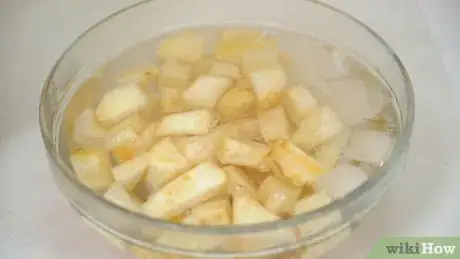
1Transfer the turnips to a bowl of ice water to cool them. Fill a bowl with clean water and add some ice cubes to it to help bring down the temperature. Use a strainer or a spoon to scoop out the blanched turnips and add them into the bowl to stop them from cooking any further.[8]
- You could also drain the hot water from the pot and then dump the turnips into the bowl of ice water.
-
2Drain the water once the turnips are cool to the touch. Wait about 2-3 minutes and then reach into the water to touch the turnips. If they’re cool to the touch and don’t feel warm at all, then they’re done cooking and good to go. Drain the water out of the bowl into a sink.[9]
- You could use a strainer or simply cover the bowl and pour out the water.
- If the turnips are still warm, just wait another minute or so. It’s really important that they’re fully cooled and don’t cook any further before you store them so they keep their texture, flavor, and color.
-
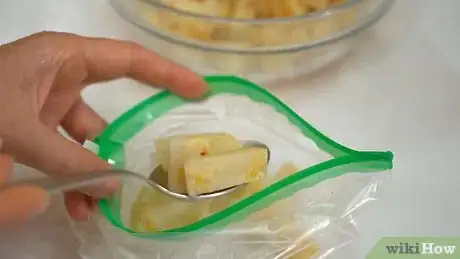
3Place the turnips into freezer bags, leaving 1⁄2 inch (1.3 cm) of headspace. Use a plastic freezer bag that’s designed to store food. Add the turnips into the bag, but leave a small amount of space at the top of the bag to allow you to press out air and allow the turnips to freeze evenly and consistently.[10]
Tip: If you can’t fit all of the turnips into 1 bag, no worries! Just use multiple bags and divide them evenly. There’s no harm in having bags that aren’t all of the way filled.
-
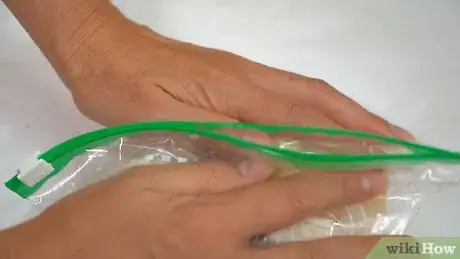
4Remove the air from the bag and seal it. Seal the bag almost all of the way, leaving a small gap at 1 end. Use your hands to squeeze the bag and press out as much air as you can. Then, seal the end of the bag so it’s fully closed.[11]
-
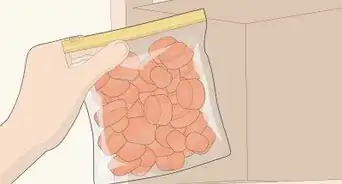
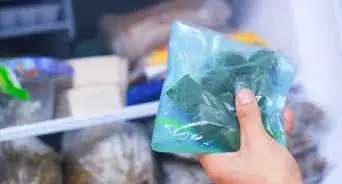
5Date the bag and store the turnips in your freezer for up to 10 months. Take a marker and write the date on the outside of the bag so you’ll remember exactly when you stored the turnips. Place the bag in your freezer and they’re good to go for at least 10 months. Always check the date before you use them.[12]
- The turnips may actually keep even longer. Inspect them and make sure they don’t look or smell rotten before you use them.
Expert Q&A
-
QuestionHow do you defrost a turnip quickly?
 JoAnna MinneciJoAnna Minneci is a Professional Chef based in the Nashville, Tennessee area. With more than 18 years of experience, Chef JoAnna specializes in teaching others how to cook through private cooking lessons, team-building events, and wellness and nutrition classes. She has also appeared in numerous television shows on networks such as Bravo and Food Network. Chef JoAnna received Culinary Arts training from the Art Institute of California at Los Angeles. She is also certified in sanitation, nutrition, kitchen management, and cost control.
Professional Chef If you want to thaw it quickly, you can put it in the sink under cool running water — the motion of the water is going to help it be warmer than the frozen food. This isn't the most efficient way, though, since you'll be throwing away a lot of water.
 -
QuestionCan I freeze halved turnips?
 Community AnswerYes, you can. Just make sure they have been fully defrosted before cooking them.
 -
QuestionCan I freeze raw half turnip and what is the process?
 Serena JohnCommunity AnswerYes, you can. Put in a freezer bag and keep for no longer than 3 months before use.
Warnings
- Eating contaminated or expired food can make you ill. Always check the turnips before you eat them to make sure they aren’t rotten or have mold on them.⧼thumbs_response⧽
Things You’ll Need
- Small to medium-sized turnips
- Vegetable peeler
- Knife
- Pot (for boiling water)
- Bowl of ice water
- Freezer bags
References
- ↑ https://nchfp.uga.edu/how/freeze/turnip.html
- ↑ https://www.bonappetit.com/columns/in-season-now/article/turnips-in-season-december
- ↑ https://www.lsuagcenter.com/~/media/system/b/e/2/b/be2b35ba97437181c16201c2a965c8d3/pub2112leafygreens4.pdf
- ↑ https://www.cookinglight.com/food/in-season/white-turnips
- ↑ https://www.lsuagcenter.com/~/media/system/b/e/2/b/be2b35ba97437181c16201c2a965c8d3/pub2112leafygreens4.pdf
- ↑ https://www.lsuagcenter.com/~/media/system/b/e/2/b/be2b35ba97437181c16201c2a965c8d3/pub2112leafygreens4.pdf
- ↑ https://nchfp.uga.edu/how/freeze/blanching.html
- ↑ https://www.lsuagcenter.com/~/media/system/b/e/2/b/be2b35ba97437181c16201c2a965c8d3/pub2112leafygreens4.pdf
- ↑ https://nchfp.uga.edu/how/freeze/turnip.html

