This article was co-authored by wikiHow Staff. Our trained team of editors and researchers validate articles for accuracy and comprehensiveness. wikiHow's Content Management Team carefully monitors the work from our editorial staff to ensure that each article is backed by trusted research and meets our high quality standards.
There are 12 references cited in this article, which can be found at the bottom of the page.
This article has been viewed 37,255 times.
Learn more...
What’s cooler than model planes suspended in the air like they’re really flying? Nothing! Whether you’re trying to recreate an intense aerial battle, or you just want to display them, it’s really not too difficult to hang your model planes from your ceiling. If you’re looking to hang the planes like they’re floating in the air, fishing line works great. For a more stable, durable option, wire coat hangers are a cheap and easy way to hang them. You also have a few other hanging options to choose from as well. All you need are a few basic supplies and a ceiling stud and you’ll be set up in almost no time at all.
Steps
Fishing Line
-
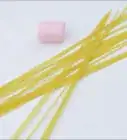
1Choose 8–10 lb (3.6–4.5 kg) test fishing line. Go with a heavy-test fishing line to hang your model plane without any visible lines, making it look like it’s suspended in the air. Use a heavy-test line so it’s strong enough to support the weight of your plane.
- Fishing line that’s rated to hold at least 8–10 pounds (3.6–4.5 kg) should do the trick.
- Braided fishing line will be more visible and isn’t necessary to support the weight of your plane.
-
2Find a stud in your ceiling to hang your plane from. Use a stud finder and move it over the surface of your ceiling until it identifies a stud. You could also slide a magnet over the surface until it sticks to a nail in a stud, or try knocking against the ceiling with your knuckle to listen for the solid sound of a stud behind it. Mark the location of the stud where you want to hang your plane so you can screw your hook into it.[1]
- It’s super important that you hang your plane form a stud because your ceiling may not be able to support its weight.
Advertisement -
3Insert a screw hook into a stud in your ceiling. A screw hook is basically exactly what it sounds like: it’s a small hook with a screw at the end! Place the pointed end of the screw hook against the ceiling and start twisting it clockwise to drive it into your ceiling. Continue twisting until all of the threads are driven into the ceiling and stud.[2]
- You can find screw hooks at your local hardware or home improvement store. You can also order them online.
- If you’re having trouble driving the screw hook into the stud, try clamping a pair of pliers over it and using them to rotate it.
-
4Make a large loop with the line and secure it with a square knot. Take a length of fishing line and form it into a large loop. Take the right-hand end of the line, wrap it under the left-hand end, and then bring the right-hand line back over the left-hand. Then, take the original right-hand line, pull it under the other line, and pull on both ends to tighten the knot.[3]
- You’ll end up with 1 large loop of line.
- Depending on the size of your plane and how far you want it to hang from your ceiling, you may want to use a length of fishing line between 20–52 inches (51–132 cm).
-
5Slip the line over the plane and hang it on the hook. Loop the fishing line around the front ⅓ section of your plane. Slip the other end of the loop over the rear section so it’s supported. Then, place the center of the fishing line on the hook in your ceiling so your plane is suspended.[4]
-
6Adjust the plane and the line until it’s balanced and stable. Use your hands to slide the fishing line and move the plane around. Find the plane’s center of gravity and move it around until it rests evenly on the fishing line and doesn’t lean forward or tilt to the side.[5]
- You can also angle the plane or have it hang as though it’s turning in flight if you want!


Coat Hanger
-
1Use wire coat hangers for a cheap and durable option. If you’re looking for a simple, cheap, and durable option, go with a classic wire coat hanger. Grab 1 out of your closet or pick them up from a local thrift store to convert into a simple plane hanger.[6]
- It’s gotta be a wire hanger. A plastic hanger will just snap when you try to bend it to hold a plane.
-
2Bend the ends of the hanger to form a horseshoe shape. Grab both of the ends of the hanger with your hands. Carefully bend both ends down and in towards each other to form a horseshoe or wishbone shape.[7]
- You should be left with 2 drooping ends of the hanger.
- Make adjustments so both drooping ends match each other uniformly.
-
3Make hooks out of the drooping ends of the hanger. Take 1 of the drooping ends of the wire hanger and bend the end of it upward to make a small hook. Then, bend the other end of the hanger into a hook to match it.[8]
- You can use something like a rolling pin to help you curl the ends up into hooks if it helps.
- Try to make the hooks match each other as best as you can so they hold your plan evenly.
-
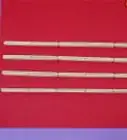
4Cut a 3–4 in (7.6–10.2 cm) section of a pool noodle in half. Take a standard pool noodle and use a knife to cut off a small section. Then, cut the small section in half so you’re left with 2 U-shaped pieces.[9]
-
5Place the cut pool noodle in the curved hooks on the hanger. Take 1 of your U-shaped pieces of pool noodle and rest it in the crook of 1 of the hooks of the hanger. Then, place the other piece in the other hook to act as padding.[10]
- You can add a drop or 2 of hot glue to the noodles or use a strip of tape to hold the foam in place.
-
6Insert a screw hook into a stud in your ceiling. Find a stud in your ceiling where you want to hang your plane. Place a screw hook against the ceiling and rotate it clockwise to drive it into the stud.
-
7Attach the plane to the hanger and hang it from the hook. Hang your plane by its wings on the padded hooks of the hanger. Make sure it’s hanging evenly and securely. Then, hand the upper hook of the hanger onto the screw hook in your ceiling.


Other Options
-
1Choose an all-in-one hanging kit for a convenient option. If you’re looking for the easiest and most effective way to hang your model planes from your ceiling, look for an all-in-one kit from your local hobby supply shop or order one online. Use the ceiling hook, loop cord, and zipper hook in the kit and follow the instruction to hang your plane safely and securely.
- A hanging system kit will have everything you need to hang your planes.
-
2Use a drop ceiling hook and a loop cord as an alternative to a kit. If you don’t want to purchase a full hanging system kit, you can gather the individual parts to use to hang your plane. Install a drop ceiling hook into a stud in your ceiling and attach a loop cord to your airplane. Hang the other end of the loop cord on the hook to hang your plane.
- Look for a stable part of your plane, such as the rear wheel or the center fuselage as an anchor point to attach your loop cord.
- You can find drop ceiling hooks and loop cords at your local hardware store.
-
3Screw an eye hook into a stud and use string for a cheaper option. If you’re looking for a simple, affordable hanging option, pick up an eye hook from your local hardware or home improvement store and screw it into a stud in your ceiling. Tie some string around your model plane and attach the other end to the hook to hang it up.[11]
-
4Use a thumbtack and string for small model planes. If you’re trying to hang small, lightweight planes, such as toys or small models, tie some string around the plane. Take a thumbtack and push it through the other end of the string. Then, stick the thumbtack into your ceiling to suspend the plane in the air.[12]
- You should only use this option for really lightweight planes that won’t pull the thumbtack from your ceiling.


Warnings
- Make sure you hang your plane from a stud! The hook could fall out of your ceiling and your plane could land on somebody’s head.⧼thumbs_response⧽
Things You’ll Need
Fishing Line
- Fishing line
- Screw hook
Coat Hangers
- Wire coat hanger
- Pool noodle
- Knife
- Superglue or tape (optional)

References
- ↑ https://youtu.be/4D31eRQqIkE?t=266
- ↑ https://youtu.be/4D31eRQqIkE?t=292
- ↑ https://youtu.be/4D31eRQqIkE?t=330
- ↑ https://youtu.be/4D31eRQqIkE?t=540
- ↑ https://youtu.be/4D31eRQqIkE?t=582
- ↑ https://youtu.be/6E7t3TalyxA?t=16
- ↑ https://youtu.be/AS2guveuah0?t=55
- ↑ https://youtu.be/AS2guveuah0?t=74
- ↑ https://youtu.be/AS2guveuah0?t=127
About This Article