This article was co-authored by wikiHow Staff. Our trained team of editors and researchers validate articles for accuracy and comprehensiveness. wikiHow's Content Management Team carefully monitors the work from our editorial staff to ensure that each article is backed by trusted research and meets our high quality standards.
The wikiHow Video Team also followed the article's instructions and verified that they work.
This article has been viewed 89,551 times.
Learn more...
A fake rock can look just as good as the real deal! Whether you want artificial rocks for landscaping, stage productions, or as decor pieces, this is a fun and easy project. Use either a cardboard box or polystyrene foam to make the frame of your rock. Then cover the frame with paper mache to give it a rock-like texture. Let the paper mache dry, give it a few coats of spray paint, and then your fake rock is ready to use!
Steps
Making the Frame and the Paper Mache
-
1Get a cardboard box around the same size you want the rock to be. A cardboard box provides a good frame for you to create your fake rock! Choose a box that is roughly the right-sized square or rectangle that you want the rock to be. If the cardboard box is open, keep the lid closed by using masking tape to stick it down.[1]
- You will be able to change the size of the cardboard box slightly during the project by making indentations and adding paper mache.
- Alternatively, you can use polystyrene foam instead of a cardboard box. Simply cut the polystyrene foam to size using a craft knife and use masking tape to hold any pieces together if you need.[2]
-
2Make indentations in the corners and sides of the cardboard box. For your cardboard box to look like a rock, it needs to look a bit less box-like! Carefully push, step on, or punch the corners of the box to make them more rounded. You can also make small indentations in the sides of the box to give it a more rock-like shape.[3]
- Don’t worry about keeping the box flat or making it look smooth. Remember that real rocks look imperfect!
Advertisement -
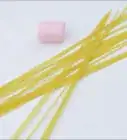
3Tear 1.5 in × 10 in (3.8 cm × 25.4 cm) strips of newspaper. Find old newspapers or magazines that you don’t need anymore and start tearing these into long strips. To make the process go faster, stack several sheets of newspaper and tear multiple strips at once. You can also use scissors to cut the strips instead if you prefer.[4]
- The strips only need to be roughly 1.5 in × 10 in (3.8 cm × 25.4 cm), as this is an easy size to work with. They don’t need to be perfect.
- The amount of newspaper that you need depends on the size of your cardboard box. Start with 40 sheets of newspaper if you are unsure, as you can always make more strips if you need to.
-
4Make the paper mache paste using a 1:1 ratio of water to white glue. Making paper mache is simple and easy! Get a large bowl and pour in the water. Then measure out the same amount of white glue and add it to the bowl. Use a spoon to mix the water and the glue thoroughly until it’s smooth to make a paste.[5]
- PVA glue is ideal for paper mache.


Applying the Paper Mache
-
1Dip the strips of newspaper in the paper mache paste. It’s time to start giving the cardboard box a rock-like texture. Take a strip of newspaper and submerge the whole strip in the paper mache paste. Then gently run your fingers down the strip to remove any excess paste.[6]
- Removing the excess paper mache paste is important, as otherwise, the newspaper may become too heavy and break down.
-
2Cover the cardboard box with 2 layers of paper mache strips. Once you have a strip of newspaper that is covered with paper mache paste, stick it anywhere on the cardboard box. Make sure that the whole strip is stuck down well. Then repeat the process of dipping strips of newspaper into the paper mache paste and sticking them onto the box until the entire box is covered. Once you have finished the first layer, add a second layer of paper mache over the first.[7]
- This creates a solid paper mache base.
-
3Let the paper mache dry for 24 hours. It’s important to give the paper mache plenty of time to dry so that it holds well before you add more layers. Keep the cardboard box in a well-ventilated area so that it dries faster. When you think that the paper mache is dry, gently press on several parts of it to make sure that it feels solid and doesn’t sink when you touch it.[8]
-
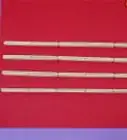
4Form 2 in (5.1 cm) thick wads from strips of newspaper. Take multiple strips of newspaper and crumple them up into long, thick, cylinder shapes. Try to crumple the strips of newspaper together very tightly so that the shape holds. These will help to make the rock look bumpy.[9]
- The number of newspaper wads that you need depends on the size of the frame.
-
5Cover the entire cardboard box in the wads of newspaper. Take each wad of newspaper and submerge it fully into the paper mache paste. Gently remove any excess paste and then stick the wads over the existing paper mache on the cardboard box. Cover the entire cardboard box with 1 layer of newspaper wads to give it texture.[10]
-
6Add 2 final layers of newspaper strips. Adding a few extra layers of paper mache will help to hold the wads of newspaper in place. Take strips of newspaper, dip them into the paper mache paste, and place them over the wads of newspaper. Try to cover all of the wads so that the rock has a smooth, textured finish.[11]
- Use additional paper mache layers to hold the wads of newspaper in place if you are worried that they won’t hold.
Painting the Fake Rock
-
1Give the paper mache 24 hours to dry completely. Now that you have finished the paper mache part of the project, the paper mache needs plenty of time to dry so that it sets well. Keep the fake rock in a well-ventilated area and check it every so often to see how the paper mache is drying.[12]
- Using a fan can help the paper mache to dry faster, especially if the weather is cool.
-
2Spray-paint the rock with a black or brown base. It’s now time to make the paper mache look more like a rock! Get different colors of spray paint so that your fake rock looks more realistic. Work in a well-ventilated area and aim the spray paint can at the fake rock. Hold down the trigger to add 1-2 base coats of a dark color such as black or brown to the rock.[13]
- The manufacturer's directions on the spray paint label will specify the recommended distance to hold the can from the fake rock.
- Make sure that all of the paper mache is covered with the base color.
-
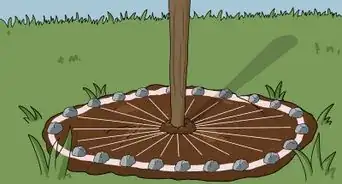
3Add small, lighter colored patches to give the rock depth. Using a few different shades will really bring your rock to life! Use a white, grey, or green spray paint to highlight specific areas of the rock such as indentations or sharp bumps. You can even use multiple colors to make the rock look more realistic.[14]
- Dark green is a good choice if you want the rock to look like it has moss or plant matter growing on it.

Things You’ll Need
- Cardboard box or polystyrene foam
- Masking tape
- Craft knife
- Newspaper
- Scissors
- Bowl
- White glue
- Spoon
- Fan
- Spray paint

References
- ↑ https://sciencing.com/make-rocks-out-cardboard-boxes-7704041.html
- ↑ http://www.stormthecastle.com/how-to-make-a/how-to-make-a-fake-boulder.htm
- ↑ https://sciencing.com/make-rocks-out-cardboard-boxes-7704041.html
- ↑ https://sciencing.com/make-rocks-out-cardboard-boxes-7704041.html
- ↑ https://sciencing.com/make-rocks-out-cardboard-boxes-7704041.html
- ↑ https://sciencing.com/make-rocks-out-cardboard-boxes-7704041.html
- ↑ https://sciencing.com/make-rocks-out-cardboard-boxes-7704041.html
- ↑ https://sciencing.com/make-rocks-out-cardboard-boxes-7704041.html
- ↑ https://sciencing.com/make-rocks-out-cardboard-boxes-7704041.html
- ↑ http://www.stormthecastle.com/how-to-make-a/how-to-make-a-fake-boulder.htm
- ↑ https://sciencing.com/make-rocks-out-cardboard-boxes-7704041.html
- ↑ https://sciencing.com/make-rocks-out-cardboard-boxes-7704041.html
- ↑ https://ourpastimes.com/make-artificial-rock-formations-7519792.html
- ↑ https://ourpastimes.com/make-artificial-rock-formations-7519792.html
About This Article

If you want to make a fake rock, first get a cardboard box that’s around the same size you want your rock to be and push the corners so they become more rounded. Next, cut 1.5 by 10 inch-long strips from old newspapers. Then, make paper mache paste by mixing water with white glue in a bowl using a 1:1 ratio. One at a time, dip the newspaper strips in the paste and then stick them on your cardboard box. When you’ve covered your box with 2 layers of strips, let it dry for 24 hours. Once it’s dry, crumble some newspaper strips to make wads and paste these to the box to give your rock texture. After you’ve covered the box with 1 layer of newspaper wads, paste on 2 final layers of newspaper strips. Let the box dry for another 24 hours and then finish the look by spray-painting it all black or brown. For more tips, including how to add depth to your fake rock with paint, scroll down!