This article was co-authored by wikiHow staff writer, Hannah Madden. Hannah Madden is a writer, editor, and artist currently living in Portland, Oregon. In 2018, she graduated from Portland State University with a B.S. in Environmental Studies. Hannah enjoys writing articles about conservation, sustainability, and eco-friendly products. When she isn’t writing, you can find Hannah working on hand embroidery projects and listening to music.
There are 15 references cited in this article, which can be found at the bottom of the page.
This article has been viewed 10,882 times.
Learn more...
Redi Shades are easy-to-install shades that block the sun from your home almost instantly. They stick onto the top of your windowsill without any hardware, so you can hang them up in just a few minutes. Make sure you read the instructions on your Redi Shade before you start installing them so you know how to measure your window and make the proper cuts.
Steps
Putting up Original Redi Shades
-
1Clean your windowsill with soap and water. Grab a cloth and dampen it with warm water, then add 1 drop of dish soap to it. Wipe down your windowsill to remove any dust or dirty, then wipe off the soap residue with a clean, damp cloth. Let your windowsill dry before you install your shades.[1]
- Redi Shades will adhere much easier to a clean surface.
-
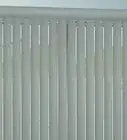
2Measure the width of your window. Most Redi Shades are designed to fit inside of your windowsill. Press a tape measure from one edge of your window to the other on the inside of the windowsill and then write down that measurement so you know how big your shades need to be.[2]
- Try to make your measurement as accurate as you can so your shades fit flush with your window.
Advertisement -
3Mark the width of your window on the shades with a pencil. Keep your Redi Shades folded up in a single line, and press your tape measure on top of them. Mark the width of your window lightly on the top of your shades with a pencil.[3]
- Make this mark exact so your shades fit perfectly.
-
4Cut your shades with a utility knife at the mark you made. Hold your shades down with one hand and carefully press a knife or box cutter on top of your measurement. Saw your knife back and forth to cut straight down through all of your shades.[4]
- The Redi Shades are easy to cut through, so you shouldn’t have to work too hard at it.
- You can throw away the excess that you cut off, since you don’t need that part anymore.
-
5Peel off the adhesive liner from your shades. Grab the end of the plastic adhesive and pull it straight up and off. The top of your shades will be sticky now, so try not to press them onto any surfaces.[5]
- The adhesive liner will always be at the top of your shades, so you can orient them on your window based on that.
-
6Stick the shades to the underside of your windowsill. Hold your Redi Shades so that the sticky side faces upwards and press them to the top of your windowsill. Slide your hands across the length of your shades to really stick them on and make sure they’re secure.[6]
Tip: If you have a large window, you can put 2 or 3 sets of Redi Shades side by side to cover the whole thing.
-
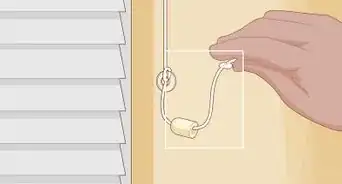
7Lower your shades to cover your window. Slowly lower your hands so that your shades fall down. If you want to put the shades up, fold them upwards and use the clips that came with them to hold them.[7]


Installing Artisan Select Redi Shades
-
1Wipe down your windowsill with soap and water. Dampen a clean cloth with warm water and add 1 drop of dish soap. Quickly wipe down your entire windowsill, then clean it off again with a damp cloth. Let your windowsill dry for about 10 minutes before you install your shades.[8]
- Arisan Redi Shades stick to the inside of your windowsill, and they will adhere much better to a clean surface.
-
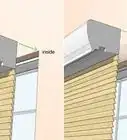
2Face the tab side of the adhesives toward the glass of your window. Hold your Artisan shades up toward your window and make sure that the tabs on each end are facing in toward the window. If they aren’t, turn your shades around to the other side.[9]
Tip: Artisan shades have to be measured before they are shipped out. If you bought Artisan shades, you probably already submitted the width of your window online.
-
3Peel the adhesive liner off each end of the shades. The Artisan shades have a small square of adhesive on the right and left side of them. Take the adhesive liner off them so that the sticky side is exposed.[10]
- Try not to push your shades on any surfaces, or the adhesive could get dusty and not work as well.
-
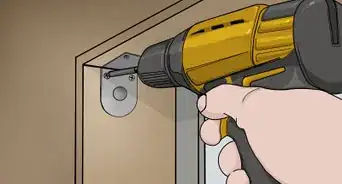
4Push the left side of the shades onto your windowsill. Align your shades so they are pressed to the very top of your windowsill, then press the left side of the shades onto the left side of your window. Press as hard as you can to stick the adhesive to your windowsill.[11]
- This is called the “fixed end” because it doesn’t have the trigger on it.
-
5Slide the right side up to the top of the windowsill. Once the left side of the shades are in place, move the right side of the shades up until the entire length sits flush with the top of your windowsill. Adjust your shades now if you need to, since it will be more difficult later on.[12]
-
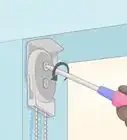
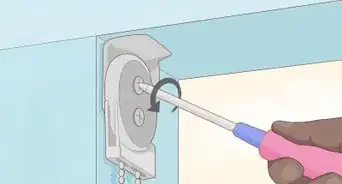
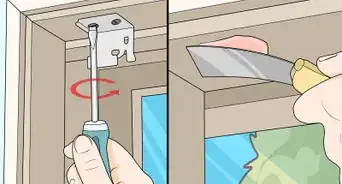
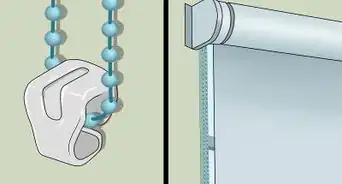
6Press the trigger on the right side of the shades to lock them into place. With one hand, feel for the trigger, or the small plastic button, on the right side of the shades. Press down on the button until you hear a click to know that your shades are locked into place.[13]
- The trigger pushes the adhesive on that side outward to lock your shades in place.
-
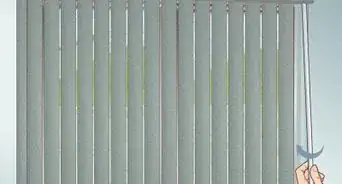
7Lower your shades to cover your window. Slowly move your hands downwards and let your shades fall over your window. If you want to raise them, use the clips that came with your shades to hold them up.[14]


Hanging Arch Redi Shades
-
1Clean your windowsill with soap and water. Get a clean cloth wet with warm water and add 1 drop of dish soap. Wipe down the bottom of your windowsill, then use a clean, damp cloth to get rid of any soap residue. Let your windowsill dry for about 10 minutes until you install your shades.[15]
-
2Measure the height and width of your window inside the window casing. Arch windows are shaped like half of a circle. Use a tape measure to find out how tall and wide your arch window is, then write those measurements down.[16]
Warning: If you have a super narrow or pointed arch, these Arch Redi Shades probably won’t work for you.
-
3Trim your shades so they are the width of your window. Lay your Arch Shades flat on a table or countertop and look at the ruler sticker on top. Mark the width of your window on the ruler sticker, then use a utility knife or a box cutter to saw through your shades at that measurement.[17]
- You can throw away the excess shades, since you won’t need them.
-
4Stick the plastic arch holder in the middle of your window. Find the plastic half-circle piece that came with your shades and position it at the bottom of your window casing. Make sure it is in the exact center of your arch window so that your shades sit evenly.[18]
- The arch holder will keep your shades in place so they don’t sag down onto the bottom of your arch.
-
5Peel the adhesive liner off both sides of the shades. Make sure both ends are removed fully so that your shades stick to your window. Your shades will be sticky now, so try not to attach them to any surfaces that aren’t your arch window.[19]
-
6Press your shades onto one half of the bottom of your arch. Stick the bottom of your shades onto the left side of the arch holder. Press down firmly so that the shades are stuck to both the window and the holder.[20]
- You shouldn’t need to adjust your shades too much since you cut them to fit the width of your window.
-
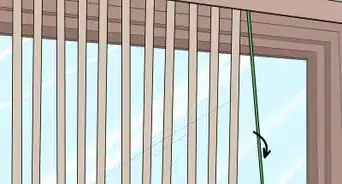
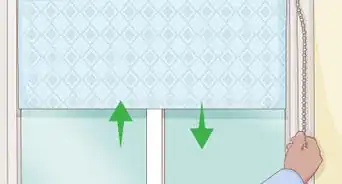
7Unfold the shades so they fan across your entire window. Lift up the shades from the side that is stuck to your window already and move them across your window to the other side. Press down on the right side of your shades to stick them onto the bottom of your windowsill.[21]
- You may need to hold down the left side of your shades as you fan them outward.


Warnings
- Always use caution when using a knife or box cutter.⧼thumbs_response⧽
Things You’ll Need
Hanging Original Redi Shades
- Cloth
- Soap
- Measuring tape
- Utility knife or box cutter
Installing Artisan Select Redi Shades
- Cloth
- Soap
Hanging Arch Redi Shades
- Cloth
- Soap
- Measuring tape
- Utility knife or box cutter


References
- ↑ https://redishade.com/no-tools-installation/#ORIGINALSHADES
- ↑ https://www.youtube.com/watch?v=PW256s_2R5I&feature=youtu.be&t=31
- ↑ https://www.youtube.com/watch?v=PW256s_2R5I&feature=youtu.be&t=69
- ↑ https://redishade.com/no-tools-installation/#ORIGINALSHADES
- ↑ https://redishade.com/no-tools-installation/#ORIGINALSHADES
- ↑ https://redishade.com/no-tools-installation/#ORIGINALSHADES
- ↑ https://www.youtube.com/watch?v=PW256s_2R5I&feature=youtu.be&t=90
- ↑ https://redishade.com/no-tools-installation/#ARTISANSELECT
- ↑ https://www.youtube.com/watch?v=pFykOKGJVN8&feature=youtu.be&t=4
- ↑ https://redishade.com/no-tools-installation/#ARTISANSELECT
- ↑ https://www.youtube.com/watch?v=pFykOKGJVN8&feature=youtu.be&t=9
- ↑ https://redishade.com/no-tools-installation/#ARTISANSELECT
- ↑ https://www.youtube.com/watch?v=pFykOKGJVN8&feature=youtu.be&t=13
- ↑ https://www.youtube.com/watch?v=pFykOKGJVN8&feature=youtu.be&t=19
- ↑ https://redishade.com/no-tools-installation/#ORIGINALARCHSHADES
- ↑ https://www.youtube.com/watch?v=YhC-oUXJI0E&feature=youtu.be&t=36
- ↑ https://redishade.com/no-tools-installation/#ORIGINALARCHSHADES
- ↑ https://www.youtube.com/watch?v=YhC-oUXJI0E&feature=youtu.be&t=80
- ↑ https://www.youtube.com/watch?v=YhC-oUXJI0E&feature=youtu.be&t=79
- ↑ https://www.youtube.com/watch?v=YhC-oUXJI0E&feature=youtu.be&t=84
- ↑ https://www.youtube.com/watch?v=YhC-oUXJI0E&feature=youtu.be&t=96
About This Article