This article was co-authored by Ed Beery. Ed Beery is an Automotive Specialist and the Owner of InTechgrity Automotive Excellence based in Denver, Colorado. With more than eight years of experience, he specializes in providing maintenance and repair services for both individuals and companies. Ed and the InTechgrity Automotive Excellence Team are approved by the American Automobile Association (AAA) for repairs and are Automotive Service Excellence (ASE) certified.
There are 9 references cited in this article, which can be found at the bottom of the page.
wikiHow marks an article as reader-approved once it receives enough positive feedback. This article received 17 testimonials and 100% of readers who voted found it helpful, earning it our reader-approved status.
This article has been viewed 475,456 times.
You can often tell if there’s an issue with your suspension just by the way it feels as you drive, but it can be difficult to assess any issues without jacking up the vehicle and visually inspecting the components of the suspension yourself. There are a number of different types of suspensions you may find in your vehicle, but some things to look for are fairly universal.
Steps
Identifying Signs of Suspension Issues
-
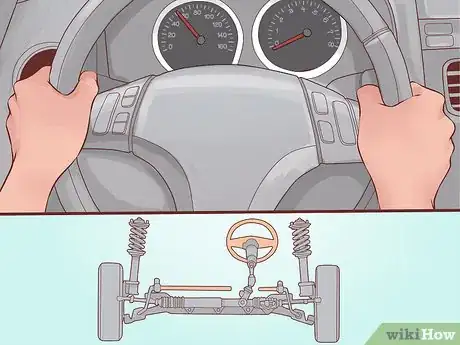
1Pay attention if your ride begins to feel rougher. Over time, components of your suspension can wear out. While visually inspecting components can often let you know if they’ve become compromised, the easiest way to determine if you are having a suspension issue is by paying attention to how the ride in your vehicle feels. If it has become progressively rougher, it is likely because the suspension is no longer absorbing the bumps the way it is supposed to.[1]
-
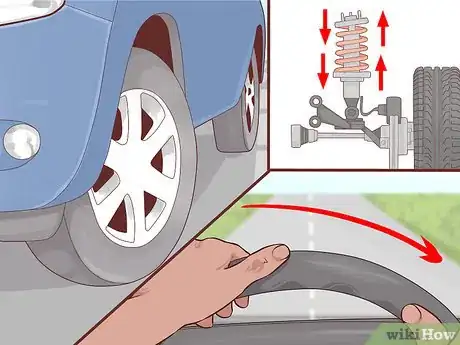
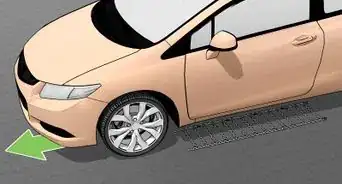
2Take note if your vehicle pulls or squeaks during turns. If you begin to feel as though the vehicle is working against you as you turn, it is likely the result of a failing suspension component. Different parts of your suspension can affect the steering response, angle of the tires, and the center of balance of the vehicle. Each of these elements can make your vehicle cumbersome or difficult to turn. A bad tie rod end will make steering response sluggish. If you hear an audible creek while turning the wheel, it may be the result of a bad lower ball joint. Conversely, if you hear knocking as the weight transfers in the vehicle during a turn, it may be caused by a bad sway bar end link.[4]
- Pay attention to how the vehicle reacts as you turn and compare it to your previous experiences in the vehicle to assess if there is an issue. [5]
- Listen carefully to see if components of your suspension are squeaking under pressure.
- Every vehicle behaves a little differently while turning, so previous experiences with the vehicle can make assessing issues much easier.
Advertisement -
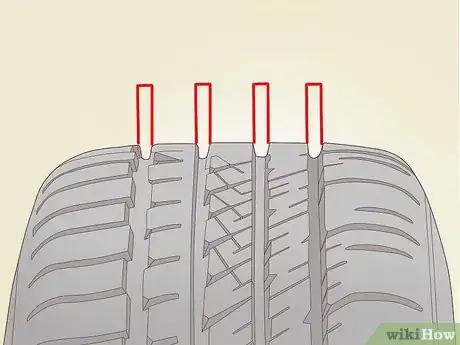
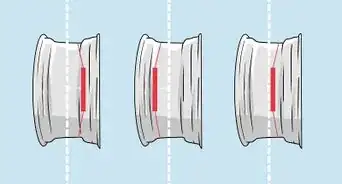
3Inspect the tread wear on your tires. Your tires should wear fairly evenly across the width of the tread. If you rotate your tires regularly, they should be worn close to evenly throughout. If you happen to notice the inside or outside of the tire is wearing at a faster rate than the rest, it could be an issue with the camber of your wheels and tires.[6] Camber is the term used to describe the angle the wheel sits in relation to the vehicle and road.[7]
- A vehicle with negative camber will wear the inside of the tires more quickly.
- A vehicle with positive camber will wear the outsides of the tires more quickly.
- Camber is determined by your suspension components and wheel alignment.
-
4Try braking abruptly to see if the nose dives as you stop. If you are having issues with your front struts or shocks, your suspension may struggle to keep the vehicle level under hard braking. Stop quickly in a safe area and pay attention to the front of your car. If the nose of the vehicle dives or drops as you slow down, it may be as result of bad shocks or struts. If you can hear an audible clunk from the front of the vehicle as you brake, there is either an issue with your control arm or sub frame bushing.[8]
- Your suspension should be able to support the weight of your vehicle and keep it fairly level during most situations.
- The front corner of your vehicle may also drop as you turn in the same direction. This is caused by the same failure.
-
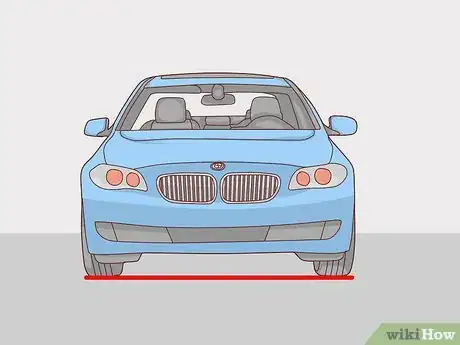
5Look to see if the vehicle sits level. With the vehicle parked, walk around it and visually assess how level it seems to be sitting.[9] If one side of the car rests higher than the other, there are likely worn out or broken suspension components to blame.[10]
- It is not uncommon for the front of the vehicle to ride slightly lower than the rear in many vehicles such as pickup trucks, but the vehicle should otherwise be level.
-
6Pay attention to swaying and bouncing at low speeds. Your vehicle should have no difficulty withstanding bumps in the road at low speeds. If you go over a bump and feel your vehicle sway back and forth or bounce after passing the bump, your suspension is struggling to support the weight of the vehicle.[11]
- Your vehicle should be able to go over a bump and quickly regain composure at low speeds.
- If your vehicle sways back and forth after going over a bump, there is likely an issue with your suspension.
Going Over Your Front Suspension
-
1Visually inspect your strut mounts or shock towers. Open the hood of your vehicle and look to either side. The struts or shock towers will extend through the fender above each wheel and be secured with one or a series of bolts or nuts. Look the fasteners over and ensure they are not covered in rust, and are not loose or otherwise compromised.[12]
- If your strut mounts or shock towers are not properly secured, they cannot function properly.
- Rust can compromise the nuts and bolts holding parts in place as well as the parts themselves.
-
2Measure the ride height on your front wheels. Use a ruler or tape measure to determine the length of empty space between the top of the tire and the bottom of the fender well on the driver’s side of your vehicle. Repeat the process on the passenger side and assess if there is a difference. While a slight variation is okay (a half inch or less) the two should be fairly equal.[13]
- If they are not even, the side that is lower is probably where the issue lies.
- If they are even, there still may be an issue with the suspension that affects both sides equally.
-
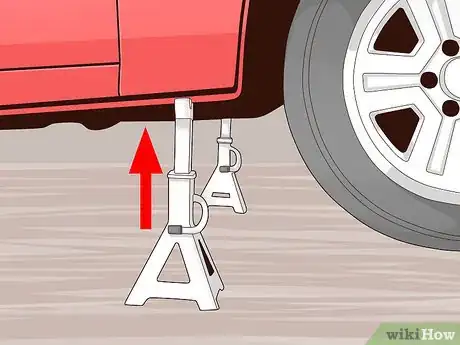
3Jack up the vehicle. You will need to get under the vehicle to visually inspect the condition of your suspension system. Place a trolley or scissor jack beneath the vehicle at one of its designated jack points for the front end. If you are unsure of where to locate your vehicle’s jack points, refer to your vehicle’s owner’s manual for clarification. Jack up the car until it’s high enough to work beneath, then place jack stands beneath the car to support its weight before beginning your visual inspection.[14]
- Never work beneath a vehicle that is supported by a jack without jack stands.
-
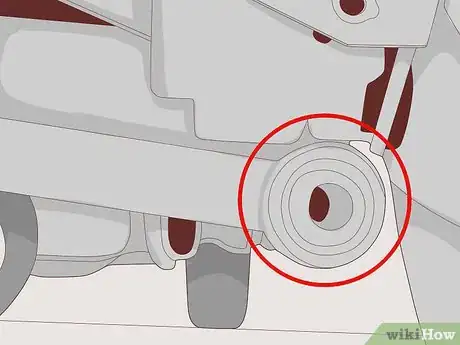
4Visually inspect grease boots and rubber bushings for signs of damage. Once you are beneath your vehicle, start at one wheel and look around at the rubber bushings separating metal components of your suspension from one another. They are usually black, though they may fade into grey over time. There may be as many as forty individual bushings between components of your suspension, though they are often round with a hole in the middle (like a doughnut). Any time you find a piece of rubber in your suspension, it is considered a bushing. If you notice cracks or tears in any bushings, they will need to be replaced.[15]
- Once a rubber bushing begins to wear out, it will allow more movement between suspension components than should be permitted, resulting in altered suspension dynamics and likely making your ride rougher.
- Torn or missing bushings can seriously compromise your vehicle’s ability to withstand bumps or even steer.
- Common bushing failures in your suspension may include sway bar end links (at each end of the sway bar), trail arm bushings at the axle pivot point on the vehicle, or the bushings in the upper or lower control arms.
-
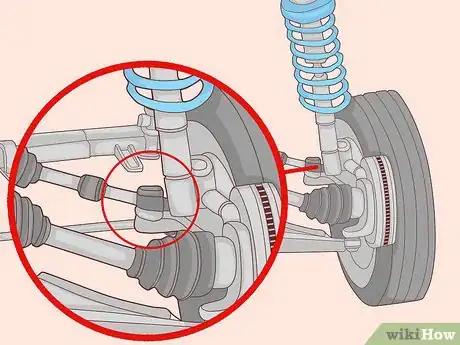
5Check for excess play in the tie rod ends. Locate the power steering box and follow its arms toward the wheels. If you are unsure where the power steering box is located in your vehicle, refer to the service manual specific to the year, make and model of your car or truck. Tie rod ends serve as the connection points between the steering box and the wheels, so if the bushings become compromised it could result in dead spots in your steering and reduced handling ability.[16]
- If you have noticed a “dead spot” in your steering wheel, it is likely the result of having too much play caused by a bad tie rod end.
- A completely failed tie rod end can be extremely dangerous, as it can prevent you from being able to control the vehicle. Replace tie rod ends before they become so worn out they fail completely.
Inspecting Your Rear Suspension
-
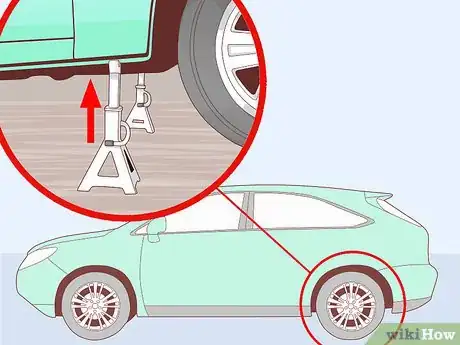
1Jack up the rear of the car. Locate the rear jack points for your vehicle and place a jack beneath it. If the front of your vehicle is resting on jack stands, you may leave it in the air, but if you only have two jack stands you should lower the front end of the vehicle and use those stands to support the rear of it while you work.[17]
- While the vehicle’s front wheels don’t have to be on the ground to inspect the rear suspension, you must place jack stands beneath the rear in order to climb under the vehicle.
- If the front tires are on the ground, place a wheel chock in front of them to ensure the vehicle can’t shift forward while you jack it up or once it is on the jack stands.
-
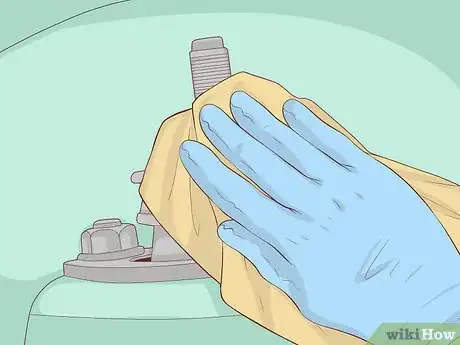
2Wipe each joint clean and inspect the bushings for damage. The rear suspension has far fewer components than the front, but they need to be inspected for the same signs of damage. It is likely that a lot of mud and debris has gotten trapped by the rear suspension, so you may need to wipe the bushings off with some water and a rag to be able to properly inspect them.[18]
- There is no need to wipe the joints and bushings down if you can easily see them.
- Look for the same signs of cracking or tearing in the rubber bushings.
-
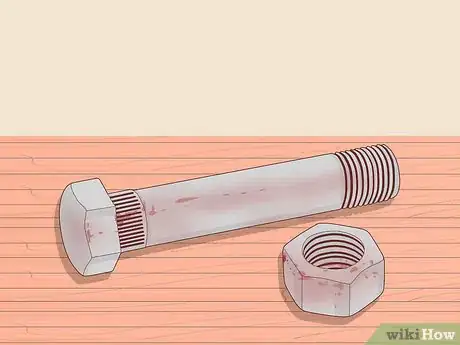
3Inspect bolts and nuts for rust and tightness. Check the nuts and bolts used to secure components of the suspension to one another and the vehicle for signs of excessive rust and to make sure they are tight. Use a screw driver to poke at the fastening hardware that appears rusty. If bits of the rusted nut or bolt comes off as you poke at it, the hardware will need to be replaced.[19]
- If you notice any of the nuts or bolts have become loose over time, use an appropriate hand or socket wrench to tighten them again.
- If portions of the frame or the suspension components themselves are too rusted, you will need to take the vehicle to a mechanic to have it repaired.
-
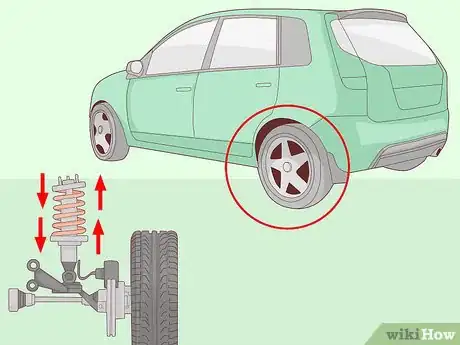
4Inspect one wheel at a time with an independent rear suspension. If your vehicle came equipped with an independent rear suspension, you will need to jack up each side of the vehicle to inspect the suspension on that side. Although you may not need to with some vehicles, you should anticipate needing to remove the wheel and tire in order to access and inspect the suspension components.[20]
- Inspect an independent rear suspension by looking for signs of damage on the bushings or excess rust on the fastening hardware or suspension components.
- Suspension components are designed to support the weight of the vehicle under load, so you should not be able to move any by hand. If you can move a component by hand, it is either too loose or the bushing has gone bad.
Conducting a Bounce Test
-
1Park your vehicle on firm, even ground. In order to conduct a bounce test you need to remove any variables that could affect how the vehicle recovers from being bounced. Soft or uneven ground can affect how the vehicle sits, giving you a less reliable outcome.[21]
- Blacktop or concrete are the preferred surfaces to conduct this test on.
- An uneven surface will shift the weight of the vehicle, causing the suspension to respond differently than it would otherwise.
-
2Push down firmly on the front of the vehicle. The bounce test requires that you compress the suspension of the vehicle and assess how it recovers. In order to do so, place both of your palms on a stable part of the front of the vehicle (the hood will suffice) and press down with all of your weight. Take your hands away and watch the vehicle as it rises again.[22]
- Press on the hood near the very front of the car to prevent putting a dent in it.
- If you are unable to put enough pressure on the vehicle to compress the suspension, ask a friend to help.
-
3Count how many bounces the suspension needs to recover. After releasing the vehicle, it should bounce back up and right itself in a single bounce. If it bounces a few more times as it settles, the shock absorbers in the front of your vehicle are likely bad.[23]
- Even if you push down on the hood several times before releasing it, it should still right itself with only one bounce.
-
4Repeat the test on the rear of the vehicle. Once you have assessed the front suspension, move to the rear of the vehicle and repeat the process by pressing down on the trunk lid. Like the front, the rear suspension should be able to right itself after a single bounce.[24]
- If the vehicle bounces a few times before settling again, take it to a professional to have the shock absorbers looked at.
- Do not press down on spoilers or fins, as they are often made of fiberglass and will break under pressure.
Expert Q&A
-
QuestionHow do you know if your suspension is damaged?
 Ed BeeryEd Beery is an Automotive Specialist and the Owner of InTechgrity Automotive Excellence based in Denver, Colorado. With more than eight years of experience, he specializes in providing maintenance and repair services for both individuals and companies. Ed and the InTechgrity Automotive Excellence Team are approved by the American Automobile Association (AAA) for repairs and are Automotive Service Excellence (ASE) certified.
Automotive Specialist Signs of suspension problems include: clunking sounds when hitting holes or speed bumps; the vehicle bouncing after hitting bumps or hole; the vehicle pulling to one side; the vehicle sitting unevenly to the ground, uneven tire wear; the vehicle leaning out when turning; hard or loose steering; and/or a rough ride overall.
 -
QuestionHow do I check a ball joint on a pick up truck?
 Community AnswerJack up that wheel, grab the tire at 12 and 6 and wiggle it. If it's excessive, it is probably ball joint. If it will wiggle at 3 and 9, it is probably a faulty tie rod. And if it will move excessively all the way around, it is probably a wheel hub or bearing.
 -
QuestionIf my car's clutch peddle has become difficult to press. Should I replace it?
 Community AnswerYour vehicle may use a clutch cable and the cable has cut a groove on the inside that may cause binding. Your pedal linkage may need to be greased,
Warnings
- Suspension parts are generally very dirty, and they can be extremely hot. Always allow the vehicle to cool down for at least 4 hours before attempting an inspection.⧼thumbs_response⧽
- Any suspected tire or suspension problem should be looked at right away. It could render the vehicle uncontrollable.⧼thumbs_response⧽
References
- ↑ https://www.knowyourparts.com/technical-resources/ride-control/diagnosing-and-replacing-chassis-ride-control-parts/
- ↑ Ed Beery. Automotive Specialist. Expert Interview. 19 November 2021.
- ↑ Ed Beery. Automotive Specialist. Expert Interview. 19 November 2021.
- ↑ https://www.testingautos.com/car_care/when-replace-sway-bar-links.html
- ↑ Ed Beery. Automotive Specialist. Expert Interview. 19 November 2021.
- ↑ Ed Beery. Automotive Specialist. Expert Interview. 19 November 2021.
- ↑ http://www.autorepairmountainviewca.com/blog/suspension-repairs.php
- ↑ http://www.autorepairmountainviewca.com/blog/suspension-repairs.php
- ↑ Ed Beery. Automotive Specialist. Expert Interview. 19 November 2021.
- ↑ http://www.carid.com/articles/how-to-inspect-your-suspension-system.html
- ↑ http://www.carid.com/articles/how-to-inspect-your-suspension-system.html
- ↑ https://www.automd.com/155/how-to-check-for-loose-or-worn-suspension-components/
- ↑ https://www.automd.com/155/how-to-check-for-loose-or-worn-suspension-components/
- ↑ https://www.automd.com/155/how-to-check-for-loose-or-worn-suspension-components/
- ↑ https://www.automd.com/155/how-to-check-for-loose-or-worn-suspension-components/
- ↑ https://www.automd.com/155/how-to-check-for-loose-or-worn-suspension-components/
- ↑ http://www.howacarworks.com/suspension/checking-suspension-joints-and-pivots
- ↑ http://www.howacarworks.com/suspension/checking-suspension-joints-and-pivots
- ↑ http://www.howacarworks.com/suspension/checking-suspension-joints-and-pivots
- ↑ http://www.howacarworks.com/suspension/checking-suspension-joints-and-pivots
- ↑ http://knowhow.napaonline.com/testing-your-shocks-how-much-bounce-is-too-much/
- ↑ http://www.sdt.com.au/safedrive-directory-CARSUSPENSION.htm
- ↑ http://www.sdt.com.au/safedrive-directory-CARSUSPENSION.htm
- ↑ http://www.sdt.com.au/safedrive-directory-CARSUSPENSION.htm
About This Article
If you are having trouble with your suspension and you need to inspect your suspension system, open the hood of your vehicle and inspect the struts or shock towers, which extend through the fender above each wheel on either side. Ensure the nuts and bolts are not rusted or loose. Next, jack up the vehicle and visually inspect the grease boots, rubber bushings, and tie rods for signs of damage or uneven wear. To learn how to inspect an independent rear suspension, keep reading!
