X
wikiHow is a “wiki,” similar to Wikipedia, which means that many of our articles are co-written by multiple authors. To create this article, 9 people, some anonymous, worked to edit and improve it over time.
This article has been viewed 63,892 times.
Learn more...
Cement board has become a popular, durable, insect- and weather-resistant building material for both interior and exterior uses. This article will offer some instructions for installing finished cement board in soffit and exterior ceiling applications.
Steps
-
1Choose the product you wish to install. Soffit and ceiling cement board products are available from a number of manufacturers and have a variety of surface finishes. You can research these at building product retailers, lumber and building supply stores, and larger home improvement warehouses. Here are some things to consider:
- Dimension. Sheets can be in various sizes, from 12 inch (30cm) widths to 48 inch (121cm), and in lengths up to twelve feet (3.6 meters). Thicknesses are available from 1/4 inch to 1/2 inch (6.5mm to 1.3cm).
- Surface. The surface of these products are available in rough-sawn lumber finish, faux stucco, and smooth.
- Perforated or non-perforated. For ventilated soffit applications, the cement board product is available in perforated sheets, for non-ventilated, solid sheets are available.
-
2Determine the framing requirements for the material you choose. Cement board requires support at a maximum of two foot (60cm) spacing, and additional blocking may be required at sheet edges to insure the surfaces are flush after installation. The best results are achieved when blocking is installed at all edge and end joints. Because of the weight of this material, joists or other framing members must be capable of supporting the total weight after installation.Advertisement
-
3Choose appropriate fasteners. For ceiling and soffit installation, exterior grade, paintable screws with countersink heads are required by some manufacturers. These should be able to penetrate the framing member a minimum of four times the thickness of the panel being installed. If you choose to use nails, hot dipped galvanized or stainless steel siding nails are recommended.
-
4Gather your supplies, including the fasteners, caulking, ladders or scaffolding, screw-guns, drills, cement board, and hand tools. Install all framing members and roofing components to assure the assembly will not be exposed to weather until the installation is complete.
-
5Place the cement board sheets on a flat surface with sufficient supports to keep them from bowing, and keep them dry before installation.
-
6Measure the width and length of a space you will install a sheet of cement board on. Allow enough space so that positioning the board can be accomplished without damaging the edges, but make sure any exposed joints will have an acceptable appearance. Trim or batten strips may be used if joints are not tight enough to offer an acceptable appearance.
-
7Cut the board to the required width and length. There are several methods used for cutting cement board:
- Circular saws. Special saw blades are available for cutting cement board, but carbide toothed circular saw blades will give satisfactory cuts if the amount of cutting is not excessive. Avoid breathing the dust produced by sawing, either by using a fan or wearing a NIOSH approved respirator.
- Pneumatic or electric sheers can be used for thin boards, but are expensive and usually only practical for a professional installer.
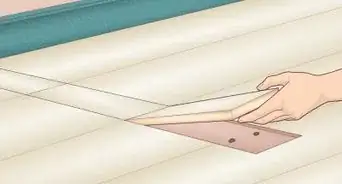
- Scoring and snapping. Using a straightedge and scoring the board with a sharp utility knife, then bending it (similar to cutting gypsum wallboard products) is a technique that can be used––it produces very little dust, but is less precise and doesn't give a smooth, flat cut.
-
8Mark the location of any electrical devices or other items which will penetrate the sheet and cut holes for them. Be very careful if large holes occur, or if holes are very close to the edge of the board, as this can cause breakage if carelessly handled in installation.
-
9Pre-drill holes for fasteners if desired. Screws can be driven through the board without pilot holes, however, if a certain spacing is required, laying out the screw locations and drilling pilot holes will make meeting this requirement simpler, and will make starting the screws easier.
-
10Lift the sheet into place. Sheets must be supported carefully, or they will break, and because of the weight of the material, at least two people should be engaged in this step. If the installers are working from a ladder or scaffold, a ground person may use a piece of lumber to help hold the panel up while the installers position the piece and tack it in place.
-
11Drive all fasteners into the panel, making sure to sink them flush with the surface or slightly below it, but be aware it is possible to drive screws too deep, causing them to fail.
-
12Fit each subsequent sheet or panel into place until the area your are working in is complete. Install trim and caulk joints as needed, clean up surfaces where blemishes or spoiling from screw penetrations has occurred.
-
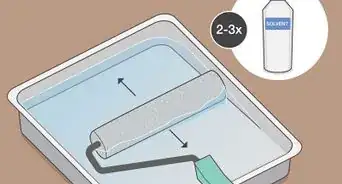
13Prime and paint the soffit or ceiling according to manufacturer's recommendations.


Advertisement
Warnings
- Avoid breathing dust produced when sawing or drilling cement products.⧼thumbs_response⧽
- Securely fasten all panels before removing supports or allowing the panel to hang freely.⧼thumbs_response⧽
- Be aware of drift causing dust to leave your work area and the possible contamination of other areas.⧼thumbs_response⧽
Advertisement
Things You'll Need
- Materials including cement board panels, fasteners, and caulk.
- Hand tools including pencil, hammer, tape measure, framing square
- Power tools, including screw guns, electric drills, saws, or shears
- Ladders or scaffolding, if required


About This Article
Advertisement