X
wikiHow is a “wiki,” similar to Wikipedia, which means that many of our articles are co-written by multiple authors. To create this article, volunteer authors worked to edit and improve it over time.
This article has been viewed 36,679 times.
Learn more...
Brita water filtration uses carbon to filter impurities out of your tap water. You can choose several models, including a pitcher, a faucet attachment or a sink dispenser model. You should choose your model according to whether you want to simply filter drinking water or if you want to filter all the water that goes through your sink.
Steps
Method 1
Method 1 of 3:
Installing a Pitcher Filter
-
1Read the instructions on the Brita water filter cartridge packaging. The installation method has changed within the last few years. If you have older models, you will need to presoak your filter in for 15 minutes in a glass of water.
- For all recently purchased filters, follow the remaining instructions.
-
2Remove the old filter and discard it. Wash your Brita pitcher with soap and water if you haven’t done so in the last few weeks.[1]Advertisement
-
3Wash your hands with soap and water. Unwrap your Brita pitcher filter.
-
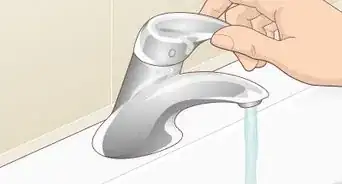
4Turn on the tap. Let cold water run over your filter for 15 seconds.[2]
-
5Insert the new filter. Run water over the top of the carafe and filter. Repeat every 40 gallons (151.4 L) or two months.[3]


Advertisement
Method 2
Method 2 of 3:
Installing a Faucet Filter
-
1Purchase a Brita faucet filtration system. Your filtration system should come with two adaptors to fit most kitchen sinks. It is an exterior filter that can be easily removed and replaced when the filter is no longer effective.
-
2Unscrew the cover on the tap. The Brita filter will need to screw onto the exterior threads on the tap. If your sink tap has interior threads, screw on one of the adaptors before you install the system.
-
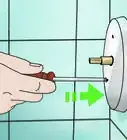
3Unwrap the base unit. Align the collar with the faucet threads. Turn the attachment carefully to connect the filter system to the faucet.[4]
-
4Ensure the faucet is secure by turning it tightly with your hands. Test for leaks by turning on the cold water.
-
5Keep the cold water on. Flush the system for five minutes. It will activate the filter and remove carbon dust.[5]
-
6Use for 100 gallons (378.5 L) before replacing. The green light will indicate the filter is still good. The red light indicates you should change the system.[6]


Advertisement
Method 3
Method 3 of 3:
Installing a Three-Way Tap Filter
-
1Unpack your three-way filter tap and dispenser. This is the longest installation process, because you are actually replacing your sink tap with a Brita brand tap and hoses.
-
2Remove the timer and testing strip. Run your tap water and insert the testing strip Consult the instructions to see under what filtration setting you should set the filter according to your results.[7]
-
3Mount the filter timer to the inside of your sink cabinet, where it will not get wet.
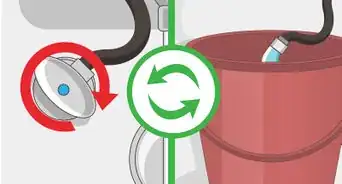
-
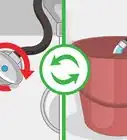
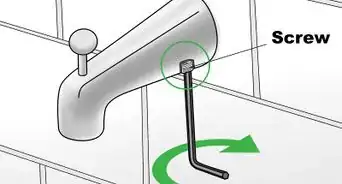
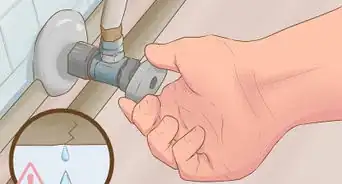
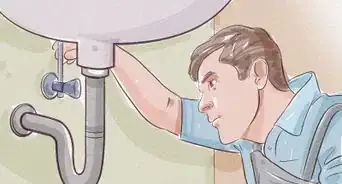
4Turn off your water taps. Place a bucket underneath the pipes. Unscrew the pipes with a wrench so that you can remove your current kitchen sink faucet.
-
5Remove all the pieces for the Brita tap and lay it nearby. Keep the directions close at hand in case you need to identify parts.
-
6Slip the shank over the three hoses. The shank is a collar-like metal piece.
-
7Attach the hoses to the inside of the tap. Screw the blue hoses into the hole marked “C.” Screw the red hose into the hole marked “H.”
- Screw the last hose into the hole marked “B.” Make sure they are secure.
-
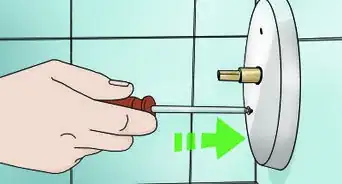
8Pull the shank toward the tap. Screw it into the bottom of the tap.
-
9Place your base on the hole in the kitchen counter, where your old tap was installed.
-
10Mount the tap to the base. Pull the hoses and shank through the hole.
-
11Set your counter plate, gasket, locking ring and hexagon nut parts underneath the sink so that you can install them easily. Loop them through the hoses in that order.
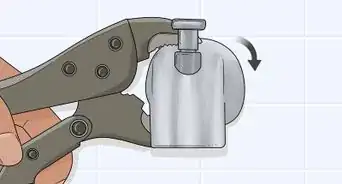
-
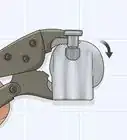
12Screw the hexagonal nut into place on the shank. Adjust the dispenser at the top, so that it is positioned correctly. Fix the dispenser in place at the bottom using a wrench.
-
13Connect your hoses. The red hose will connect with the hot water supply. Next, insert the gasket into the T-piece, which you will place over the cold water intake.
-
14Screw the T-piece onto the top of the cold water supply. Insert the gaskets into the remaining hoses. Connect each side to the Brita filter device.[8]
-
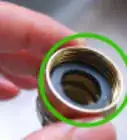
15Insert the filter cartridge into the blue Brita filter device. The system is ready. Install the wall mount to hold your filter device in place so that it can be unscrewed and replaced when it is no longer effective.
-
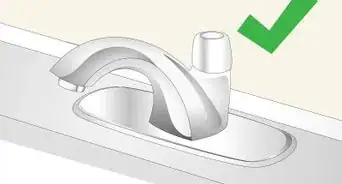
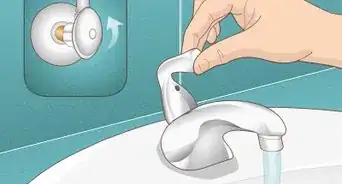
16Turn on the cold water tap. Run the faucet. Check for leaks.
-
17Pay attention to your filter timer so that you know when it’s time to change. Unlock the current filter, release the pressure handle and pull the filter out. Replace it with a new filter and secure the locking handle.
- Reset your timer. Recycle your Brita cartridge.[9]


Advertisement
Community Q&A
-
QuestionWhen I turn my sink on, water comes out from the filtered neck as well. How can I fix this?
 Community AnswerThere is a well known defect with a certain model that Brita has been repairing, which sounds like the issue you're having. Call Brita and see if they can send out a repairman to fix the internal plastic pipe that has broken.
Advertisement
Things You'll Need
- Brita water pitcher
- Brita filter
- Water tap
- Brita faucet filtration system
- Adaptor
- Brita 3-Way tap dispenser kit
- Wrench
- Screwdriver
- Brita 3-Way tap cartridges
- Bucket


References
- ↑ https://www.youtube.com/watch?v=ERtk2rdHkOo
- ↑ https://www.youtube.com/watch?v=ERtk2rdHkOo
- ↑ https://www.brita.com/using-your-brita/faqs/
- ↑ https://www.michigan.gov/documents/flintwater/BRITA_Filter_Fact_Sheet_FINAL_2516_514031_7.pdf
- ↑ https://www.michigan.gov/documents/flintwater/BRITA_Filter_Fact_Sheet_FINAL_2516_514031_7.pdf
- ↑ https://www.brita.com/using-your-brita/using-your-brita/
- ↑ https://www.waterfiltershop.co.uk/downloads/Brita_Torlan_Installation_Manual.pdf
- ↑ https://www.waterfiltershop.co.uk/downloads/Brita_Torlan_Installation_Manual.pdf
- ↑ http://www.youtube.com/watch?v=Zujxk7hSuxY
About This Article
Advertisement