This article was co-authored by Dave Jones. Dave Jones is a Professional Plumber and the Midwest Regional Vice President at Roto-Rooter Plumbing & Water Cleanup. In 1992, Jones joined Roto-Rooter as a drain service technician at the age of 18. Since then, he has risen through the ranks into positions of increasing authority. Dave served as general manager of Roto-Rooter’s Charlotte, North Carolina, and Atlanta, Georgia branches before being promoted to Contractor Area Manager and later to Regional Vice President. Dave holds Master Plumber Licenses in Pennsylvania, North Carolina, and Georgia.
This article has been viewed 105,998 times.
A faulty tub faucet can make it impossible to take a bath and can become a real inconvenience. Luckily, removing and replacing your old tub spout is a cheap and easy project that doesn’t require much equipment. A slip-on faucet will have a screw on the underside of it and needs to be unscrewed before you can remove it. Screw-on faucets, on the other hand, can simply be unscrewed from the wall. Once you remove your old faucet, installing a new one is easy. As long as you take the correct steps, you can remove and replace your tub faucet in no time!
Steps
Removing a Slip-On Faucet
-
1Look on the underside of the faucet to locate the screw. Slip-on spouts will have a set screw under the spout, near the tub wall. The set screw secures the spout onto the water supply pipe. Feel and look at the faucet for a screw hole on the underside of it. If there is no screw under your faucet, you probably have a screw-on faucet.[1]
- The screw is usually recessed.
- Use a flashlight to help you locate the screw.
- Close the drain so that small parts cannot fall into it.
- Spread a rag or towel across the bottom of the tub to protect its surface from falling tools or parts.
-
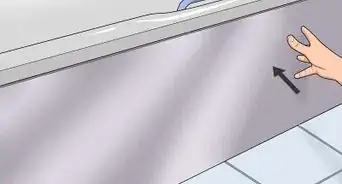
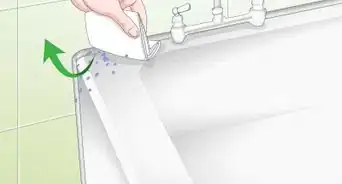
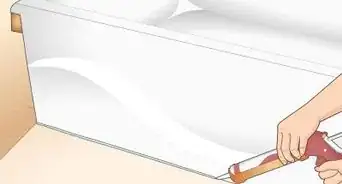
2Scrape the caulk off the wall with a putty knife, if applicable. Many times there will be caulk between your faucet and wall that’s meant to seal cracks. Carefully peel away at the edges of the caulk with a putty knife. Continue scraping the caulk away until your remove it all.[2]
- Use a razor blade as an alternative to a putty knife.
- If there is no caulk on your faucet, you can skip this step.
Advertisement -
3Use an Allen wrench to remove the screw. An Allen wrench or hex key will fit the set screw under your faucet. Insert the wrench into the screw and turn it counterclockwise to loosen it. Remove the screw and set it aside.
-
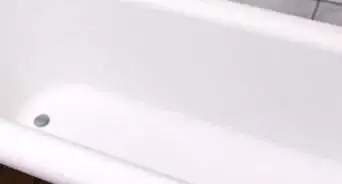
4Pull the faucet away from the wall. Grab the faucet with both hands and pull it from the wall. If the faucet feels stuck, rotate it a little bit to loosen it. Do not bend the faucet side to side or you may damage the pipe inside of it. After you remove the faucet, you should see the water supply pipe, which is usually made of copper.[3]


Detaching a Screw-On Faucet
-
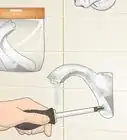
1Remove the caulk from around the faucet, if applicable. Carefully scrape around the faucet and the wall with a putty knife or a razor blade and lift up as much caulk as you can. Continue to scrape away at the caulk, removing small portions, until there is no more caulk on the wall and faucet.[4]
- If your faucet doesn’t have caulk connecting it to the bathroom wall, you can skip this step.
-
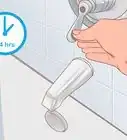
2Turn the spout counterclockwise. Grab the faucet with both hands and turn it counterclockwise. Unscrewing the faucet counterclockwise will loosen and remove it from the wall.[5]
- As their name implies, screw-on faucets are screwed onto metal threads on your water supply pipe.
-
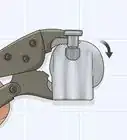
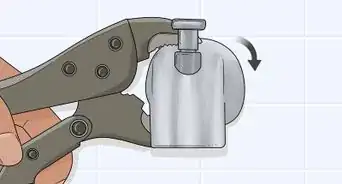
3Turn the faucet with a wrench if it’s stuck. Open the handles on an adjustable wrench and carefully place it around your faucet. Tighten the wrench around the faucet and slowly rotate the wrench in a counterclockwise motion. Rotate the faucet 2-3 full rotations. This should loosen it up enough so that you can unscrew it with your hand.[6]
-
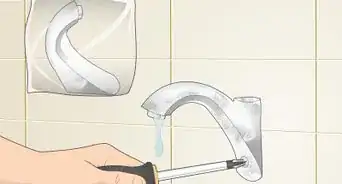
4Use a screwdriver if you don’t have a wrench. If you’re having issues turning the faucet, you can use a screwdriver as a makeshift lever. Stick the screwdriver into the hole in your faucet and push it up to turn the spout counterclockwise. Once it’s loose, unscrew it with your hands.
-
5Pull the spout from the plumbing. Once you’ve turned the faucet counterclockwise 4-5 times, you can simply slide it off of your water supply pipe. If you don’t need to remove an adapter from the pipe, you’re done.
-
6Remove the set screw in the adapter if you have one. An adapter will look like a threaded metal piece that’s fit over your water supply pipe. There’s a recessed screw on the top or bottom of the piece. Remove the screw by turning it counterclockwise with a hex key or Allen wrench.[7]
-
7Slide the adapter off of the water supply pipe. Once the set screw is removed, the adapter should slide on and off the water supply pipe easily. Take the adapter off the pipe to complete the faucet removal.


Replacing the Faucet
-
1Purchase a faucet that's the same length and style of your old one. Measure the length of your old tub faucet with a measuring tape and write it down on a piece of paper. This will help you purchase the same size and style of faucet that you had before.
-
2Wrap Teflon tape around the water pipe if you’re installing a screw-on faucet. If you are installing a screw-on faucet, there should be threads on the end of your water supply pipe. Wrap 2-3 layers of Teflon tape around these threads to make it easier to screw on the tub faucet.
- Teflon tape is especially useful if the threads on your water supply pipe are stripped.
-
3Screw a screw-on faucet onto your water supply pipe. Screw the new faucet onto the threads to attach it to the water supply pipe. Continue turning it clockwise until the faucet is tightly attached to the pipe.[8]
-
4Fit the faucet over the pipe if you’re using a slip-on faucet. Line up the hole inside of the faucet with the water supply pipe and push the open end of the faucet onto the pipe.
-
5Tighten the screw on the bottom of the slip-on faucet. Turn the screw on the bottom of the faucet clockwise with an Allen wrench. Continue turning the screw until it’s tight, but don’t overtighten it. This should secure your faucet in place.


Things You’ll Need
Slip-On Faucet
- Hex key or Allen wrench
- Putty knife or razor blade
Screw-On Faucet
- Putty knife or razor blade
- Screwdriver or adjustable wrench
- Hex key or Allen wrench (if you need to remove an adapter)
Replacing the Faucet
- Tape measure
- Pencil or pen
- Paper
- Teflon tape
- Allen wrench
- A replacement faucet


References
- ↑ https://www.familyhandyman.com/plumbing/faucet-repair/how-to-replace-a-bathtub-spout/view-all/
- ↑ https://www.plumbingsupply.com/info-tubspouts.html
- ↑ https://www.plumbingsupply.com/info-tubspouts.html
- ↑ https://www.bobvila.com/articles/how-to-replace-a-tub-spout/
- ↑ https://www.bobvila.com/articles/how-to-replace-a-tub-spout/
- ↑ https://www.youtube.com/watch?v=Mzxz-v4lafs&t=310s
- ↑ https://www.youtube.com/watch?v=B1Ny9KLSLYk&t=247s
- ↑ https://www.bobvila.com/articles/how-to-replace-a-tub-spout/
About This Article

To remove a slip-on tub faucet, look under the faucet to locate the screw. Once you find it, scrape away any caulk around the base of the faucet with a putty knife. Use an Allen wrench or hex key to remove the screw, then pull the faucet away from the wall. You might need to wiggle or twist it a little to loosen it. If it’s a screw-on faucet, remove the caulk, then rotate the whole faucet counter-clockwise to unscrew it. If it’s too tight to turn by hand, you may need to loosen it with an adjustable wrench. Once you’ve turned the faucet enough to release it from the threads, pull it away from the wall. Use a hex key to release the screw-in adapter if you have one, then pull that off as well. For tips about how to turn the faucet if it’s stuck, keep reading!