This article was co-authored by Jason Shackelford. Jason Shackelford is the Owner of Stingray Auto Repair, a family owned and operated auto repair shop with locations in Seattle and Redmond, Washington. He has over 24 years of experience in auto repair and services, and every single technician on Jason’s team has more than 10 years of experience.
This article has been viewed 307,195 times.
If you are using large accessories such as an upgraded car stereo system, they can often put a strain on your electrical system. If you feel like other accessories are struggling to get the power they need or you notice your headlights significantly dimming, then it may be time to install a capacitor. A power capacitor is an extra accessory that you can use that acts as a power storage device to supplement the electrical capabilities of your vehicle. An auto mechanic can install a capacitor, but you may find the process easy enough to handle on your own.
Steps
Choosing a Capacitor
-
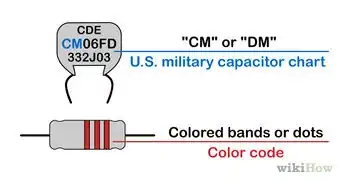
1Understand the basic idea of a capacitor. The capacitor acts as a storage tank for electrical power. The amount of power that the capacitor can store is measured in Farads and the general rule of thumb is that you will need one Farad of capacitance for every one kilowatt (or 1,000 Watts) of power demand in your system.[1]
-
2Decide whether or not you want an internal meter. Some capacitors come with built in meters that display their current charge. Keep in mind that if you go this route you will need to wire the meter into a switched power supply so that it the meter turns off with the car. Otherwise, the meter would stay on constantly and drain your system.[2]Advertisement
-
3Purchase your capacitor. Odds are, if you need a capacitor, you have dropped some money on electrical components in your car. The cost of your capacitor could range from around $30.00 to over $200.00 depending on how large and how fancy you decide to go. Remember that they all serve essentially the same function, and that for most people a one Farad capacitor without an internal meter will work just fine.


Installing a Capacitor
-
1Be sure that your capacitor has been discharged. A charged capacitor can release a large amount of energy very quickly. This can be quite dangerous. You should always handle electrical components with care. [3]
-
2Disconnect the battery ground terminal. This will kill power electrical system and allow you to work safely.
- If you already have a capacitor in your system you will need to discharge it. Capacitors store power, and thus can still shock you even after removing the power supply.
-
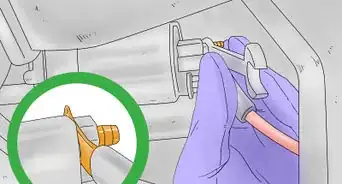
3Mount your capacitor.The capacitor can go in a number of places in your system. There is only a negligible difference in effectiveness no matter where you place it, but nearest the components that are struggling to get power (such as dimming headlights) is considered best. It is important that wherever you place it has a suitable place to mount the capacitor away from passengers.[4]
- Although you are installing the capacitor to keep up with the extra power that is being pulled from accessories such as an upgraded stereo system, you have to remember that the capacitor is like a storage tank for power that supplements the whole system. By putting it close to the parts that are not getting sufficient power you allow it to supply power to those parts with minimal loss do to the extra resistance of a long wire.
-
4Connect the capacitor’s positive terminal. Whether you are connecting to the battery, amp, or a distribution block of some kind, you need to connect the positive terminal of the capacitor to the positive terminal of the other component by running a wire between them. Eight gauge wire is usually recommended.[5]
-
5Connect the capacitor’s negative terminal. This terminal needs to be connected to ground.[6]
-
6Connect the remote turn on wire. If your capacitor has an internal meter, it will also have a third wire. This is the remote turn on wire and serves to kill power to the meter whenever the car is turned off. You will need to wire this into the remote turn on wire into any 12 volt switched power source (such as the ignition switch or amplifier).[7]
-
7Reconnect the battery ground terminal. This will restore power to your system. All of your components should now be working.


Charging a Capacitor
-
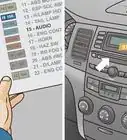
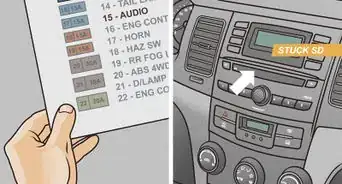
1Locate the main power fuse for your audio system. This fuse is installed with your system to prevent damage to the electrical components of your car, but will need to be removed before charging the capacitor. It should be near the battery on the main power line for your audio system.[8]
-
2Remove the main power fuse. This will provide you with a place to install the resistor that will help you charge your capacitor. The resistor allows the capacitor to charge more slowly. This prevents damage to the capacitor and the electrical system.
-
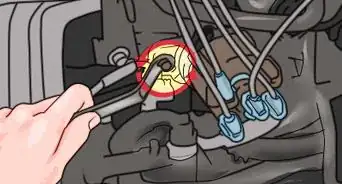
3Put the resistor in place of the main power fuse. It is usually recommended to use a resistor that is 1 Watt and 500-1,000 Ohms. A higher impedance (Ohm value) will charge the capacitor more slowly and prevent damage. Connect the positive terminal of the capacitor to the resistor.
-
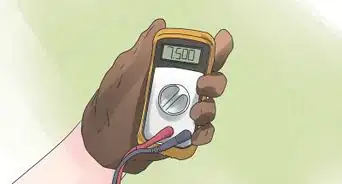
4Measure the voltage on the capacitor with a voltmeter. A multi-meter will do the job fine as well. Set it to read DC Volts and put the positive lead of the meter on the positive terminal of the capacitor and the negative lead of the meter to ground. When the meter reads 11-12 volts, the capacitor is charged.
- Another way to charge a capacitor is to wire a test light from the positive terminal of the capacitor to the power line. As long as the capacitor is charging, there will be current flowing through the light and the light will shine. Once the capacitor is charged the light will go out because current will no longer be flowing (the voltage drop between the power line and the capacitor will be zero).
-
5Remove the voltmeter. It is no longer necessary to monitor the status of the capacitor. If you used the light method, you can now remove the test light.
-
6Remove the resistor. Disconnect the positive terminal of the capacitor from the resistor and disconnect the resistor from the power wire. It is no longer needed, so you can store it away in case you ever need to charge your capacitor again.
-
7Replace the main power fuse. This will allow your audio system to receive power once again.


Community Q&A
-
QuestionWhat do I do if there is no place on a capacitor for a remote wire hookup? Should it come on when the main fuse is put into place, and what would cause the capacitor to power up, but not the amp?
 Community AnswerIf there is absolutely no place to wire a remote turn on lead for a capacitor, it has a built in turn on/off function for the cap, which will turn on when you turn on the car and power up everything. If the amp is not turning on, do you have the power wire running from the (+) terminal of the cap to the Power input of the amp?
 -
QuestionDo I need to use a resistor to charge the capacitor, or can I just use the test light?
 Community AnswerYou can use the test light, but be sure to connect the capacitor in series with the test light.
 -
QuestionIf both the amp and cap have a remote wire, do I need to split and connect it to both?
 Community AnswerYes. You will actually just run the remote turn on wire from the amp already hooked up, and then run the turn on to the cap.
Warnings
- Never install an uncharged capacitor. It is an instant power draw on the system and will blow any fuse in the system. Always charge the capacitor first.⧼thumbs_response⧽
- Discharge the capacitor before disconnecting it from the circuit. Do this by connecting the resistor across the leads of the capacitor.⧼thumbs_response⧽
- Never hold a resistor in your hands when charging/discharging a capacitor. They can get very hot, and if you have chosen too small of a resistor, they can blow up.⧼thumbs_response⧽
Things You'll Need
- Power Capacitor
- Resistor
- Voltmeter
- Eight Gauge Wire
- Hand Tools
- Wiring Tools


References
- ↑ http://www.caraudiohelp.com/car_audio_capacitors.html
- ↑ http://www.crutchfield.com/S-QwuPR0qfqNW/learn/learningcenter/car/capacitors/faq.html#6
- ↑ http://www.crutchfield.com/S-WEjsGucUkDY/learn/learningcenter/car/capacitors/faq.html
- ↑ http://www.mobileaudio.com/rac-faq/rac-faq_2.html#SEC22
- ↑ http://www.mobileaudio.com/rac-faq/rac-faq_2.html#SEC22
- ↑ http://www.caraudiohelp.com/car_audio_capacitor_installation.html
- ↑ http://www.crutchfield.com/S-QwuPR0qfqNW/learn/learningcenter/car/capacitors/faq.html#6
- ↑ http://www.popularmechanics.com/cars/how-to/a10359/installing-a-diy-car-amplifier-16639127/
About This Article

To install a capacitor, start by disconnecting your car’s battery ground terminal so that you can work safely. Next, mount the capacitor somewhere close to the element that needs more power, such as the headlights or stereo system. Once the capacitor is mounted, connect its positive terminal to the positive terminal of the battery using an 8-gauge wire. Then, connect the negative terminals and reconnect your battery's ground terminal to restore power to the entire system. For tips on how to charge a capacitor, read on!