This article was co-authored by Ryaan Tuttle. Ryaan Tuttle is a Home Improvement Specialist and the CEO of Best Handyman, Inc. in Boston, Massachusetts. With over 17 years of experience, he specializes in building home service businesses, focusing on creating scalable and efficient brands. With the help of his global team, the companies have achieved over 10+ million in sales and received recognition through magazine features, and enjoy partnerships with wikiHow and Jobber field service software. Boston Magazine and LocalBest.com have named Best Handyman Boston the Best Handyman in Boston. Ryaan holds Construction Supervisor and Home Improvement Contractor Licenses.
There are 8 references cited in this article, which can be found at the bottom of the page.
This article has been viewed 158,640 times.
Doors are more complex and deserve more care than you might think. A good door has to be leveled according to the flooring and ground slope. This is where your jamb comes into play. To install the jamb the right way, nail measured pieces of wood together to form the jamb's frame. Level it out against the door frame by placing shims behind it. Add door stops to the inside of the jamb to keep the door from swinging through it.
Steps
Cutting the Jamb Pieces
-
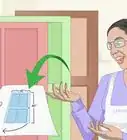
1Measure the width of the door frame. Break out the tape measure. You'll need to know how wide your door frame is so the jamb fits in it. Hold the tape measure up to the top of the door frame. Note the measurement and save it for later.[1]
- Keep in mind that if the door has 2x4 walls, then the frame will be 4-1/2" (11.4 cm). If the door has 2x6 walls, then the frame will always be 6-1/2" (16.5 cm).
-
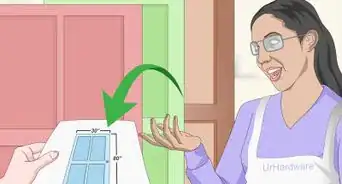
2Measure the sides of the door frame. Take your tape measure to one side of the door frame. Note the length and mark this on one piece of wood. If you have level ground, this measurement will be the same for the other side. Most likely they'll be different, so measure the other side of the frame and mark its length on another piece of wood. Don't forget to also measure the top part of the frame for the smaller piece of wood.[2]Advertisement
-
3Cut the wood. Suit up with safety gear, including gloves, safety glasses, and a visor, before turning on your circular saw. Thin the pieces of wood so they fit within the frame. Follow up by cutting their length according to the measurements you took earlier.[3]


Creating and Installing the Jamb
-
1Nail the wood together. Lay one of the longer pieces of wood on its side and add a bit of wood glue to the end. Attach the shorter piece to one end of the longer piece. Get your nail gun and hold it square on the outside of the area where the wood meets. Add the nails to secure the pieces together. Align the other piece of wood on the opposite side and attach it the same way.
-
2Hold the jamb up to the door frame. Carefully move your newly-cut wood up into the frame.[4] Since you measured, it should fit in there well. Align the left side against the wall and see if it appears level. Double-check this with a level.
-
3Level out the jamb with wood strips. After attaching the jamb to the frame, place wood strips (shims) under it.[5] Make sure that you do not lift the jamb too much. Figure out where you need to place the shims to level the hinge side from top to bottom. Get these strips from the home improvement store. Slip them between the jamb and frame as needed.[6]
- Always start with the side where the door will attach to the hinges.
- Make sure to fasten the hinge side jambs directly to the stud. You can fasten them loosely in case you need to slide a jamb behind it, but it is best to keep it tight.
-
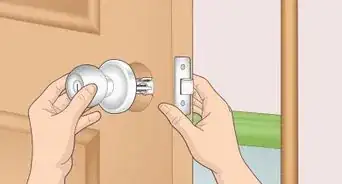
4Hold the door against the jamb to check for clearance. You can hold the jamb in place by lightly hammering in a few nails. Place the door inside the jamb. The door needs to fit comfortably inside the jamb. Look for the gap between the door and jamb to be one-eighth of an inch (.32 cm) on all sides. Add or remove shimming so the door fits. When you're sure the measurements are correct, remove the door.[7]
-
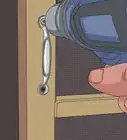
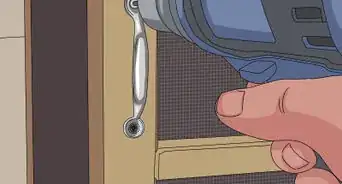
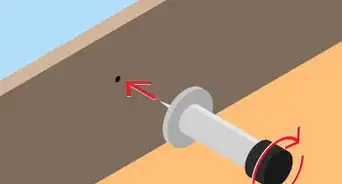
5Nail the hinge side of the jamb to the frame. Get your nail gun again. Make sure the jamb is even against the wall and frame. Begin securing it with nails from top to bottom. Be sure to put a nail through each shim to hold them in place.[8]
- Weather strips are a good way of hiding screw marks. Screws make exterior doors stronger and more adjustable. Drill a hole in the jamb before adding the screws, then attach the weather strips over them.[9]
-
6Secure the other sides of the jamb to the frame. Move onto the top side. First, hold your level up to the jamb. If it doesn't appear level, add some shims to even it out. Finish by nailing the jamb to the frame. Repeat this with the side opposite the hinges.[10]
-
7Cut the shims to size with a utility knife. The shims will have their ends sticking out of the jamb. Go ahead and take your utility knife or other woodcarving knife and score them, then use your hammer to break off the ends.[11]


Installing Door Stops
-
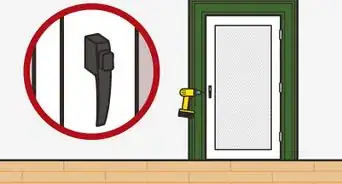
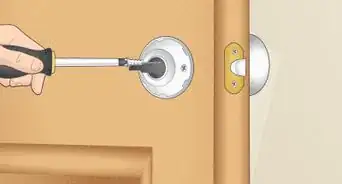
1Hang the door in the jamb. Screw the hinges onto the correct side of the jamb. Unless you are installing a prehung door, you'll need to trace the outline of the hinges on the jamb and cut an indentation using a router or utility knife. Place the door in the jamb and fasten it to the hinges. Make sure it's tight and opening in the right direction.[12]
- It's ideal to do this first so you can gauge how much space you have for the door stops and align them properly behind the hinges.
-
2Measure out the stopper width. The door stopper (also called stop molding) can be bought pre-cut or fashioned out of wood strips. You will need to measure out how wide the stopper needs to be so that the pieces on each side of the door frame fit together. The moulding goes behind the hinges and rests in the middle of the jamb. Measure it against the jamb until you're sure it's the right thickness.[13]
- The stop molding is thin. When cutting it yourself, you only need strips of wood about one or two inches (two to five cm) wide.
-
3Measure the stopper's length on the door jamb. Start with the top part. Measure all the way across the jamb so that the stopper will go all the way across the jamb. Now measure the amount of wood needed from top to bottom of both the left and right sides of the jamb.[14]
-
4Cut your stopper wood down to size. Use a saw to trim the wood to the required length. You'll have a shorter piece for the top of the door and two longer pieces for the sides.[15]
-
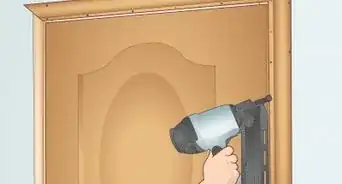
5Nail the stopper to the door frame. Get your nail gun one more time. Start with the top side. Keep the stopper pieces even and centered in the jamb. Nail the shorter piece to the frame. Nail the other pieces to the sides. When you're done, the closed door should rest inside the jamb.[16]


Things You'll Need
- Wood or jamb kit
- Nail gun
- Wood shims
- Circular saw
- Utility knife
- Level


References
- ↑ https://www.bunnings.com.au/diy-advice/home-improvement/doors-windows/how-to-install-a-door-jamb
- ↑ http://www.younghouselove.com/2014/09/thats-my-jamb/
- ↑ https://www.bunnings.com.au/diy-advice/home-improvement/doors-windows/how-to-install-a-door-jamb
- ↑ Ryaan Tuttle. Home Improvement Specialist. Expert Interview. 13 January 2021.
- ↑ Ryaan Tuttle. Home Improvement Specialist. Expert Interview. 13 January 2021.
- ↑ http://www.younghouselove.com/2014/09/thats-my-jamb/
- ↑ http://articles.chicagotribune.com/2001-08-24/business/0108240014_1_jamb-hinge-door
- ↑ https://www.bunnings.com.au/diy-advice/home-improvement/doors-windows/how-to-install-a-door-jamb
- ↑ https://www.familyhandyman.com/doors/tips-for-hanging-doors/view-all
- ↑ https://www.handymanhowto.com/how-to-install-door-jambs-and-casing-for-a-bi-fold-door/
- ↑ https://www.rona.ca/en/projects/Install-an-interior-door
- ↑ http://www.younghouselove.com/2014/09/thats-my-jamb/
- ↑ https://www.bunnings.com.au/diy-advice/home-improvement/doors-windows/how-to-install-a-door-jamb
- ↑ https://www.bunnings.com.au/diy-advice/home-improvement/doors-windows/how-to-install-a-door-jamb
- ↑ http://www.home-repair-central.com/adjusting-the-door-stop.html
- ↑ http://www.younghouselove.com/2014/09/thats-my-jamb/
About This Article

To install a door jamb, start by measuring the door frame and cutting the wood to size. Next, add glue to the end of 1 of your longer pieces of wood and attach a shorter piece to it. Then, use a nail gun to secure the 2 pieces together before attaching the other side of the jamb in the same way. Once you've completed the jamb, lift it up into the door frame to make sure it fits. If there are any gaps, slide shims, which are thin pieces of wood, between the jamb and the frame. Finally, nail the jamb in place and cut the shims to size with a utility knife. To learn how to install door stops, read on!