This article was co-authored by wikiHow Staff. Our trained team of editors and researchers validate articles for accuracy and comprehensiveness. wikiHow's Content Management Team carefully monitors the work from our editorial staff to ensure that each article is backed by trusted research and meets our high quality standards.
This article has been viewed 311,146 times.
Learn more...
Aftermarket air intakes can improve a car's performance and sound. If installed properly, they can even pay for themselves with the boost in gas mileage. You can even do additional work to upgrade the throttle body after installing a new air intake system to see even more impressive results. Though each air intake comes with its own set of manufacturer’s instructions, there is a basic method to installing most systems.
Steps
Preparing to Change Air Intake Systems
-
1Determine the exact specifications of your car. If you own a commonly customized car, such as a Honda Civic or a Volkswagen Jetta, you will likely need only your model, year, and engine type. If your car is less commonly modified, it may be harder to find aftermarket parts.
-
2Research the types of intakes available and choose the one that fits your needs best.
- Short-pipe intakes are the simplest design to install, but offer the least benefits in terms of horsepower, torque, and gas mileage. They pull hot air directly from within the engine compartment into the engine.
- Cold air intakes pull cool air from places outside the engine compartment such as around the wheel well or bumper. These are a bit more complicated to install since you may have to install part of the intake from underneath the car. The cooler air is denser than the air inside the engine compartment so it gives a better boost to performance and gas mileage than short-pipe designs.
- Ram-air intakes usually pull cool air from the bumper area. Because they are designed to be at the front of the car, they actually pressurize the cool air coming into the engine as the car moves faster. This provides maximum airflow and maximum benefits. It is also the most complicated to install since you will likely have to install part of the system from underneath the car. You may even have to remove your bumper.
Advertisement -
3Park your car. You should choose an area that has plenty of space for you to move around the front and sides of your vehicle. You also want a well-lit area so that you can see what you are doing. Be sure to turn your vehicle off before proceeding.
-
4Wait until your engine has cooled completely before doing anything. Parts in the engine compartment can get very hot when the car is running. You do not want to get burned.
-
5Unplug the car battery. Start by removing the negative terminal (black or unmarked) and then remove the positive terminal (red).


Removing the Original Air Intake
-
1Locate the air intake. This should be easy to identify. It will look like a large plastic tube running from the engine to a large plastic filter box.
-
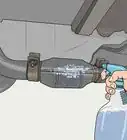
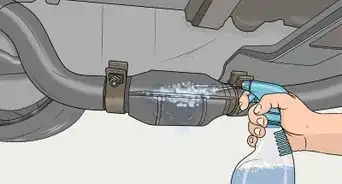
2Remove the air intake system. This consists of removing the air filter, the filter box, and the tube running from the filter box to the opening in the engine bay. Some of these parts will be attached to the engine bay by small plastic mounts. You will need a wrench or socket set to remove the small bolt holding the mounts in place. Some pieces of the intake system are fastened to each other with hose clamps, which can be loosened by turning the small bolt on the end with a screwdriver or socket.
- You may need to remove one or more air sensors which feed information to the car's computer. These should be handled very delicately.
-
3Keep your original air intake. If the new intake you purchased is damaged or doesn’t fit, you will have to re-install the original intake system before driving your car. Set the intake aside until you know the new one works properly.


Installing the New Air Intake
-
1Install the new intake. You should follow the specific manufacturer’s instructions as to which piece to install first. Be sure to secure the intake with hose clamps where appropriate. Carefully re-install any sensors removed with the old intake. Once the new intake is installed, install a new air filter.
- Remember that if you purchased a cold air or ram air intake, you will likely need to climb under the car to complete the installation as these systems pull cool air from outside the engine compartment.
-
2Check to make sure the intake system is secured properly. If the intake easily strikes other objects in the engine bay, tighten the mountings until it is secure.
-
3Re-attach your battery terminals. You should attach the red (positive) terminal first. Next, attach the black (negative/ground) terminal.
-
4Test drive your new intake! You want to make sure that the intake is functioning properly before you hit the open road.

Community Q&A
-
QuestionDo I have to change the MAP if I change my air intake system?
 Community AnswerNo, the airflow sensor together with the ECU will adjust your tune accordingly.
 -
QuestionI have a 2004 V6 VW Holden, and I want to put a pod filter on instead of the standard air box. What do I do with the sensor that connects to the air box?
 Community AnswerMost intakes will come with a Mass Air Flow spot, so you take your existing one out of the stock intake and connect it into your aftermarket intake in the same spot. Be sure to orient it in the same way as it was in the stock air box, otherwise it will flag your "check engine" light.
 -
QuestionCan I put a cold air intake on a 1985 Toyota Pickup?Community AnswerYes. You can do that with any vehicle that has an engine.
Warnings
- If you install a cold air intake, your vehicle will now be getting air from outside of the engine compartment. Virtually all accomplish this by placing the filter around the front fender or bumper. This is much closer to the ground than stock intakes, and if the vehicle travels through water high enough to reach the intake, it may suck water into the engine. This causes what is called "hydrolock", and may damage the engine. Be careful when approaching standing water to ensure this doesn't happen. Installing a bypass valve will prevent this, but cost more money.⧼thumbs_response⧽
- The battery should always be disconnected before you start work.⧼thumbs_response⧽
- Performance air intakes are not simply large tubes. Each is carefully designed, with the diameter, bend angles, and connections experimentally determined to provide consistent, maximized airflow. Using home-made improvised intakes could negatively impact performance, and in some cases be very dangerous.⧼thumbs_response⧽
Things You'll Need
- New air intake
- Air filter compatible with new intake
- Bits and bit driver
- Hose clamps
- Flashlight (to see in cramped spaces)


References
- Videos provided by BleepinJeep
About This Article

An aftermarket air intake can improve your car’s performance and make it sound better. Replacing your air intake is relatively easy if you have a screwdriver and wrench or socket set. Make sure your engine’s cool and your battery is unplugged before you remove your old air intake. You’ll need to remove the air filter, the filter box, and tube running to the engine bay. Once you’ve removed the old air intake, slot your aftermarket one in its place and secure it with a wrench. For more tips, including how to choose an aftermarket air intake, read on!