This article was co-authored by Matthew Rava. Matthew Rava is an Auto Repair Expert and the Co-founder & Head of Marketing of Brakes to You. He specializes in auto repairs that concern brakes. Matthew earned a BS from West Chester University of Pennsylvania.
There are 7 references cited in this article, which can be found at the bottom of the page.
wikiHow marks an article as reader-approved once it receives enough positive feedback. In this case, several readers have written to tell us that this article was helpful to them, earning it our reader-approved status.
This article has been viewed 464,935 times.
Customizing your brake calipers with a new paint job will make your wheels pop. Just like on high end sports cars, you can add a colorful paint job to your brake calipers to set your car apart. No one wants to see rusty calipers behind a set of shiny rims. Take the time to prepare your calipers properly, and you can make sure that you end up with a paint job that lasts and prevents rust.[1]
Steps
Removing the Wheels
-
1Apply the parking brake. Safety is a priority whenever you are working on a car. Before removing the wheels apply the parking brake on to make sure your car is secure.
-
2Loosen the lug nuts ¼ turn. While the tires are still on the ground, use a tire iron or air gun to turn the lug nuts and make the wheel easier to remove.Advertisement
-
3Position your jack under the frame of the car next to the wheel you are removing. Use the jack to raise the car off the ground. Check your car’s owner’s manual for proper jack placement.
- Lift the car high enough to slide a jack stand underneath the frame.
- Slowly lower the car onto the jack stand.
- Remove the jack to leave the car resting on the stand.
-
4Remove the lug nuts from the wheel to remove it. Use a tire iron or an air gun to remove the lug nuts one at a time.[2]
- When all the lug nuts are removed, pull the tire gently toward you.
- Set the wheel aside with the lug nuts.
-
5Repeat the process for all four wheels. If you don’t have four jack stands you can do one wheel at a time, but keep in mind it will take much longer while you wait for paint to dry.


Preparing the Calipers
-
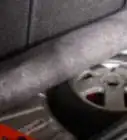
1Remove the calipers from the wheel assembly. The calipers are usually held in place by one or two bolts in the rear. A ratchet wrench works best to remove the bolts securing the caliper.
- Do not disconnect the caliper from the brake line.
- Be careful not to crimp or damage the brake hose connected to the caliper.
- Place the caliper on a box or inverted bucket.
-
2Separate the brake pads from the caliper. Brake pads usually clip in place. Locate the clips that hold the brake pads in place and gently remove the brake pads. Removing the brake pads will ensure that you don’t get paint on them and possibly compromise your car’s braking ability.
-
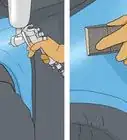
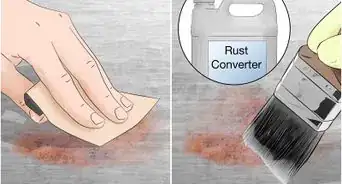
3Clean the calipers thoroughly. Properly cleaning the brake calipers prior to painting will help prevent the paint from flaking off. The cleaning process is crucial to ensure that the paint sticks and you end up with a quality paint job.[3]
- Use a stiff wire brush to remove any rust or built up grime on the caliper’s metal parts. Do not brush the rubber casing around the caliper pistons or they may be damaged.
- Dip the brush in mineral spirits or gasoline as a solvent to aid the cleaning process.[4]
- Spray brake cleaner on the caliper to remove the bits loosened by the wire brush.
- Sand the metal parts of the caliper with a 150-200 grit sandpaper. Make sure to get all the bends and groves around the caliper.
- Give the caliper another cleaning with the spray on brake cleaner.
- Use a paper towel and rubbing alcohol to clean the calipers one final time.
-
4Use tape and newspaper to mask the area around the caliper that is not being painted. Take time to carefully cover everything around the caliper so you don’t get overspray in unwanted locations.
- Tape the rubber protectors around the caliper pistons.
- Wrap the brake rotor in newspaper to protect it from paint
- Cover the panels around the wheel with paper so you don’t get paint on the car.


Painting the Calipers
-
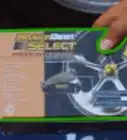
1Select a high quality paint. Calipers are exposed to very high temperatures during braking. Choose a paint that is heat resistant or developed specifically for calipers.
- Specialty caliper paints can be purchased from auto parts stores.
- Purchase a heat tolerant spray paint from your local hardware store.
- Make sure the paint is designed for use on metals.
-
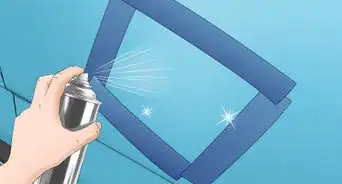
2Paint the caliper one side at a time. Spray multiple coats to achieve an even paint job. Do not apply spray paint in thick coats or you will get drips and runs in your paint. Spray smoothly and from different angles to get maximum coverage.
- Shake the can and follow the label directions on the paint can.
- Spray short bursts, not a continuous stream of paint.
- Move the can from side to side as you spray.
- Wait 5 minutes between coats of paint.
- Spray 3 to 4 coats on the top side of the caliper.
-
3Allow the caliper to dry for 30 minutes, then paint the other side. After applying multiple coats to one side of the caliper, wait for it to dry to the touch before turning it over.
- Repeat the painting process on the opposite side of the caliper
- Be gentle when turning the caliper so you don’t twist the brake line.
- You do not need to paint the inner portion of the caliper as this isn’t seen and may affect the performance of your brakes.
-
4Allow the paint to dry for one hour before replacing the caliper. Depending on the temperature and humidity, the time it takes for your paint to dry may vary. You don’t want to ruin all your hard work, so make sure the paint is completely dry before replacing the caliper.


Finishing the Job
-
1Click the brake pads back in place on the caliper. This may be a good time replace your brake pads if they are beginning to wear thin.
- Use a C-clamp to compress the caliper piston to position the brake pads properly.
- Bolt the caliper back in place around the brake rotor. Place the caliper back around the rotor and replace the bolts that you removed to take the caliper off. Make sure the bolts are tight to securely reassemble your brake system.
- Important:Take care not to twist or crimp the brake line.
-
2Position the tire back on the car. Place the tire on the bolts attached to the wheel assembly.
- Hand tighten the lug nuts onto the bolts.
- Use a tire iron or an air gun to tighten the lug nuts.
- Tighten the lug nuts in a criss-cross pattern alternating sides rather than in a circular pattern.
-
3Use a jack to remove the car from the jack stand. Slowly raise the car about an inch to slide the jack stand out from under the car.
- Remove the jack stand.
- Lower the car to the ground.
- Double check that your lug nuts are securely tightened.
-
4Wait 24 hours for the paint to cure completely. It may be hard to resist taking your fresh calipers out for a spin, but waiting the added time will ensure that the paint cures to the metal and doesn’t peel off due to the heat of braking.[5]
-
5Take the car out for a test drive. Make sure your brakes are working properly. Enjoy the looks from the people you pass admiring your newly painted calipers.


Community Q&A
-
QuestionI purchased rebuilt calipers. What are they coated with? Can I just paint them or do I have to clean them first?
 Community AnswerThe best thing to do is clean off the surface with lacquer thinner or a good brake degreaser, dry, and install. Keep your dirty hands off the brake surface.
Warnings
- Avoid painting the brake pads, discs or the piston's rubber boot, doing so will affect your car’s braking performance.⧼thumbs_response⧽
- Wear a mask while cleaning and painting. Brake dust and paint fumes may irritate your lungs.⧼thumbs_response⧽
Things You'll Need
- Lug wrench
- Jack stands
- Wire brush
- Cleaning solvent
- Brake cleaner
- Newspaper
- Masking tape
- Paint


References
- ↑ http://www.caliwheels.com/brake-caliper-painting-p-6.htm
- ↑ http://www.dmv.org/how-to-guides/changing-tire.php
- ↑ https://www.autobutler.co.uk/how-to/paint-brake-calipers
- ↑ http://orca.st.usm.edu/~jmneal/tiburon/calipers.htm
- ↑ http://www.torquecars.com/styling/painting-calipers.php
- ↑ https://www.carparts.com/blog/how-to-replace-a-brake-caliper/
- ↑ https://www.carparts.com/blog/how-to-replace-a-brake-caliper/
- Videos provided by The Faction
About This Article

To paint brake calipers, start by choosing a heat resistant spray paint, since calipers are exposed to very high temperatures. Then, spray a thin layer of paint onto one side of the caliper, and watch out for runs and drips in your paint. Spray on 3 to 4 coats to ensure an even paint job, and make sure to wait 5 minutes in between each coat of paint. After you’ve finished painting one side, let the paint dry for 30 minutes before turning the caliper over and painting the other side. To learn more, including how to prep your calipers before painting them, scroll down!