This article was co-authored by Mike Garcia. Mike Garcia is a Licensed Landscape Contractor and the Founder of Enviroscape LA, a full-service landscape design and construction firm in Los Angeles, California. With over 30 years of experience, Mike specializes in sustainable landscape practices. Mike holds an Ornamental Horticulture degree, C-27 Landscape Contractor and D-49 Tree Service Contractor licenses, and Permaculture Design, California Naturalist, International Certified Professional Pond Contractor, and Pond Building certifications. He is one of eight Internationally Certified Pond Builders in the world. Enviroscape LA has won landscape and water feature awards from the International Professional Pond Contractors Association (IPPCA), National Association of Pond Professionals (NAPP), and the California Landscape Contractors Association (CLCA). Mike is a past president of the CLCA and currently serves on their local Board of Directors. Enviroscape LA has been featured in PONDS USA Magazine, Pond and Garden Lifestyles Magazine, and the Los Angeles Times. Mike has appeared on Extreme Home Makeover, HGTV's Landscapers Challenge, and A & E's series Fix That Yard.
This article has been viewed 47,848 times.
Irrigation systems are a simple, safe, and efficient way to water your yard or garden. As long as you have the right materials, your irrigation system can water individual plants or cover large areas of your yard. Lay out your piping and attach the watering devices to create the safest and most efficient system possible. After a few hours of hard work, you'll have a safe and efficient yard irrigation system.
Steps
Choosing a Watering Device
-
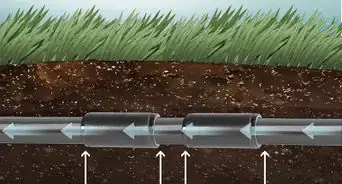
1Install a dripper system to water individual plants. Dripper irrigation systems provide a steady flow of water to individual plants. If you want to water each plant on its own, choose a dripper system to give your plants a direct water source.[1]
- A dripper system consists of many square, flat waterspout-like "drippers" hooked to your irrigation piping that emit a small, steady water flow.
- Dripper systems also work well for potted outdoor plants.
- If you have a large yard or want to cover more area, you may want to choose another system.
-
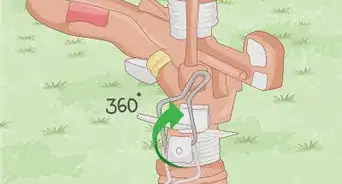
2Choose a sprinkler irrigation system to cover more distance. Sprinkler heads can water a radius between 3 feet (0.91 m) to 30 feet (9.1 m), depending on the flow rate and water pressure. Pick a sprinkler system if you have a large yard that needs even watering.[2]
- Sprinkler irrigation systems consist of many sprinkler bulbs hooked to the irrigation piping that spray water out of their nozzles.
Advertisement -
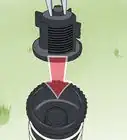
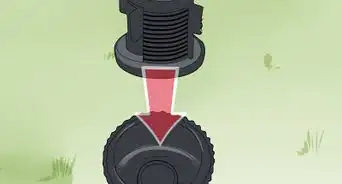
3Buy a sprayer or bubbler system as a hybrid between drippers and sprinklers. Sprayers and bubblers have adjustable radiuses and can provide either direct or general attention to plants in your yard. Choose a bubbler or sprayer system if you want to control the amount of direct water flow your plants get at a given time.[3]
- Sprayer and bubbler systems look like a cross between sprinklers and bubblers. They are generally flat and square, with a nozzle on top that sprays a steady water flow.
- Bubbler and sprayer systems tend to have a smaller radius than sprinkler systems.


Planning the System
-
1Measure your yard's perimeter and area. Take measurements of the perimeter and area of your yard. Take measurements of the length and width, then multiply these numbers to find the land's total area.
- Work slowly to keep the land's measurements as accurate as possible.
-
2Purchase grid paper to map out your irrigation system. Grid paper can keep your drawing precise. Assign each grid a certain distance to help you visualize your backyard and plan an accurate layout.
- You might assign each grid, for example, a distance of 1 square foot (0.093 square meters).
-
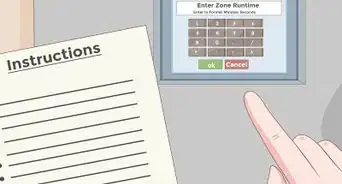
3Draw an approximate layout of the irrigation system. Using your yard measurements, map out an approximate layout of your yard. Mark your yard's water source, power source, main plants or garden areas, and areas where you will install the irrigation tubing.[4]
- The water source is generally the outdoor faucet, and the power source is the way you'll turn the system on and off.
- Use a pencil while designing the layout in case you need to make changes or correct mistakes.


Laying out the Tubing
-
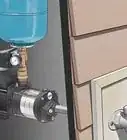
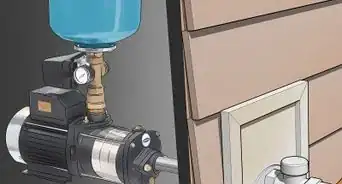
1Attach a vacuum breaker to the outdoor faucet and irrigation tubing. Vacuum breakers prevent contaminated water in your irrigation system from washing back up into your home's water supply. Screw the vacuum breaker onto your outdoor faucet, and attach your irrigation tubing to the opposite side of the vacuum breaker.[5]
- Vacuum breaker are cylindrical metal tubes that screw into your home's outdoor faucet at the top.
- You can buy vacuum breakers from most garden centers or home improvement stores.
-
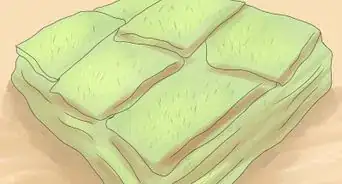
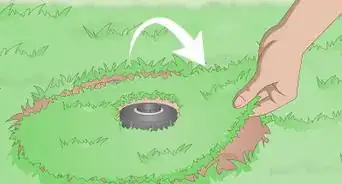
2Spread the irrigation tubing around your yard based on your layout plans. Position 1⁄2 in (1.3 cm) poly tubing along the areas that you plan to water with the irrigation system. Cut the tubing with pruning shears when you have reached the end length of your system or areas where you will need to make angles.
- Let your tubing sit in the sun for several hours before using it to make it more flexible and easier to work with.
- You can buy poly tubing from most hardware or home improvement stores.
-
3Use 90-degree fittings to make bends in the layout, if needed. If you want your system to turn at an angle, cut the tubing with pruning shears and press its end into a 90-degree fitting, twisting it in place. Attach the other end of the 90-degree fitting to the opposite half of the tubing to continue laying out your system.[6]
- Buy 90-degree fittings online or from most home improvement stores.
- You can also use T-fittings as an alternative using the same method. A T-fitting is a tube that bends at a slight angle to accommodate turns in your irrigation layout.
-
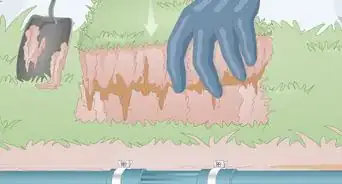
4Install a ground stake every 1–2 feet (0.30–0.61 m) to pin the tubing in place. Hook the top of the ground stake over the tubing and pin it to the ground. This will prevent the tubing from moving around when you turn on the water.[7]
- Look for ground stakes at a home improvement store or garden center.
-
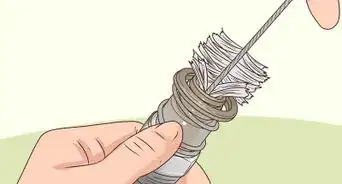
5Close the tubing shut with a tubing clamp. When you've laid out all of the tubing, turn on the water for a few minutes to flush out the dirt from the system. Slide a tubing clamp the approximate size of the tubing around the end of the system to crimp it shut and avoid waterlogging an area of your yard.[8]
- Turn off the water before clamping your tubing shut.
- Tubing clamps are small, oval-shaped metal clips that secure open tubing ends. You can buy these clamps from most hardware or home improvement stores.


Connecting the Watering Devices
-
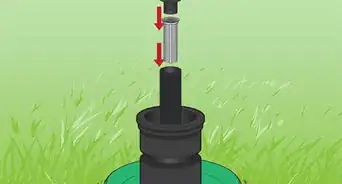
1Punch 1⁄4 in (0.64 cm) wide holes into the tubing. Use a hole punch tool to mark wherever you want to install a sprinkler, bubbler, dripper, or sprayer. Push the hole punch firmly into the tubing and twist it until it makes a complete, clean hole through the other side.[9]
-
2Attach 1⁄4 in (0.64 cm) poly tubing to the holes with a barbed connector. Push the barbed connector through the hole in the irrigation tubing. Attach a length of 1⁄4 in (0.64 cm) tubing to the opposite side of the barbed connector, cutting it with pruning shears when it reaches the area that you want to water.[10]
- You can find barbed connectors, which are cylindrical metal tubing connectors, and 1⁄4 in (0.64 cm) tubing from most home improvement stores.
-
3Install the watering device at the end of the 1⁄4 in (0.64 cm) tubing. Attach the dripper, sprayer, bubbler, or sprinkler by connecting it through the end of the 1⁄4 in (0.64 cm). To hold it in place, attach a small gardening stake to the end and press it into the ground near the area it needs to cover.[11]
-
4Flush and test the irrigation system via the outdoor faucet. Turn on your outdoor faucet to flush out any remaining dirt and test your irrigation system. Adjust the positioning of the watering devices or add more as needed.
- If you notice any issues with a watering device, check the 1⁄4 in (0.64 cm) tubing to make sure it is attached securely.


Expert Q&A
Did you know you can get expert answers for this article?
Unlock expert answers by supporting wikiHow
-
QuestionHow do you fix a leaking irrigation system?
 Mike GarciaMike Garcia is a Licensed Landscape Contractor and the Founder of Enviroscape LA, a full-service landscape design and construction firm in Los Angeles, California. With over 30 years of experience, Mike specializes in sustainable landscape practices. Mike holds an Ornamental Horticulture degree, C-27 Landscape Contractor and D-49 Tree Service Contractor licenses, and Permaculture Design, California Naturalist, International Certified Professional Pond Contractor, and Pond Building certifications. He is one of eight Internationally Certified Pond Builders in the world. Enviroscape LA has won landscape and water feature awards from the International Professional Pond Contractors Association (IPPCA), National Association of Pond Professionals (NAPP), and the California Landscape Contractors Association (CLCA). Mike is a past president of the CLCA and currently serves on their local Board of Directors. Enviroscape LA has been featured in PONDS USA Magazine, Pond and Garden Lifestyles Magazine, and the Los Angeles Times. Mike has appeared on Extreme Home Makeover, HGTV's Landscapers Challenge, and A & E's series Fix That Yard.
Licensed Landscape ContractorWith an overhead irrigation system, if you've determined that there's a leak, then you need to determine where the leak is coming from. If it's coming from the top part called the nozzle, that just unscrews. Unscrew the broken nozzle and then screw a new one on. In the case of drip irrigation, a lot of times some of the drip irrigation will get punctured on accident. In that case, once you open up the line and determine where the leak is, cut the broken drip and put pressure on both ends. Push on it, and it'll be good as new.
Support wikiHow by unlocking this expert answer.
Warnings
- Installing a vacuum breaker is essential to avoid water contamination. Attaching a vacuum breaker to your outdoor faucet first before setting up your system.⧼thumbs_response⧽
Things You'll Need
- Grid paper
- Vacuum breaker
- 1⁄2 in (1.3 cm) poly tubing
- 1⁄4 in (0.64 cm) poly tubing
- 90-degree fittings
- Ground stakes
- Tubing clamp
- Hole punch
- Barbed connectors
- Garden stakes
- Watering device (dripper, sprinkler, sprayer, or bubbler)


References
- ↑ https://www.familyhandyman.com/landscaping/how-to-install-an-irrigation-system-in-your-yard/view-all/
- ↑ https://www.familyhandyman.com/landscaping/how-to-install-an-irrigation-system-in-your-yard/view-all/
- ↑ https://www.familyhandyman.com/landscaping/how-to-install-an-irrigation-system-in-your-yard/view-all/
- ↑ https://www.younghouselove.com/2017/08/how-to-install-irrigation-system/
- ↑ https://www.thisoldhouse.com/how-to/how-to-install-drip-irrigation
- ↑ https://www.thisoldhouse.com/how-to/how-to-install-drip-irrigation
- ↑ https://www.familyhandyman.com/landscaping/how-to-install-an-irrigation-system-in-your-yard/view-all/
- ↑ https://www.gardenbetty.com/drip-irrigation-assembling-and-installing-your-system/
- ↑ https://www.gardenbetty.com/drip-irrigation-assembling-and-installing-your-system/
About This Article