This article was medically reviewed by Sarah Gehrke, RN, MS. Sarah Gehrke is a Registered Nurse and Licensed Massage Therapist in Texas. Sarah has over 10 years of experience teaching and practicing phlebotomy and intravenous (IV) therapy using physical, psychological, and emotional support. She received her Massage Therapist License from the Amarillo Massage Therapy Institute in 2008 and a M.S. in Nursing from the University of Phoenix in 2013.
wikiHow marks an article as reader-approved once it receives enough positive feedback. In this case, 93% of readers who voted found the article helpful, earning it our reader-approved status.
This article has been viewed 34,438 times.
Colostomy irrigation can be a way to avoid using a colostomy bag after a colorectal surgery, if you have a stoma. Irrigation will not always be enough to replace the use of a colostomy bag, but it may allow you to use only a cap, mini-pouch, or patch to protect the stoma. Irrigating involves instilling water through your stoma into your large intestine to flush out your colon. This can be done every 1-3 days, minimizing odor and leaking and giving you more control over your bowel movements.[1] This process can increase your independence and quality of life, allowing for a more active and care-free life with a stoma. To manage the irrigation process, you will first attach the irrigation sleeve, and then irrigate your colostomy with water.
Steps
Learning the Basics of Irrigation
-
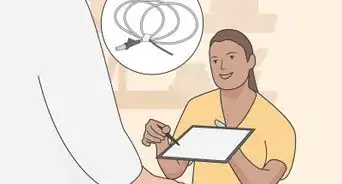
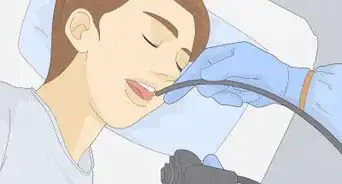
1Learn the irrigation process from your healthcare professional. If you are transitioning from a colostomy bag to using colostomy irrigation, learn the proper technique from your doctor, surgeon, or ostomy nurse. Though the procedure is relatively easy to learn, it’s always best to have a professional demonstrate it for you the first 1 or 2 times.
- Ask your care provider any questions you have about using your irrigation system. Don’t be afraid to ask for a repeat demonstration, such as, “Could you please show me how to do this again next week so that I know I’m doing it right?”
- If at any point you experience difficulties irrigating at home, see your doctor or nurse for help.
-
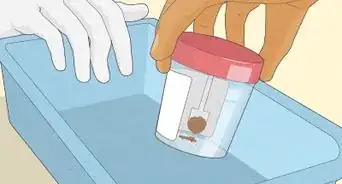
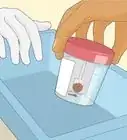
2Get the supplies you need. At the very least, you need to get an irrigation bag, tubing, a cone tip, an irrigation sleeve, an ostomy belt, and a clip.[2] Using some water-based lubrication on the end of the cone can make insertion easier, so try to obtain that, as well. Get materials by contacting suppliers directly or asking your doctor or ostomy nurse for recommendations. Call manufacturers or suppliers to request free sample if you want to test different products.
- The ostomy belt and irrigation bag should last for several years. Replace the ostomy bag every 1-2 months or when it develops an odor.
- You can continue to use the brand that you initially left the hospital with, or you can switch brands. It’s a matter of personal preference.[3]
-
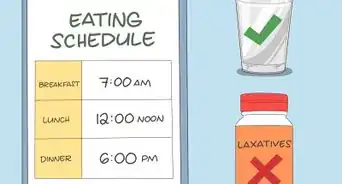
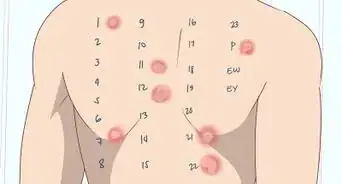
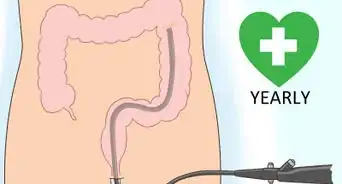
3Create an irrigation schedule that works for you. Irrigation flushes your entire bowel, and the time it takes to refill depends on your body and your diet. Most people irrigate either daily or every 2-3 days. Irrigate your colostomy on a schedule once you establish your elimination pattern.[4]
- Space out your irrigations as far apart as you’re comfortable, but if you experience leakage, try irrigating more frequently. For instance, if you irrigate every other day and experience leakage, try irrigating daily.
- It takes about an hour to do a full irrigation. Set aside a specific time each day to irrigate—this will help you remember to do it, and will help your body to learn its elimination timing.[5]
- Once this pattern is established, you may not have to wear the colostomy pouch anymore. Instead, you will use a stoma plug, cap, or mini-pouch. Talk to your doctor about this.
-
4Prepare your supplies before you begin irrigating. When it’s time to irrigate, assemble all of your materials. Attach the cone tip to the end of the irrigation tube. Clamp the tube so water does not flow until you’re ready for it. Fill your irrigation bag with 500–1,500 milliliters (16.9–50.7 fl oz) of body-temperature water. Hang the irrigation bag at shoulder height or higher, preferably above your head.[6] Attach your adjustable ostomy belt to the irrigation sleeve, and put this belt around your waist.
- Hang your irrigation bag however you can. Try using a clothes hanger clipped on the corner of a bathroom mirror. Or, consider installing a more permanent fixture for everyday use.
- When you attach your belt to your body, your stoma should be in the center of the irrigation sleeve’s ring.
- Many ostomy nurses suggest using 500 milliliters (16.9 fl oz) of lukewarm water for the first several irrigations. You can use more or less depending on what your doctor or nurse recommends.


Using Your Irrigation Sleeve
-
1Decide whether you want to sit or stand. Some people choose to stand beside the toilet, though this can be tiring. You could also sit up straight on the toilet itself, though some beginners may find this challenging. Consider sitting on a chair placed next to the toilet.[7]
- Keep the end of the sleeve clipped while you position yourself. If you’re standing, let the whole device rest on the floor. If you’re sitting, keep your appliances hanging.
- If desired, put on rubber or latex gloves. This can help you stay clean while you get comfortable with your new equipment.
-
2Position your irrigation sleeve. Place the irrigation sleeve, which should already be attached to the adjustable belt, over your stoma. Position the other end of the irrigation sleeve so the irrigation water runs directly into the toilet.
-
3Eliminate any air bubbles that are in the tubing. Release the clamp to allow some of the water to flow into the irrigation sleeve. Re-clamp the tubing once all of the air bubbles have been removed.[8]
-
4Insert the cone’s tip into your stoma. Moisten the pointed end of the cone with a water-based lubricant like K-Y Jelly or Lubrifax. Insert the cone’s tip so that it goes about 3 inches (7.6 cm) into your stoma, or about halfway in. Never force the pointy tip into your stoma.
- The tip should fit snugly so that the amount of leakage is minimized during the irrigation process.
- Your stoma may react to being touched by clenching up. If this happens, sit calmly for a few moments, take some deep breaths, and try again.[9]
-
5Troubleshoot issues with cone insertion. Water may leak from the cone as you’re trying to insert it. If so, make sure the tip of the cone is pushed firmly into your stoma and is at least halfway in. Make sure you don’t have any blockages in the stoma by stopping and starting the water’s flow. Try removing the cone and letting the stoma empty, then inserting the cone again.[10]


Irrigating Your Stoma
-
1Allow water into the cone by releasing the clamp. Slowly release the clamp on the tube, allowing the water from the irrigation bag to gradually flow into the cone and enter into your stoma. If you start to feel an intestinal cramp, slow or stop the water for a minute and relax, then try again.[11]
- This process should take about 5-10 minutes.
-
2Hold the cone in place for a moment before removing it. Once the irrigation bag has emptied, hold the cone in the same position for about 10 seconds. Carefully remove the cone after this time has passed.
- You will start to expel water and waste shortly after you insert the water into your stoma. This may happen in stages or all at one time.
-
3Drain the output. Drain the waste output through the irrigation sleeve for about 10 minutes, allowing the contents to empty into the toilet. Keep the sleeve on for a full hour, especially at first when you’re learning how your body will respond to irrigation. You do not have to stay in the bathroom the whole time – feel free to clamp the tail of the sleeve closed and get up and move around. If you feel yourself starting to expel more waste, return to the bathroom and empty your sleeve into the toilet.[12]
- Some people may only need to keep the sleeve on for up to 20 minutes.
- Be sure to clamp the sleeve before moving around to avoid spillage.
-
4Remove and wash the irrigation sleeve. After the full hour of drainage, remove your irrigation sleeve. Rinse the sleeve in cool water and hang it and the irrigation bag somewhere to dry. Some people recommend rinsing your sleeve with a vinegar solution about once a week to limit bacterial growth.[13]
-
5Replace your cap, patch, or mini-pouch to protect your stoma. Gently clean around your stoma using a washcloth, mild soap, and water. Do not rub the skin around your stoma – pat it dry with a paper towel, toilet paper, or tissue. Most people who irrigate only have to use a mini-pouch, patch, or cap over their stomas between irrigations. Be sure your appliance is clean, and replace it over your stoma until you need to irrigate next time.[14]


Warnings
- Do not use irrigation if you have a hernia, stoma prolapse, abdominal radiation, ongoing bowel disease, irritable bowel syndrome, or kidney or heart disease.[18] Irrigation should also not be used by children or young adults, people with learning disabilities, people with limited manual dexterity, or people who are severely or terminally ill.⧼thumbs_response⧽
- Irrigation only works if you have a portion of sigmoid or descending colon left. Irrigation is not a helpful technique if you have a transverse colostomy.[19]⧼thumbs_response⧽
Things You’ll Need
- Irrigation bag with tubing and clamp
- Plastic cone
- Irrigation sleeve
- Adjustable ostomy belt
- Water-based lubricant
- Mild soap that contains no perfumes or oils
- Clean washcloth
- Soft paper towels/toilet paper/tissue
- Rubber or latex gloves (optional)
- Stoma plug or cap


References
- ↑ http://www.ncbi.nlm.nih.gov/pmc/articles/PMC3951489/
- ↑ http://www.ostomy.org/uploaded/files/ostomy_info/Phoenix_Irrigation.pdf?direct=1
- ↑ http://www.ostomy.org/Ostomy_Supply.html
- ↑ http://www.ostomy.org/uploaded/files/ostomy_info/Phoenix_Irrigation.pdf?direct=1
- ↑ Lippincott's Nursing Procedures. Fifth ed. Philadelphia: Lippincott Williams & Wilkins, 2009. 700-02. Print.
- ↑ http://www.ostomy.org/uploaded/files/ostomy_info/Phoenix_Irrigation.pdf?direct=1
- ↑ http://www.ostomy.org/uploaded/files/ostomy_info/Phoenix_Irrigation.pdf?direct=1
- ↑ https://www.cancer.org/treatment/treatments-and-side-effects/treatment-types/surgery/ostomies/colostomy/management.html
- ↑ http://www.ostomy.org/uploaded/files/ostomy_info/Phoenix_Irrigation.pdf?direct=1
- ↑ http://www.ostomy.org/uploaded/files/ostomy_info/Phoenix_Irrigation.pdf?direct=1
- ↑ http://www.ostomy.org/uploaded/files/ostomy_info/Phoenix_Irrigation.pdf?direct=1
- ↑ http://www.ostomy.org/uploaded/files/ostomy_info/Phoenix_Irrigation.pdf?direct=1
- ↑ http://www.ostomy.org/uploaded/files/ostomy_info/Phoenix_Irrigation.pdf?direct=1
- ↑ http://www.ostomy.org/uploaded/files/ostomy_info/Phoenix_Irrigation.pdf?direct=1
- ↑ http://www.ostomy.org/uploaded/files/ostomy_info/Phoenix_Irrigation.pdf?direct=1
- ↑ http://www.ostomy.org/uploaded/files/ostomy_info/Phoenix_Irrigation.pdf?direct=1
- ↑ http://www.ostomy.org/uploaded/files/ostomy_info/Phoenix_Irrigation.pdf?direct=1
- ↑ http://www.ostomy.org/uploaded/files/ostomy_info/Phoenix_Irrigation.pdf?direct=1
- ↑ http://www.ostomy.org/uploaded/files/ostomy_info/Phoenix_Irrigation.pdf?direct=1


Medical Disclaimer
The content of this article is not intended to be a substitute for professional medical advice, examination, diagnosis, or treatment. You should always contact your doctor or other qualified healthcare professional before starting, changing, or stopping any kind of health treatment.
Read More...