This article was co-authored by wikiHow staff writer, Janice Tieperman. Janice is a professional and creative writer who has worked at wikiHow since 2019. With both a B.A. and M.A. in English from East Stroudsburg University, she has a passion for writing a wide variety of content for anyone and everyone. In her free time, you can find her working on a new crochet pattern, listening to true crime podcasts, or tackling a new creative writing project.
This article has been viewed 13,895 times.
Learn more...
Icy steps are super frustrating during the winter season, and they can also be really dangerous. It’s very easy for you or a loved one to fall and get injured on a slippery step. Thankfully, it only takes a few minutes and a few household items to ice-proof your steps before or after a winter storm.
Steps
Using Salt and Hot Water
-
1Fill a large bucket or basin with hot water. Find a container that can enough water to coat your outdoor staircase. Make sure that the water is hot and steamy to the touch, and not just lukewarm.[1]
- For instance, if your staircase is only 2-3 steps, you may only need 1 US qt (0.95 L) or so of water. If you’re coating a large, 8-10 step staircase, you may need 1⁄2 US gal (1.9 L) of water.
-
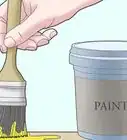
2Dissolve several scoops of rock salt into the water. Mix at least 1 cup (513 g) of rock salt into the container of water. Stir the salt until completely dissolves in the water.[2]
- You may not need as much salt if you’re working with a smaller staircase.
- You can find rock salt online or at your local hardware store.
Advertisement -
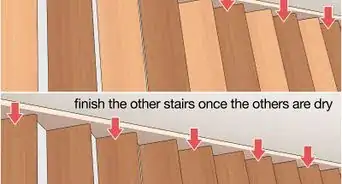
3Pour the mixture over your steps 1 day before a winter storm. Check the local weather forecast and see if there’s any snow or ice on the horizon. The day before the snow is supposed to hit, dump the salty water over your steps completely. After the snowstorm hits, you can use your steps without as much fear of slipping or tripping![3]
- The mixture helps to prevent snow and ice from sticking to your steps during a storm.
- You can also use this mixture to melt snow and ice that’s already covering your steps.
- Feel free to pour this mixture on your sidewalks, as well.


Mixing Dish Soap and Rubbing Alcohol
-
1Pour 1⁄2 US gal (1.9 L) of hot water into a large bucket or jug. Look for a container that can hold enough water to cover your steps completely. Check that the water is hot to the touch, or else the other ingredients may not dissolve well.[4]
- If you don’t have a bucket or basin on hand, an empty water or ice tea jug can work well for this.
-
2Stir in 1 tsp (4.9 mL) of dish soap and 1 US tbsp (15 mL) of rubbing alcohol. Mix some generic dish soap into the water, along with the rubbing alcohol. Continue stirring both ingredients until they’re completely dissolved in the hot water.[5]
- Rubbing alcohol and dish soap have a lower freezing point, and won’t freeze as quickly as water.
- If you’re covering more than 1 staircase, you may want to double the recipe.
-
3Dump the mixture over icy the steps. Keep an eye on the weather report and see when the next snow or ice storm is. The day before the storm hits, pour the de-icing mixture over your steps. You can also use this on steps that are already covered in snow or ice.[6]
- The combination of dish soap, hot water, and rubbing alcohol will prevent snow and ice from sticking to your stairs.


Melting Snow and Ice from Your Stairs
-
1Sprinkle fertilizer on your steps for an easy solution. Take a handful of traditional plant fertilizer and cover each of your steps with it. Wait a few hours for your steps to thaw out and be safe to walk on. Don’t use fertilizer to de-ice your sidewalks, as it can melt with the snow and ice and turn into harmful run-off.[7]
- You can find fertilizer at any gardening supply store.
- Make sure that ammonium sulfate is an ingredient in your fertilizer, or else it won’t work very well as a de-icer.
-
2Coat your icy steps with magnesium chloride for an eco-friendly option. Visit your local hardware store and pick up a bag of magnesium chloride, which is an eco-friendly alternative for rock salt (sodium chloride) and calcium chloride. Sprinkle a few handfuls of magnesium chloride over your steps, then wait a few hours for the ice and snow to melt away completely.[8]
- Magnesium chloride doesn’t release as much chloride into the environment, and it continues to melt ice in really cold weather.
-
3Use caution when choosing sodium or calcium chloride. Weigh your options before sprinkling bare rock salt or calcium chloride over your steps. Only use small handfuls on your steps, as chloride is pretty harmful to the environment. Wait a few hours for the snow and ice to melt before using your steps again.[9]
- Calcium chloride can burn your skin if you aren’t wearing gloves.


Warnings
- Don’t use de-icing products on your steps if they’re less than 6 months old, as they may damage your concrete and metal steps.[11]⧼thumbs_response⧽
Things You’ll Need
Using Salt and Hot Water
- Rock salt
- Hot water
- Bucket or basin
Mixing Dish Soap and Rubbing Alcohol
- Hot water
- Dish soap
- Rubbing alcohol
- Bucket or jug
Melting Snow and Ice from Your Stairs
- Fertilizer
- Magnesium chloride
- Calcium chloride
- Sodium chloride (rock salt)


-Step-19.webp)
References
- ↑ https://www.bobvila.com/articles/homemade-ice-melt/
- ↑ https://www.bobvila.com/articles/homemade-ice-melt/
- ↑ https://www.businessinsider.com/hacks-for-surviving-winter-2014-1
- ↑ https://www.nbcnews.com/better/news/how-melt-ice-when-you-re-out-rock-salt-ncna834716
- ↑ https://www.nbcnews.com/better/news/how-melt-ice-when-you-re-out-rock-salt-ncna834716
- ↑ https://www.nbcnews.com/better/news/how-melt-ice-when-you-re-out-rock-salt-ncna834716
- ↑ https://www.bobvila.com/articles/homemade-ice-melt/
- ↑ https://nylandmarks.org/news/dont-salt-your-steps-winter-technical-tips/
- ↑ https://nylandmarks.org/news/dont-salt-your-steps-winter-technical-tips/