This article was co-authored by wikiHow Staff. Our trained team of editors and researchers validate articles for accuracy and comprehensiveness. wikiHow's Content Management Team carefully monitors the work from our editorial staff to ensure that each article is backed by trusted research and meets our high quality standards.
This article has been viewed 194,519 times.
Learn more...
Knitting tutorials and patterns often describe how to knit assuming the reader is right-handed. Luckily, these instructions are easy to modify for lefties. Start by learning how to hold your knitting needles and cast on left-handed. Then, practice knitting across rows. After you have mastered these skills, you can try modifying other techniques and patterns for left-handed knitting.
Steps
Casting On
-
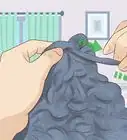
1Make a slip knot and slide it onto the left-hand needle. Wrap the yarn around your index finger twice and then pull the first loop through the second loop. Tug the tail of the yarn to tighten the base of the slip knot.[1]
- This slip knot will count as your first cast on stitch.
-
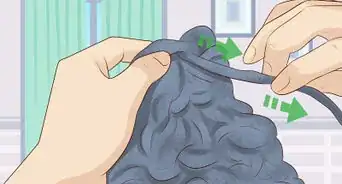
2Loop the yarn over the end of the right hand-needle. Hold 1 knitting needle in each hand. Position your thumb and index finger about 1 in (2.5 cm) from the tips of the needles. Then, bring the working yarn over the end of the right-hand needle.[2]
- At this point, you should have the slip knot on the left-hand needle and the loop you just made on the right-hand needle.
Advertisement -
3Insert the left-hand needle into the loop on the right-hand needle. Push the needle through the loop going from front to back. Hold the working yarn taut as you do this to keep the loop around the needles.[3]
- Both needles should be going through the loop at this point.
-
4Loop the yarn over the left-hand needle and pull this yarn through. Next, bring the working yarn up and over the left-hand needle again. Pull it through the loop on the needle and allow the loop to slip off of the right-hand needle and onto the left-hand needle.[4]
- You should now have 2 stitches on the left-hand needle: the slip knot (which counts as 1 cast on stitch) and the cast on stitch you just made.
-
5Repeat the sequence to cast on more stitches. Make the number of stitches required for your pattern. If you are just practicing, then make a row of 20 or more cast on stitches. You can knit across the row and create a practice swatch, or keep knitting and make it into a scarf.
Tip: Be careful not to cast on the stitches too tightly. The stitches should be snug on the needle, but still easy to move back and forth.[5]


Knitting the Knit Stitch
-
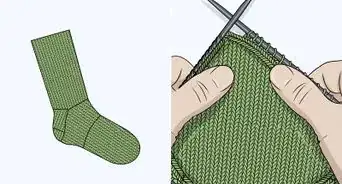
1Insert the left-hand needle into the first stitch on the right-hand needle. Hold the needle with the stitches on it in your right hand and the empty needle in your left hand.[6] Then, push the tip of the left-hand needle into the first cast on stitch in the row on the right-hand needle.[7]
- Only push the tip through the stitch by about 1⁄2 in (1.3 cm). This is plenty of needle to work with.
-
2Loop the yarn over the end of the left-hand needle. Bring the yarn up and over the end of the needle after inserting it into the cast on stitch. Wrap the yarn going from the front to the back of your work.[8]
- Make sure to hold the working yarn taut as you do this.
-
3Pull the yarn through the loop. Use the left-hand needle to pull this new loop though the cast on stitch. Allow the cast on stitch to slip off the end of the right-hand needle as you do so.[9]
- Now you should have 1 new stitch on the left-hand needle.
-
4Repeat this to the end of the row. Go through the same sequence for each cast on stitch in the row. When you get to the end of the row, you will have transferred all of the stitches from the right-hand needle to the left-hand needle.[10]
- If you want to continue working in the knit stitch across all your rows, transfer the needle with the stitches on it back to your right hand. Then, repeat the knit stitch sequence for all of the stitches in the next row.
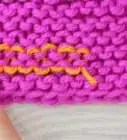
Tip: Knitting across all rows is called the garter stitch. The knit stitch is also a part of many more advanced stitches that you can try left-handed, such as the brioche stitch, waffle stitch, and the rice stitch.


Modifying Other Knitting Skills
-
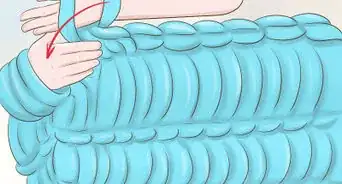
1Purl by inserting the left-hand needle into the front of the stitch. The purl stitch is just like the knit stitch, except you insert the needle going from back to front instead of from front to back. Transfer the needle with the stitches on it to your right hand and hold the empty needle in your left hand. Then, insert the needle through the first stitch going from back to front, loop the yarn over the end of the needle, and pull through.[11]
- Make sure that the yarn is in the front of your work before you begin purling.
- Practice purling by working across 1 or more rows.
Tip: You can knit the ribbed stitch by alternating between knit and purl stitches, such as by knitting 1 then purling 1 all the way across a row. Then, reverse the sequence for the next row.
-
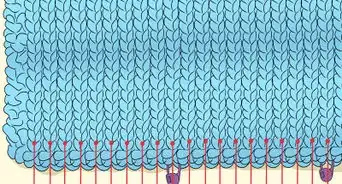
2Cast off when you are finished with your project. Once you are done knitting, you will need to cast off or bind off your last row. To do this left-handed, hold the needle with the stitches in it in your right hand. Then, knit the first 2 stitches so they are on the left-hand needle. Use the right-hand needle to lift the first knit stitch over the second knit stitch. Then, knit 1 and lift the new first stitch over the stitch you just knit.
- Continue to do this to the end of the row.
-
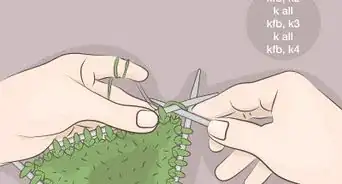
3Follow the pattern’s instructions for the stitch sequence. Most patterns are written in a way that it does not matter which hand is your dominant hand. However, if you do encounter instructions meant for right-handed knitters, simply reverse them. Focus on knitting pattern’s stitch sequence instructions and change any mention of right or left needles to its opposite.
- Try watching left-handed video tutorials and following left-handed patterns until you get the hang of reversing a right-handed pattern’s instructions.


Community Q&A
-
QuestionHow do I knit Fair Isle left handed?
 Community AnswerIt's really easier to see this on a video. Check it out on Youtube.
 -
QuestionHow do I close a stitch?
 Community AnswerYou can close a stitch using a slip stitch. If you're unsure of how to do this, I suggest reading wikiHow's article on slip stitching.
 -
QuestionHow do I make a left-leaning decrease when knitting left-handed?Community AnswerSkip crocheting one stitch in each row.
Warnings
- Don't try to knit for the first time using furry or "eyelash" yarn! Although it's pretty, it is a lot harder to see what you're doing.⧼thumbs_response⧽
Things You'll Need
- Knitting needles
- Yarn
- Pattern or knitting book (optional)
References
- ↑ https://www.craftyarncouncil.com/knit_diagrams.html
- ↑ https://www.craftyarncouncil.com/knit_diagrams.html
- ↑ https://www.craftyarncouncil.com/knit_diagrams.html
- ↑ https://www.craftyarncouncil.com/knit_diagrams.html
- ↑ https://www.youtube.com/watch?v=OhiKp9Y7cgM&feature=youtu.be&t=175
- ↑ https://www.youtube.com/watch?v=OhiKp9Y7cgM&feature=youtu.be&t=220
- ↑ https://www.craftyarncouncil.com/knit_diagrams.html
- ↑ https://www.craftyarncouncil.com/knit_diagrams.html
- ↑ https://www.craftyarncouncil.com/knit_diagrams.html
About This Article