This article was co-authored by Jen Webber and by wikiHow staff writer, Jessica Gibson. Jen Webber is a Knitting Specialist and the Manager of The Quarter Stitch, a crafting store based in the French Quarter of New Orleans, Louisiana. With over 17 years of knitting and crafting experience, Jen helps educate customers and the public on best knitting practices for their DIY projects.
This article has been viewed 423,542 times.
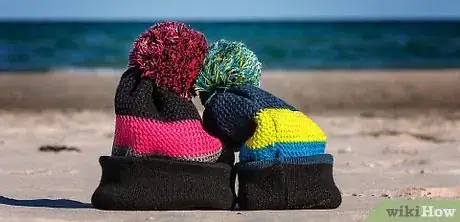
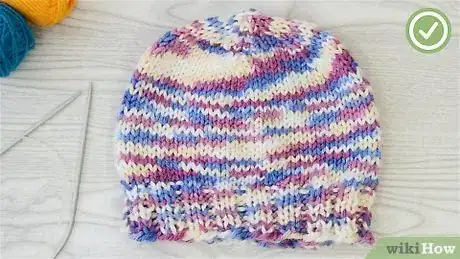
Beanies are a great project for new knitters since they work up fast and you only need a few basic skills. You might see patterns that call for knitting the hat on double-pointed needles, but these can be tricky if you're still learning. Instead, use long circular needles to knit in the round so you never have to switch to the straight ones. Making a beanie is good knitting practice and you'll have a custom hat when you're done.
Steps
Casting On
-
1Choose a small or large size for your beanie. For the best fit, wrap a flexible measuring tape around the widest part of your head and write down the measurement. Then, choose 1 of these beanie sizes that most closely matches your measurement:[1]
- Small: 20 1⁄2 in (52 cm) circumference
- Large: 23 1⁄4 in (59 cm) circumference
-
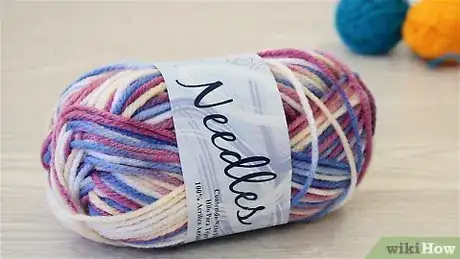
2Buy 1 skein of bulky weight yarn. Pick bulky weight yarn in any color you like and pull 10 inches (25 cm) away from 1 end. Choose a comfortable yarn that washes easily. For example, pick bulky (#5) yarn made from cotton, acrylics, or wool blends.[2]
- You'll use 2.63 ounces (75 g) of yarn for the small hat or 3.44 (97 g) for the large size.
- This beanie is a great project if you'd like to use up some of your yarn stash since you won't be using the entire skein of yarn.
Advertisement -
3Make a slip knot. Take the yarn that you pulled out and twist the end into a loop that crosses over itself with the tail on top. Pinch the tail end with 1 of your hands and slide the index and thumb of your other hand under the loop. Pinch the working yarn with these fingers and pull it through the loop to form the slip knot.[3]
- If you're unsure whether or not you've made a slip knot, keep pulling. The knot will come undone if you've successfully made a slip knot. If the knot tightens and doesn't come loose, you didn't make a slip knot.
-
4Slide the knot onto US 10 1/2 (6.5 mm) needles and cast on 72 or 80 stitches. Take your slip knot and place it on 1 of the circular needles. Then, pull on the yarn tail to tighten the knot around the needle. If you're making a small beanie, cast on 72 stitches or cast on 80 stitches for a large beanie.[4]
- Keep in mind that circular needles are usually easier for beginning knitters than juggling 4 or 5 double-pointed needles.
- Choose circular needles that are 47 inches (120 cm) long. While this might seem really big, the length allows you to bend them so you can make a magic loop. This way, you don't have to use double-pointed needles at all!
Knitting the Body
-
1Bend the cable in half to divide the stitches between your needles. Slide all of the stitches to the cable that stretches between the needles and find the middle point. Bend the cable so half of the stitches are on 1 side while the other half are on the opposite side. Then, slide the stitches onto the needles.[5]
- This is called the magic loop method and it's the simplest way for beginners to work projects in the round. This is because you don't have to switch to double-pointed needles at any point.
- For example, if you're making the small size, slide 36 stitches onto each needle. To make the large size, push 40 stitches onto each needle.
-
2Pull out the working needle and use it to knit 1 (K1) and join the round. To start working your first round, turn the needles so they're horizontal and hold the needle with the working yarn at the back so it's farther away from you. Slowly pull the back needle away from the stitches and bring it towards you. Insert the tip of this needle into the other needle and make 1 knit stitch.[6]
- To make it easier to count rounds, you can slip a stitch marker onto this first stitch. Then, move the marker whenever you reach the end of a round.
- Before you knit the stitch to join the round, check that the working yarn is over the cable and not under it.
-
3Knit 2 stitches and purl 2 (P2) stitches across 1 round to start the edge. Once you've made K2, P2 across all the stitches on 1 needle, turn the work so you can K2, P2, along all of the stitches on the other needle. This completes 1 round in a ribbed stitch.[7]
- If you'd like narrower ribbing, work K1, P1 for all of the stitches instead of K2, P2.
-
4Work the ribbed stitch for 6 rounds. To make the bottom edge or brim of the beanie, continue to knit 2 (K2), purl 2 (P2) across each round. Work 6 rounds so you can see the ribbed pattern.[8]
- It can help to keep a tally on a sheet of paper so you can keep track of how many rounds you've made. You can also find stitch or round counters at craft supply stores. Every time you finish a round, adjust the dial to advance the number so you can always see which round you're working.
-
5Knit every stitch until the beanie is 6 3⁄4 or 7 in (17 or 18 cm) long. Once you've finished the ribbed edge, knit each of the stitches on both of the needles. This makes the garter stitch, which is what you'll use to make the body of the hat. Work the garter stitch until the ribbing and body of the beanie measure 6 3⁄4 inches (17 cm) long for a small or 7 inches (18 cm) long for a large.[9]
- To measure, place the end of a ruler at your cast-on edge and measure the length of your knitted fabric.
- If you want the beanie to be slouchy, knit an extra 1 to 2 inches (2.5 to 5.1 cm).
Decreasing the Crown
-
1Work a decreasing row once you're ready to shape the crown. After you've made the body, gradually make the rows smaller as you come to the top of the hat. To start decreasing the large hat, knit 6 stitches. Insert your needle through the next 2 stitches and knit them as 1 to make a K2TOG stitch. Then, slip 2 stitches onto the right needle, insert the left needle through them, and make 1 slip slip knit (SSK) stitch. Knit 6 stitches and repeat the pattern until you reach the end of the round.[10]
- The decreasing repeating pattern looks like this:
- K6, K2TOG, SSK, K6
- If you're making the smaller hat, you don't need to work as many stitches, so follow this repeating pattern:
- K4, K2TOG, SSK, K4
- The decreasing repeating pattern looks like this:
-
2Knit every stitch for the next even round. Once you've made an odd decreasing round, make a knit stitch for each stitch on both of your needles. This way, your beanie gradually tapers towards the top.[11]
-
3Continue to alternate decreasing rounds with knit rounds. Every time you work an odd decreasing round, reduce the stitch count by 1. For example, if you had K4 at the start of the previous round, K3 for the next decreasing round. Remember to knit all of the stitches for even rounds.[12]
- When you reach the top of the hat, you won't have many stitches left to work. For example, your last odd row has you K2TOG and SSK while the last row just has you K2TOG.
-
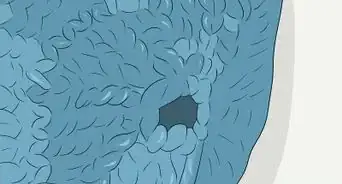
4Thread the yarn tail and pull it through the remaining stitch. Cut the yarn to leave a 10 in (25 cm) tail and thread it through the eye of a tapestry or darning needle. Slide the needle through the stitch that's left on your needle.[13]
- At this point, you don't need the circular needles since your beanie is off of them.
-
5Pull the yarn tightly and make a knot on the inside of the crown. Pull the yarn to make the crown of the beanie gather. Then, sew back and forth over the top at least 2 times before you push the needle to the inside of the hat. Make a simple knot in the yarn inside the hat and trim the thread close to the knot.[14]
- You don't need to weave in the excess yarn since the knot and tiny tail are completely hidden.
-
6Weave in the tail near the edge of the beanie to finish your hat. Thread the yarn tail from where you started through the eye of the tapestry or darning needle. Then, weave the tail into the stitch that's near the base. Sew back and forth at least 2 times to secure the tail to the hat and trim off the excess yarn.[15]
- Although most beanies don't have pom poms on top, feel free to make a soft pom pom with a long yarn tail. Use the tail to attach the pom pom to the crown of the hat and sew it to the inside of the hat.
Expert Q&A
Did you know you can get expert answers for this article?
Unlock expert answers by supporting wikiHow
-
QuestionIs it hard to knit a beanie?
 Jen WebberJen Webber is a Knitting Specialist and the Manager of The Quarter Stitch, a crafting store based in the French Quarter of New Orleans, Louisiana. With over 17 years of knitting and crafting experience, Jen helps educate customers and the public on best knitting practices for their DIY projects.
Knitting Specialist It does help to have some knitting under your belt before you take on a project like knitting a hat. For most of the hat, you'll use a circular needle, but then when you get to the top, you need to switch over to double pointed needles. That looks daunting, but the extra needles are really just holding the stitches.
 -
QuestionHow do I knit a hat with only two needles?
 Community AnswerYou would have to use a pattern that is not in the round, and stitch it together afterwards.
 -
QuestionI finished knitting my hat, it is small and I need to make it bigger without starting again. Can I do this?
 Eye of the ligerCommunity AnswerI'm very sorry to disappoint you, but that's impossible. Maybe you could give the hat to a child you know-a nephew or cousin. Then you can make a new hat for yourself.
Things You'll Need
- 1 skein of bulky weight yarn
- Size 10 1/2 (6.5 mm) circular needles that are 47 inches (120 cm) long
- Yarn needle
- Scissors
- Ruler
References
- ↑ http://stitcheryprojects.com/2014/02/04/basic-bulky-beanie-hat/
- ↑ http://stitcheryprojects.com/2014/02/04/basic-bulky-beanie-hat/
- ↑ http://stitcheryprojects.com/2014/02/04/basic-bulky-beanie-hat/
- ↑ http://stitcheryprojects.com/2014/02/04/basic-bulky-beanie-hat/
- ↑ https://youtu.be/xTuEDtGmOUE?t=299
- ↑ https://youtu.be/xTuEDtGmOUE?t=375
- ↑ http://stitcheryprojects.com/2014/02/04/basic-bulky-beanie-hat/
- ↑ http://stitcheryprojects.com/2014/02/04/basic-bulky-beanie-hat/
- ↑ http://stitcheryprojects.com/2014/02/04/basic-bulky-beanie-hat/
- ↑ http://stitcheryprojects.com/2014/02/04/basic-bulky-beanie-hat/
- ↑ http://stitcheryprojects.com/2014/02/04/basic-bulky-beanie-hat/
- ↑ http://stitcheryprojects.com/2014/02/04/basic-bulky-beanie-hat/
- ↑ https://youtu.be/xTuEDtGmOUE?t=1918
- ↑ https://youtu.be/xTuEDtGmOUE?t=1969
- ↑ http://stitcheryprojects.com/2014/02/04/basic-bulky-beanie-hat/
About This Article
To knit a beanie, start by casting 80 stitches of medium-weight worsted yarn onto size 8 circular needles and placing a stitch marker at the end of the row. Then, knit 10 rows in a “knit 2, purl 2” pattern to create the brim of the hat. Next, alternate pure knit stitches and purl stitches in each row until the hat is about 10 inches long. Finally, narrow the hat at the top by knitting 2 stitches together in a single stitch until the top is closed and pulling the yarn tight. For tips on how to create a slouchier beanie, read on!
