wikiHow is a “wiki,” similar to Wikipedia, which means that many of our articles are co-written by multiple authors. To create this article, 42 people, some anonymous, worked to edit and improve it over time.
wikiHow marks an article as reader-approved once it receives enough positive feedback. In this case, 86% of readers who voted found the article helpful, earning it our reader-approved status.
This article has been viewed 969,678 times.
Learn more...
Air mattresses are a convenient, easy to store, and flexible item to have when company shows up to spend the night. Even a tiny leak will leave the sleeper flat on the floor by morning. Finding leaks can be like looking for a needle in a haystack, though manufacturers have several methods to troubleshoot finding a leak. Consider inspecting the valves first, as this method is most likely to reveal the problem. If that doesn't work, try one of the other methods.
Steps
Inspecting the Valves
-
1Remove sheets and bedding from the air mattress. You won't be able to see holes or tears in the mattress with the bedding on.
- Move the bedding to a safe place, away from the area where you will look for leaks so that its out of the way.
-
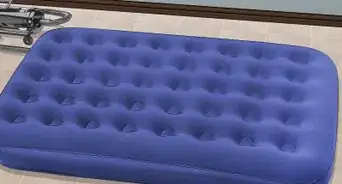
2Move the air mattress to a place where you have room to maneuver. You will need to be able to walk around the mattress, flip it, and inflate it.
- If you are camping it is a good idea to do this inside a tent away from breezes and noise.
- Make sure you have adequate light. You will need to be able to see well enough to look for holes.
Advertisement -
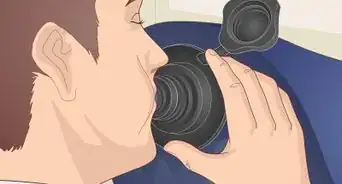
3Fill it as much as you can with air, without risking the mattress bursting. Air mattresses are not designed to be filled with high pressure sources such as air compressors.
- You can use your breath or an air pump to inflate the mattress. Many air mattresses come with these to aid in inflation.
- Do not overinflate your mattress. Most manufacturers warn that this can cause a mattress to burst.
-
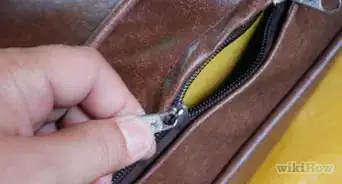
4Inspect the valve. It is a good idea to do this before inspecting the rest of the mattress, because the valve is a common source of leaks. Doing this first can save you a lot of time rather than searching for leaks using other methods since valves are a main source of leaks. [1]
- Make sure that the valve plug is completely inserted into the valve stem.
- For double locking valves, make sure that the valve stem has been completely pressed against the stop behind it.
- If there is a problem with the valve, it is unlikely to be able to be patched. However, if the valve plug won't seal against the valve stem you can try inserting a thin piece of plastic for a quick fix.
- If the valve plug is completely inserted into the valve stem, and the valve stem is completely pressed into the stop behind it, you are ready to look for a leak in the mattress itself.


Using The Dish Soap Method
-
1Add a little liquid dish soap to a spray bottle of warm water. Mix thoroughly to ensure that you can get an even amount of soap across the whole mattress.[2]
- If you don't have a spray bottle, you can use a soapy wet rag.
- A sponge wetted with soapy water or bubble soap will also work for this method.
-
2Spray or wipe around the valve first. Escaping air will cause bubbles to form on the surface. Make sure your mattress is fully inflated.
- Always check the valve area first with any method, as the valves are a common source of leaks.
- If you see bubbles near the valve, inspect it to make sure it is sealing properly.
-
3Spray the surface of the mattress systematically. Start with the seams, followed by the rest of the fabric. [3]
- The leak will reveal itself with soap bubbles.
- Don't worry about getting soap on the mattress. This can be wiped off later and the mattress will dry.
-
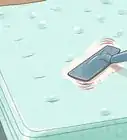
4Mark the leak with a permanent marker once you locate it. Permanent marker will not bleed on the wet surface of the mattress.[4]
- You might find it easier to mark the mattress if you use a towel to dry the area first.
- You can also use a piece of duct tape or felt marker to make your mark more clear once the mattress is dry.
-
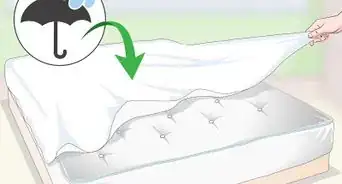
5Dry the mattress in direct sunlight or in the wind for an hour or two. The seams will take the longest to dry.[5]
- If you don't dry a mattress before storing it, mold or mildew can form. It is important to make sure it is 100% dry before you put it away.
- Before you can use any kind of adhesive patch to repair your mattress, it must be 100% dry.


Inspecting the Air Mattress
-
1Inspect the air mattress visually. You should do this with the mattress still fully inflated.[6]
- Even a pinhole can become visible when a mattress is inflated.
- Do this in an area where you have plenty of light.
- Do this systematically. First, inspect the top of the mattress, then the sides, than the underside.
- Make sure you visually inspect the seams of the mattress, as this is a common area for tears.
-
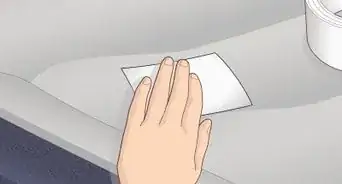
2Move the palm of your hand slowly along the surface of the mattress. Often, you may feel the escaping air "brush" against your skin. [7]
- You can wet your hand with cold water first. Escaping air will increase the evaporation rate from your skin and make it feel colder.
- Pass your hand slowly along the surface of the mattress. If you move too quickly, you might not pick up on the subtle sensation of escaping air.
-
3Apply pressure to the mattress with your hand and listen for leaks. Move your head along the surface with your ear near the mattress.[8]
- Your ear is more sensitive to feeling escaping air. Escaping air will also make a hissing sound.
- Listening for escaping air is more effective in finding large holes or leaks rather than small ones.
- Listen especially carefully around the seams of the mattress, as this is the most common area for leaks.
-
4Mark the leak with a pen or piece of tape. You will then be able to locate the leak when you go to patch it.
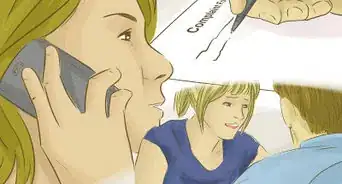
- Some manufacturers will provide instructions on how to patch a leak. Others will ask that you send the mattress to them for repair.
- Don't attempt to patch your mattress without proper instructions from the manufacturer. Different materials may require different methods.
- Once you locate one leak, inspect the rest of the mattress. There may be more than one hole or tear contributing to the problem.


Submerging Your Mattress
-
1Check the label of your air mattress. Some manufacturers recommend that you do not submerge their products.[9]
- Submerging an air mattress puts it into contact with a lot of water. Fabric may become saturated.
- Once an air mattress is saturated with water, seams may begin to deteriorate. Protective coating on synthetic fabrics may also begin to separate from the fabric.
-
2Partially inflate the mattress with air. If it is not at least partially inflated, you you not be able to see air escaping under water.
- Fully inflating the mattress may make it very difficult to submerge in a pool or bathtub.
-
3Submerge the valve stem in a pool or bathtub filled with water with the valve closed. Apply pressure around the valve stem. [10]
- See if you can force any air out of the valve.
- Escaping air will cause a stream of bubbles to form around the leak. Look for these around the valve as you apply pressure.
- Submerge parts of the fabric under the water. Look for bubbles, indicating escaping air from a leak.[11]
- Do this in sections. Looking at a smaller area is easier than trying to find leaks in the whole mattress at one time.
- Pay close attention to the areas around the seams. Seams are a common area for holes and tears to occur.
- Mark the leak with a permanent marker once you find the source. Permanent marker is less likely to bleed on a wet surface. [12]
- You can partially dry the area around the leak with a towel to aid in marking the leak.
- Once the mattress is dry you can make your mark more clear by placing duct tape or a larger mark near the leak.
-
4Dry the mattress in direct sunlight or in the wind for an hour or two. The seams will take the longest to dry.[13]
- If you don't dry a mattress before storing it, mold or mildew can form. It is important to make sure it is 100% dry before you put it away.
- Before you can use any kind of adhesive patch to repair your mattress, it must be 100% dry.


Using the Garden Hose Method
-
1Use an outdoor table to do this method. If your table is wooden, cover it with a blanket, newspapers, or a vinyl tablecloth.
- It can be a nuisance to get a wood table too wet. This method requires the use of a hose and a good deal of water.
- You can also use a deck or patio to do this method. If you are working on a wood surface, make sure it is covered.
-
2Hook up a garden hose and "flood" the area around the valve with water. Move slowly, as a leak could only be visible for a few seconds.
- Concentrating on looking for bubbles where the water is running.
- Bubbles escaping around the valve area can indicate there is a leak in the valve. Inspect the valve to make sure it is sealed properly.
-
3Flood the rest of the surface of the mattress with water. Use a small stream of water and work slowly.
- Concentrate on looking for streams of bubbles escaping from a leak in the mattress.
- Look closely around the seams for bubbles. This indicates escaping air and seams are common sites of tears and holes.
-
4Mark the leak with a permanent marker once you find the source. Permanent marker is less likely to bleed on a wet surface. [14]
- You can partially dry the area around the leak with a towel to aid in marking the leak.
- Once the mattress is dry you can make your mark more clear by placing duct tape or a larger mark near the leak.
-
5Dry the mattress in direct sunlight or in the wind for an hour or two. The seams will take the longest to dry.[15]
- If you don't dry a mattress before storing it, mold or mildew can form. It is important to make sure it is 100% dry before you put it away.
- Before you can use any kind of adhesive patch to repair your mattress, it must be 100% dry.


Our Most Loved Articles & Quizzes


Community Q&A
-
QuestionWhat if I can't find the leak?
 Community AnswerUse a thin, light plastic attached to a stick or hanger. Cut the plastic into thin strips away from the stick or hanger (the thinner the better, but not too long or short). Move it across an inflated mattress and the hole will be revealed when a strip blows away from the mattress.
 -
QuestionHow can I repair the leak around the edge of the air valve?
 Community AnswerA thick, well-applied layer of duct tape should do the trick.
 -
QuestionHow do I find a leakage in an electric pump built-in on an air mattress?Community AnswerFully inflate the mattress. Bundle the cord in a tight, flat package with rubber bands and tape in place over the connection or stow it away in the recession provided. Use lightweight Saran Wrap and typical desk tape to install an airtight patch over the entire area. The plastic wrap bubble will be loose and it will be possible to press out excess air before putting on the last section of tape. Be sure to lightly burnish the tape with a fingernail to close any gaps. Any leak will at least fill out the looseness or slack in the plastic patch.
Warnings
- Don't put water inside of an air mattress. There is no way you will be able to dry it out before mold starts.⧼thumbs_response⧽
- Do not set the mattress on a pointed object while viewing.⧼thumbs_response⧽
- Make sure the mattress is 100% dry before you store it to prevent mold and mildew growth.⧼thumbs_response⧽
- Do not over-inflate the air mattress. It may burst.⧼thumbs_response⧽
Things You'll Need
- Soapy water solution.
- Spray bottle.
- Garden hose with water.
- Outdoor table or surface to work on.


References
- ↑ http://www.campetent.com/air-mattress-leak.html
- ↑ http://www.campetent.com/air-mattress-leak.html
- ↑ http://www.campetent.com/air-mattress-leak.html
- ↑ http://www.campetent.com/air-mattress-leak.html
- ↑ http://www.campetent.com/air-mattress-leak.html
- ↑ http://www.campetent.com/air-mattress-leak.html
- ↑ http://www.campetent.com/air-mattress-leak.html
- ↑ http://www.campetent.com/air-mattress-leak.html
- ↑ http://www.campetent.com/air-mattress-leak.html
About This Article
Before you try to locate a leak in an air mattress, inflate it as much as you can and inspect the valve to see if it's damaged since a broken valve is a common source of leaks. If the valve looks fine, try spraying the air mattress with warm, soapy water and looking for bubbles created by air escaping the mattress. Carefully check the entire mattress, including the seams, and continue spraying it until you find a leak. To learn how to use a garden hose to find the leak in your air mattress, keep reading!