This article was co-authored by wikiHow Staff. Our trained team of editors and researchers validate articles for accuracy and comprehensiveness. wikiHow's Content Management Team carefully monitors the work from our editorial staff to ensure that each article is backed by trusted research and meets our high quality standards.
There are 15 references cited in this article, which can be found at the bottom of the page.
This article has been viewed 69,180 times.
Learn more...
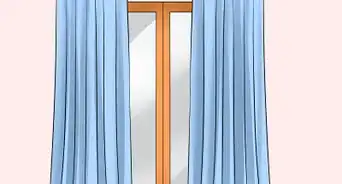
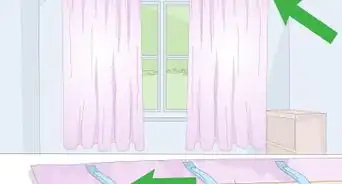
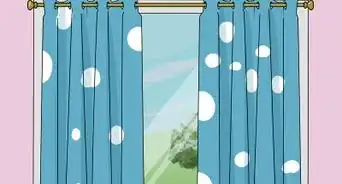
Blinds make for great window coverings and decorations, but store-bought ones can be expensive. Save money by making your own at home. You can make a basic blind by sewing together fabric and fabric lining. To roll up the blinds, repurpose parts from old store-bought ones or sew dowel rods onto the fabric. Put the finished blinds on the wall for a functional and decorative way to enhance any room.
Steps
Cutting and Sewing Fabric
-
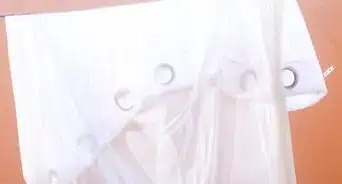
1Measure the length and width of the window you plan on covering. Use a tape measure to take the measurements, then write them down so you have them for later. Remember to measure around the window frame instead of the glass. The material needs to be bigger than the actual window to cover it up.
- If you’re planning on mounting the blinds outside of the window, measure the entire area you want the blinds to cover. They have to be a little longer than inside-mounted blinds to overlap the entire window.
- If you’re planning on covering multiple windows, take measurements for each one.
-
2Get patterned fabric to fit over the blinds. The fabric will cover the blinds, so choose a pattern you like. Pick something with a double-sided pattern or sew pieces of fabric together so the front and back both look appealing. Fabrics that are 100% cotton or a cotton and polyester blend work best for this project. Once you have a good piece of fabric to work with, spread it to press out the wrinkles.
- Canvas and decorative cotton are a few good choices for blinds. Stiffer fabric rolls up better. If you wish to use a softer material, layer it over something like lining fabric.
- Visit craft stores to see what kinds of fabrics they have available or look online to find different patterns. Craft stores also carry most of the other supplies you need.
Advertisement -
3Measure the fabric to the size you need for your window. The fabric actually has to be a little longer than your measurement to account for the hems you add later. Add an extra 2 in (5.1 cm) to the fabric’s length and width to account for this. Mark the final dimensions on the fabric with a pencil. This cut of fabric is all you need for a basic blind that hangs flat against a traditional blind headrail.[1]
- Keep in mind that the length depends on how you plan on hanging the blind. Cut the blinds about 12 in (30 cm) longer if you're going to attach them to rollers instead of flat headrails. Leave them about 2 in (5.1 cm) wider than the window to account for the hem.
- Factor in an extra 2 in (5.1 cm) to the length if you plan on making a top hem. Add another 1⁄2 in (1.3 cm) if you’re going to staple the blind to a mounting board.
- For example, if you have a 72 in (180 cm)-long window, the fabric needs to be at least 74 in (190 cm) long to fit well on a blind headrail. Make it 84 in (210 cm) if you’re using a roller instead.
-
4Cut the fabric with a sharp pair of scissors. After transferring the window measurements to the fabric, trim away any excess. The cutting process is trickier than you think since one slip could throw off your entire blind. Work slowly, cutting in straight lines to keep the fabric looking as even as possible.[2]
- Remember that any creases and wrinkles could throw off your measurements. Make sure you iron them out if you notice any before you cut.
-
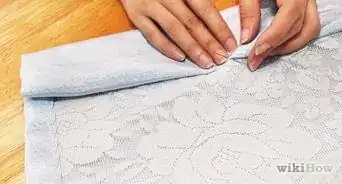
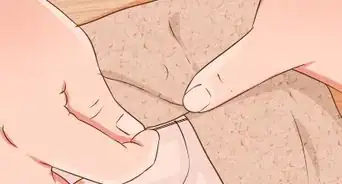
5Fold the sides of the fabric to create 1 in (2.5 cm) hems. Lay the fabric flat with the front side face down. Pick up the fabric on one of the longer ends, fold it over by 1⁄2 in (1.3 cm), and then fold it over again. Crease it to flatten it on top of the fabric. Repeat the process on the opposite side of the fabric to create the second hem.
- Make sure you’re working on the left and right sides of the blind. These hems go on the longer sides of the fabric.
-
6Sew the hems in place using a needle and thread. Put some pins through the hem in order to fasten it tightly against the fabric. To make the hems stronger, sew them in place with zigzag stitch. This kind of stitch not only prevents the hem from fraying, but it adds a little more artistry to your finished blinds. If you’re not worried about that, you can finish it with a straight stitch or another alternative.
- You could use a sewing machine if you have one. Another option is to stick the fabric together with hemming tape if you don’t like sewing.
- If you’re using hemming tape, fold the fabric on top of it and iron the hem to secure it. Hemming tape isn’t as durable as sewn hems and can come undone in the wash.
-
7Fold and sew the bottom hem to protect the fabric from damage. The bottom hem is a little bigger than the side ones. To make it, fold the fabric up by 1⁄2 in (1.3 cm) first and press it flat. Then, fold it up by another 1 1⁄2 in (3.8 cm). After flattening it, sew it to secure it in place.[3]
- You could also add another piece of hemming tape if you don’t wish to sew.
- If you’re making your own hanging mechanism, consider wrapping a piece of 1 in × 2 in (2.5 cm × 5.1 cm) wood in the hem. It needs to be as long as the blind is wide. Use craft glue to secure it.


Using Existing Blinds
-
1Get regular blinds that are the same size as the ones you are making. The hardest part of making blinds is hanging them, but there is an easy way to get around that problem. You can take advantage of the headrail or roller from an existing set of blinds. The headrail attaches to the wall through a couple of brackets that fasten with screws. If you have used blinds before, you may even have one ready to repurpose.
- You can use old blinds if you have them or get new ones. Try looking for some mini blinds that fit your window. Cheap ones are available at most hardware stores.
-
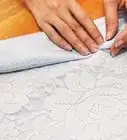
2Glue the headrail to the back of the fabric. Leave the blinds whole for now, setting them face up on the table. Spread a line of bottled craft glue across the front side of the headrail. As soon as you are done, pick up the headrail, taking care not to smear the glue. Line up the headrail with the top edge of the fabric before pressing it in place.[4]
- The glue dries quickly, so be sure to attach the headrail to the fabric right away.
- If you don’t have a good headrail, try using a piece of 1 in × 2 in (2.5 cm × 5.1 cm) wood that is as long as the fabric is wide. Wrap it up in the fabric to create another seam. Keep in mind that the fabric needs to be cut another 2 in (5.1 cm) longer than normal for the additional hem.
- If you make your own headrail out of wood, attach it to the wall or a headrail board on the wall. Another option is to fit it inside the brackets of an open headrail, if possible.
-
3Flip the blinds over to find the cords holding the slats together. Turn the blinds over with caution, keeping the fabric pressed up against the headrail. On the backside, look for 2 different types of cords. The one you need is a thinner cord with smaller connectors running to each slat, similar to a ladder. Pull the cord up to check for the connecting strings that tie to the holes in each slat.[5]
- The thicker cords running down the length of the blinds are pull cords. You don’t need to cut them, so separate them from the ladder cords.
-
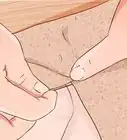
4Cut the ladder cord free from each of the slats. Spread the slats to find where the cord connects to each one. Use a sharp pair of scissors to cut the small connecting ladders binding the cord to the slats. You will need to do this for each slat, which takes some time, but make sure you free all of them. Pull the cord away when you’re done.[6]
- Some blinds can have as many as 3 of these smaller ladder cords, so check your blinds thoroughly. Remove all of them.
-
5Pull the caps off of the bottom bar to remove it. Look for a round, white cap in the center of the lower bar on the blinds. The pull cord attaches to it, so untie the cord. Once you have it free from the cord, nothing will be holding the bottom bar in place. Set the cap and bar aside.[7]
- Without the cap and bottom bar serving as an anchor, nothing holds the blinds in place. Keep in mind that they will slide right off if you lift the blinds at all.
-
6Remove most of the slats and space the remaining ones out evenly. The number of slats you leave in place depends on the length of your blind. Generally, 5 slats are enough, but you can adjust this to change how your blinds fold up. Measure out the positioning using a ruler or tape measure, then slide the other blinds into position on the fabric. Keep them well-spaced so your blind rolls up smoothly later.[8]
- For example, if your fabric is 70 in (180 cm) long, position 5 1 in (2.5 cm)-wide slats 10 in (25 cm) from one another.
- Start from the bottom when adding slats. If you’re positioning slats 10 in (25 cm) apart, set the first slat 10 in (25 cm) above the bottom edge of the fabric.
-
7Glue the slats to the fabric using craft glue. Start with the top slat and stand it on one edge as you add the glue. Slather a line of glue all the way across the slat, avoiding the pull cords still attached to it. Repeat this with the remaining slats to stick them in place. Press each slat down firmly against the fabric before you’re finished to ensure they stay put.[9]
- If you glue the pull cords to the fabric, you won’t be able to roll up the blind later. Take care to avoid getting any glue on them.
-
8Replace the bottom bar and tie the pull cords to its caps. Slide the bar back into place, slipping the ends of the cords through its holes. Tie a knot on the end of each cord to keep it from falling out of place. When you’re done, push the caps back onto the bar to cover the holes and prevent the knotted cords from coming out.
-
9Glue the fabric to the bottom bar to complete the blind. Stand the bottom bar up on its side to protect the hem from fraying while you’re using the blind. Spread another bead of craft glue across its length, then push the fabric to its underside. Hold it there for up to 10 minutes to give the glue plenty of time to dry.[10]
- The bottom bar gives the blind some weight so it’s easy to pull down and roll back up. It’s worth adding a piece of wood there if you don’t have one to repurpose from old blinds.
-
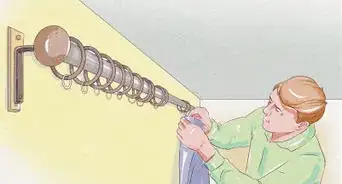
10Hang the headrail on the wall using mounting brackets. Most store-bought blinds come with the brackets you need to hang them. If you don’t already have brackets in place, use some 2 in (5.1 cm) wood or drywall screws to attach them to the wall. Position the brackets above the window or window frame. When you’re done, push the headrail into the mounting clips on the bracket to hang and enjoy your new blinds.[11]
- The way you mount the blinds may vary a little depending on whether they are inside or outside-mounted.
- For stability, screw the brackets to the support beams in the wall. Use a stud finder that beeps when it passes over the beams.
- If you need mounting brackets or screws, shop online or visit a hardware store.


Making Blinds From Scratch
-
1Mark spots to place wood dowels to hang up the blind. Cut the fabric and hem it like you normally would, then flip it over. Measure up 8 to 12 in (20 to 30 cm) from the bottom of the blind and mark the spot with a fabric marker. Do this 4 more times, spacing the marks out evenly along the length of the blind. These spaces will allow the blind to fold up when it’s on the wall, so keep the spaces nice and even.[12]
- Measure the length of the blind first if you need to in order to space the marks evenly. You could make room for an extra dowel if your blind is very long or remove one if it is short.
- You can leave extra space on the top of the blind. It doesn’t have to be the exact same size as the other spaces you measured since that part will be used to hang the blind.
-
2Cut strips of fabric to make pockets for the dowels. Measure the distance between the left and right hem on the fabric, then begin cutting strips to the same length. Use fabric lining to make sturdier pockets, although regular fabric is fine too if you have some to spare. You will need a strip for each dowel. Cut them about 2 in (5.1 cm)-wide for pockets that fit most dowels.[13]
- You can adjust the size of the pockets as needed to fit the dowels you plan on using. A 2 in (5.1 cm)-wide pocket is generally fine, although you could get the dowels ahead of time and adjust for them.
-
3Tape the fabric strips to the blind fabric to form the pockets. The easiest way to make the pockets is with long pieces of hemming tape. Set the tape on the fabric strips and use an iron to get them to stick. Then, spread the strips out along the width of the blind according to the marks you made. Work carefully to iron the long edges of the fabric, leaving the shorter ends open to form the pockets.[14]
- You could also stitch each strip to the fabric. It works better if you backed the fabric with lining since that prevents the stitching from showing on the front side of the blind.
- If you attached a liner to the back of the fabric, try turning the blind inside out. Secure the strips and dowels, then turn the blind inside-out to hide them.
-
4Insert dowels into all of the pockets you created. Get 3⁄4 in (1.9 cm) wood dowels that are the same length as the pockets you made. Simply slide a dowel into each of the pockets to create the support system for your blind. The dowels are a simple, easy way to string up custom blinds. Keep them well-hidden in the pockets so they don’t mess up the overall appearance of your new blind.[15]
- If you’re not a big fan of sewing, you could glue wooden strips to the back of the blind. You don’t even need to iron on pockets if you don’t want them, although they are still useful for hiding the supports.
- Most craft stores sell dowels and the other supplies to finish the blinds. Check online if you can’t find what you need.
-
5Install the blinds over the window using wood or a headrail. If you don’t have a headrail from another set of blinds, install a wood header above the window. Get a 1 in × 2 in (2.5 cm × 5.1 cm) piece of wood that spans across the window. Then, install it in place with some 2 in (5.1 cm) drywall screws. Add the screws about every 12 in (30 cm) across the center of the wood.[16]
- This installation is meant for outside-mounted blinds. For inside-mounts, attach a small wood board to the upper edge of the window frame if it will support it.
- Remember to attach the board to the support beams in the wall for stability. The weight of the blinds could cause it to fall off if it isn’t firmly anchored to the wall.
-
6Staple the blind against the top of the board. Wrap the top edge of the blind over the board you installed. That will wrap about 1⁄2 in (1.3 cm) of fabric over the board. Then, use a staple gun to easily secure the fabric to the wood. Space the staples out about every 2 in (5.1 cm) to keep the blind well-secured whenever you need to roll it up.[17]
- Another way to do this is by making a hem by rolling a board in the fabric. Glue it in place, then screw the board to the wall. You won’t need to add a separate board to hang the blind.
-
7Attach eye screws to the underside of the wood. Position the eye screws about 2 in (5.1 cm) from the ends of the wood board. Twist them clockwise by hand until they’re all the way into the wood. Then, position an extra eye screw directly in the center of the wood. It will be an even distance from the other screws.[18]
- You could add more screws for extra stability if you think you will need them to support large or heavy blinds. Try spacing the screws out evenly, such as 10 in (25 cm) apart from one another.
-
8Position eye screws through each dowel on the blinds. The eye screws serve as a way to string up the blinds, but you need to add them to each individual dowel or slat. Keep the eye screws level with the ones you installed on the headrail. It’s slow work, but get them all set up so your blind rises and falls with the smoothness of any store-bought one.[19]
- Turn these eye screws so the heads are positioned horizontally. That means the openings face the top and bottom of the blind so you are able to run cords through them.
- Another option is to sew plastic rings onto the dowel pockets you made. If you hid the pockets inside the lining of the blind, you will need to add rings this way to string up the blinds.
-
9Tie cords through each column of eye screws to lift the blinds. You will need to cut a separate length of cord for each column of eye screws you set up. Run the cord from the top of the blind to the bottom, knotting it on the bottom eye screw. Keep in mind that the cords need to be about 1 1⁄2 in (3.8 cm) times longer than the blinds, although this will vary depending on how you mount them. When you’re done, cut the excess length off.[20]
- Run all of the cords through the top eye screws and to the right. The cord on the left will go through all of the eye screws you have there. Let the cords hang from the side of the blind or install an extra eye screw beneath the headrail to hold them.
- The length of cord you need will depend on the length of your blinds and how long you want the pull cord to be. If you’re unsure, keep the cords long at first and cut away the excess later.
- You can buy replacement pull cords or a cord roll. Check online or at hardware stores.
-
10Hang a metal cleat on the wall to hold the pull cord. A metal cleat is like a wall rack for the cord to keep blinds positioned where you want them. It will come with the screws you need to attach it to the wall. Put it to the right of the blinds, keeping it near the headrail. Then, tie all of the cords together to create a pull cord that fits in the cleat.
- When you need to reposition the blinds, take the pull cord out of the cleat. When you’re done, put the cord back to hold the blinds still.


Community Q&A
-
QuestionHow can I make a blind that keeps the heat out of the room sufficiently?
 T. ChinsenTop AnswererHome improvement stores carry Mylar that allows light in, but will reflect heat out. This layer can be added to the window rather than the blind. Any fabric or material with metallic fibers can reduce heat but may not be as efficient as Mylar. Cost will be a factor in deciding what material to use for the area(s).
Things You'll Need
Cutting and Sewing Fabric
- Measuring tape
- Pencil
- Scissors
- Iron
- Fabric
- Thread or hemming tape
- Needle or sewing machine
- Fabric lining (optional)
Using Existing Blinds
- Blind headrail or roller
- Blind slats or wood strips
- Craft glue
- Scissors
- Stud finder
- Mounting brackets
Making Blinds From Scratch
- 3⁄8 in (0.95 cm) wood dowels
- Hemming tape
- Iron
- Staple gun
- 1 in × 2 in (2.5 cm × 5.1 cm) wood or headrail
- Cordless screwdriver
- Stud finder
- 2 in (5.1 cm) drywall screws
- Eye screws or plastic rings
- Blinds cords
- Metal cleat

References
- ↑ https://www.youtube.com/watch?v=NxgHJO993Rk&feature=youtu.be&t=299
- ↑ http://www.evansofmasterton.co.nz/how-to-make-roman-blinds.html
- ↑ https://www.youtube.com/watch?v=NxgHJO993Rk&feature=youtu.be&t=369
- ↑ http://allparenting.com/my-home/articles/967403/easy-no-sew-roman-shades
- ↑ http://allparenting.com/my-home/articles/967403/easy-no-sew-roman-shades
- ↑ https://www.youtube.com/watch?v=r7QVylIWx3c&feature=youtu.be&t=87
- ↑ http://allparenting.com/my-home/articles/967403/easy-no-sew-roman-shades
- ↑ https://www.youtube.com/watch?v=r7QVylIWx3c&feature=youtu.be&t=105
- ↑ https://www.youtube.com/watch?v=hWU1w0v6q9Y&feature=youtu.be&t=160
- ↑ https://www.youtube.com/watch?v=hWU1w0v6q9Y&feature=youtu.be&t=104
- ↑ https://www.prettyhandygirl.com/ringing-in-new-year-hanging-new-blinds/
- ↑ https://weallsew.com/make-roman-shade-tutorial/
- ↑ https://www.youtube.com/watch?v=g3VW44HvdfM&feature=youtu.be&t=292
- ↑ https://www.youtube.com/watch?v=g3VW44HvdfM&feature=youtu.be&t=383
- ↑ https://weallsew.com/make-roman-shade-tutorial/
- ↑ https://www.youtube.com/watch?v=8VWojBKyawk&feature=youtu.be&t=1149
- ↑ https://www.youtube.com/watch?v=g3VW44HvdfM&feature=youtu.be&t=714
- ↑ https://www.idealhome.co.uk/diy-and-decorating/how-to-make-a-roman-blind-craft-idea-85817
- ↑ http://www.evansofmasterton.co.nz/how-to-make-roman-blinds.html
- ↑ https://www.idealhome.co.uk/diy-and-decorating/how-to-make-a-roman-blind-craft-idea-85817
About This Article