X
This article was co-authored by wikiHow Staff. Our trained team of editors and researchers validate articles for accuracy and comprehensiveness. wikiHow's Content Management Team carefully monitors the work from our editorial staff to ensure that each article is backed by trusted research and meets our high quality standards.
This article has been viewed 86,115 times.
Learn more...
Curtain tiebacks are a great way to draw curtains aside and bring light into your room. Unfortunately, they do not always match your room or your curtains. If they do, they are often out of your budget. A fun and easy solution would be to make your own. There are many ways in which to make curtain tiebacks.
Steps
Method 1
Method 1 of 3:
Making Fabric Tiebacks
-
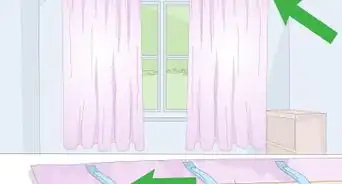
1Cut a 5 by 22-inch (12.7 by 55.88-centimeter) strip out of fabric.[1] Choose a color and pattern that matches your curtains. This will be enough to make one fabric tieback. If you'd like to make another, simply cut a second piece of fabric.
- If you'd like to make larger tiebacks, try 9 by 30 inches (22.86 by 76.2 centimeters) instead.[2]
-
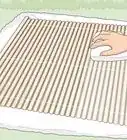
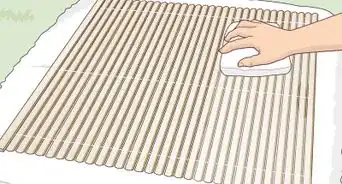
2Fold the fabric strip in half lengthwise with the right sides facing inward. Press the strip flat with an iron, using a heat setting that is suitable for the fabric you are working with.Advertisement
-
3Sew along two of the edges, using a ½-inch (1.27-centimeter) seam allowance. Sew along the long edge and one of the narrow edges. Leave the other narrow edge open so that you can turn the curtain tieback inside out.
-
4Turn the curtain tieback inside out. Use a chopstick, knitting needle, or some other blunt tool to push the curtain tieback inside out. To reduce bulk and prevent bunching, snip the corners of the seams first, just be careful not to cut through the stitching.
-
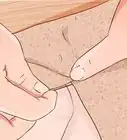
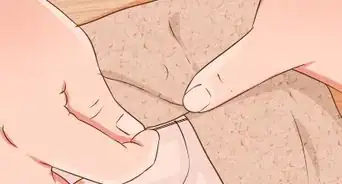
5Tuck the raw edge in, then press the entire tieback flat with an iron.[3] If the raw edge won't stay tucked inside the tieback, secure it with pins.
-
6Topstitch all the way around the tieback, ¼-inch (0.64centimeter) away from the edge.[4] Use a color that matches your fabric; you can also use a contrasting color if you'd like something more interesting. Be sure to sew back and forth over the start and end of your sewing a few times to prevent unraveling.
-
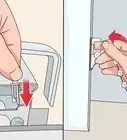
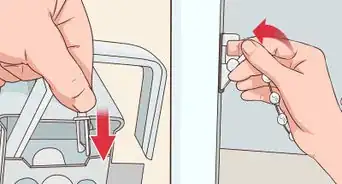
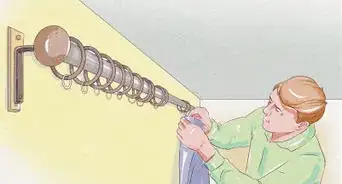
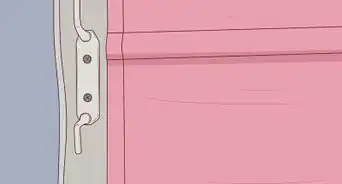
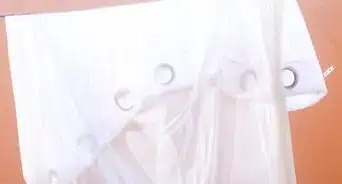
7Hand sew a small, plastic or metal ring to the top left and top right corners of your tieback.[5] Make sure that the rings are big enough to fit over the wall hooks. If you don't have any wall hooks, you'll want to mount some to either side of your curtain. The hooks should be the same color as your wall so that they blend in.
-
8Decorate the curtain tiebacks, if desired. Find a pretty silk or fabric flower that matches your curtain, and hot glue it to the front corner of your tieback. You can also get several flowers, and attach them to the tieback with snaps. This way, you can change out flowers as the seasons change.[6]
-
9Use the curtain tiebacks. Hook the tieback onto the wall hook. Pull the curtain towards the wall, then wrap the tieback around it. Hook the other side of the tieback onto the hook.


Advertisement
Method 2
Method 2 of 3:
Making Beaded Tiebacks
-
1Cut a 22-inch (55.88-centimeter) long piece of flexible, aluminum wire. Use a pair of heavy-duty wire cutters to do this. The type of wire used to hang pictures would be ideal, because it is strong to hold back curtains, yet thin enough to go through an acrylic bead. This is enough to make one beaded curtain tieback. If you'd like to make more, you'll have to repeat this method for each one that you make.
- Consider making 3 to 5 beaded strings, each one a little shorter than the other, and tying them all onto the same ring. This will created a tiered effect.
-
2Slide the end of the wire through a metal ring, leaving a 2-inch (5.08-centimeter) tail. The ring needs to be big enough to fit over the metal hook mounted on your wall. Something that is about 1-inch (2.54-centimeter) wide would be ideal.
- If you do not have a tieback hook, you should mount one. It does not need to be very big.
-
3Wrap the tail end around the wire tightly. With each turn, use a pair of flat-nose pliers to push the wrapped wire up towards the ring. You want it to be as snug as possible. When you have about ½-inch (1.27 centimeters) left, use your pliers to tuck the tail into the wrapped wire.
-
4String on 1 to 1½ inches (2.54 to 3.81 centimeters) worth of spacer beads. You will need about 5 to 8 spacer beads for this. The beads need to be small, but not so small that you can't fit them over the wire.
-
5Start stringing on your other beads. If you have a focal bead, put it in the center. When you are 5 to 5½ inches (12.7 to 13.97 centimeters) away from the end, stop. Acrylic beads are recommended, because they are less-likely to chip or break if they fall.
-
6String on 1 to 1½ inches (2.54 to 3.81 centimeters) worth of spacer beads. Again, you will need about 5 to 8 spacer beads for this. You will end up with a 4-inch (10.16 centimeter) long tail.
-
7Attach the other ring. Slide the end of the wire until you have a 2-inch (5.08 centimeters) long tail. Wrap it tightly around the wire, as before, and tuck the excess into the coils. You will have some wire visible between the beads and the coils. If you don't want this, then start wrapping with a longer tail. Snip off any excess wire when you are done.
-
8Use the curtain tiebacks. Hook the ring part of the tieback onto a wall hook. Pull the curtain towards the wall, then wrap the tieback around it. Hook the other end of the tieback onto the hook.
- If you have not already done so, mount a small wall hook to either side of your window.


Advertisement
Method 3
Method 3 of 3:
Making a Brooch Tieback
-
1Trace a circle onto a sheet of sturdy cardboard. You can make the circle using a compass or a small plate. You can also use a CD instead. The circle should be between 4.75 and 5 inches (12.1 and 12.7 centimeters) wide.
- Use a thin, but stiff, cardboard, such as mounting board or illustration board.
- The color does not matter; however, if you plan on using a light-colored ribbon, you may want to choose a light color for your cardboard.
-
2Trace a smaller circle inside the first one. The circle should be about 2 inches (5.08 centimeters) smaller than the first one, and placed right in the center. You will end up with a 1-inch (2.54 centimeters) thick ring.
- For a more delicate-looking tieback, make the circle 1-inch (2.54 centimeters) smaller, so that you end up with a ½-inch (1.27 centimeters) thick ring.
-
3Cut the ring out using a craft blade. Cut the larger circle out first, then cut the smaller one. Save the ring, and discard the small circle.
-
4Secure the end of a ribbon to the back of the ring with some hot glue or fabric glue. You will be winding the ribbon around the ring, so glue the ribbon at a slight angle. Choose a ribbon that is between ½ and 1-inch (1.27 and 2.54 centimeters) wide. The ribbon an be either satin or grosgrain; avoid sheer or lace ribbons.
- Pick a color that contrasts with your curtains. If your curtains have a pattern on them, match the color either to the background or to the pattern.
- For a rustic theme, use jute twine.
-
5Start wrapping the ribbon around the ring. Overlap the ribbon with each turn, so that you don't get any gaps.[7]
-
6Secure the end of the ribbon to the back of the ring with hot glue or fabric glue. Once you are back where you started, cut off the excess ribbon with a pair of scissors, then glue the end down to the back of the ring.
-
7Decorate the ring, if desired. Your ring will have a top, bottom, left, and right side. You can only decorate the top and bottom. If you decorate the left and right sides, you won't be able to slide the pin through it. Use hot glue or fabric glue to attach your decorations. Pearl beads, silk flowers, and ribbon flowers are great choices! Make sure that the decorations match the color of your ring or the color/theme of your curtain.
- For a rustic theme, use flat-backed seashells, sand dollars, and starfish.
- Use different sizes for a more interesting design. Place the larger flowers/beads towards the middle, and the smaller ones towards the edges.
- Don't get carried away; less is more!
-
8Wrap some matching ribbon around a chopstick to make the pin. Place a dot of glue at one end of the chopstick, and press the end of your ribbon into it. Start wrapping the ribbon around the chopstick, overlapping it with each turn. When you reach the other end, cut off the excess ribbon, and glue the end down.[8]
- Choose a color that is the same color as your ring, or a contrasting one.
- Try to cover both ends of the chopstick with ribbon as well to conceal any raw wood.
-
9Decorate the top, wider part of the pin, if desired. Choose smaller versions of the decorations you used on your ring, and glue them to the top of the pin using hot glue or fabric glue. You don't need to decorate all the way around the pin; just the front will be enough. Don't decorate more than 1 to 2 inches (2.54 to 5.08 centimeters), or the pin won't be able to go through the curtain.
- If you weren't able to cover both ends of the chopstick with ribbon, you can hide the raw wood with a dab or paint or nail polish. Choose a color that matches your ribbon, then let it dry.
-
10Use the tieback. This tieback works in a similar fashion to those ring-shaped brooches. Here is how you use it:
- Position the ring in front of the curtain panel.
- Gather the curtain in your hand, and push a small part of it through the ring.
- Place tip of chopstick pin in front of the ring.
- Slide the pin behind the gathered curtain, and out the other side. Make sure that the tip of the pin is in front of the ring.


Advertisement
Community Q&A
-
QuestionHow do I determine the length of the tieback?
 T. ChinsenTop AnswererThe article has 5 x 22" (12.7 x 55.88 cm) for a standard tieback length, with larger tiebacks at 9 x 30" (22.86 x 76.2 cm). The thickness of the curtain and how far back you want it pulled needs to be considered for the best look. The article tiebacks' space will basically be at half the length, i.e. a 5.5" / 14 cm and 6" / 15 cm space to hold back the curtains. You can decide the width space needed for the curtains and cut the length accordingly.
Advertisement
Things You'll Need
Making Fabric Tiebacks
- Fabric
- Fabric scissors
- Sewing machine
- Thread
- Iron
- 2 small metal or plastic rings
- Needle
- Sewing pins (optional)
Making Beaded Tiebacks
- 22 inches (55.88 centimeters) flexible aluminum wire (per tieback)
- 2 metal rings (per tieback)
- Acrylic beads
- Acrylic spacer beads (about 10 to 16 per tieback)
- Wire cutters
- Flat-nose pliers
Making a Brooch Tieback
- Cardboard
- Craft blade
- Ribbon
- Hot glue
- Chopsticks
- Decorations (silk flowers, ribbon flowers, etc.)

References
- ↑ http://www.homemadeginger.com/2010/05/how-to-make-curtain-tie-backs.html
- ↑ http://www.beneathmyheart.net/2011/05/burlap-tiebacks-with-interchangeable-flowers/
- ↑ http://www.beneathmyheart.net/2011/05/burlap-tiebacks-with-interchangeable-flowers/
- ↑ http://www.homemadeginger.com/2010/05/how-to-make-curtain-tie-backs.html
- ↑ http://www.homemadeginger.com/2010/05/how-to-make-curtain-tie-backs.html
- ↑ http://www.beneathmyheart.net/2011/05/burlap-tiebacks-with-interchangeable-flowers/
- ↑ https://www.youtube.com/watch?v=5JEx-FuahEU
- ↑ https://www.youtube.com/watch?v=5JEx-FuahEU
About This Article

wikiHow Staff
wikiHow Staff Writer
This article was co-authored by wikiHow Staff. Our trained team of editors and researchers validate articles for accuracy and comprehensiveness. wikiHow's Content Management Team carefully monitors the work from our editorial staff to ensure that each article is backed by trusted research and meets our high quality standards. This article has been viewed 86,115 times.
Co-authors: 9
Updated: June 8, 2021
Views: 86,115
Categories: Making Curtains and Blinds
Advertisement