This article was co-authored by wikiHow staff writer, Jack Lloyd. Jack Lloyd is a Technology Writer and Editor for wikiHow. He has over two years of experience writing and editing technology-related articles. He is technology enthusiast and an English teacher.
The wikiHow Tech Team also followed the article's instructions and verified that they work.
This article has been viewed 2,402,714 times.
Learn more...
This wikiHow teaches you how to create a brochure using Microsoft Word on both Windows and Mac computers. Brochures are informative documents that can be folded into a compact format. To make a brochure in Microsoft Word, you can either use a pre-made template or create one from scratch.
Steps
Using a Template
-
1Open Microsoft Word. It's a dark-blue app with a white "W" on it.
-
2Type brochure into the top search bar, then press ↵ Enter. Doing so will search the database for brochure templates.
- On Mac, if you don't see the Template page, click File in the top menu bar and select New from Template… in the drop-down menu.
Advertisement -
3Select a brochure template. Find a brochure template that you like and click on it. The brochure's preview page will open.
- Most brochure templates will be formatted roughly the same, so you should choose a brochure based on appearance.
-
4Click Create. It's to the right of the brochure's preview. Doing so will prompt Word to begin loading the brochure, which should only take a few seconds.
-
5Enter your brochure's information. Depending on the template that you chose, this step will vary; however, for most brochures, you can replace the placeholder text in each spot with your company's information.
- Most brochures have several pages of information, including a testimonial section.
- You can replace the photos in the brochure by clicking a photo, clicking the Format tab, clicking Change Picture, clicking From a File, and selecting a file from your computer.
-
6Save your brochure. To do so:
- Windows - Click File, click Save As, double-click This PC, click a save location on the left side of the window, type your brochure's name into the "File name" text box, and click Save.
- Mac - Click File, click Save As..., enter your brochure's name in the "Save As" field, click the "Where" box and select a save folder, and click Save.


Creating a Brochure from Scratch
-
1Open Microsoft Word. Its app icon resembles a white "W" on a dark-blue background.
-
2Click Blank document. It's a white box in the upper-left side of the window. Doing so opens a blank Word document.
- Skip this step on Mac.
-
3Click the Layout tab. You'll find this at the top of the Word window. A new toolbar will appear below the row of tabs here.
-
4Click Margins. This option is on the far-left side of the Layout toolbar. A drop-down menu will appear.
-
5Click Custom Margins…. It's at the bottom of the Margins drop-down menu. Doing so opens a new window.
-
6Lower each margin. In the "Margins" section at the top of the window, you'll see several different margin options (e.g., "Left"), each of which has 1 in a text box to the right of it. Change the value in this text box to 0.1 to ensure that your brochure's margins are wide enough to accommodate your content.
-
7Click Landscape. It's in the middle of the window.
-
8Click OK. This is at the bottom of the window. Doing so saves your changes and reformats your Word document.
-
9Add columns to your document. To do so:
- Make sure that you're still on the Layout tab.
- Click Columns
- Select a number of columns in the drop-down menu.
-
10Add column breaks. This will ensure that each column (i.e. panel) of your brochure holds separate paragraphs of information. To do so:
- Make sure that you're still on the Layout tab.
- Click Breaks
- Click Column in the drop-down menu.
-
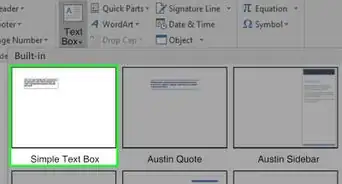
11Enter your brochure's information. There are two main types of information that you can add to your document:
- Text - Type in your brochure's information on a per-column basis. You can edit the text that you type by clicking the Home tab and then selecting options in the "Font" section while the text that you want to edit is highlighted.
- Images - Make sure that your cursor is at the point on the page in which you want to insert a photo, then click Insert, click Pictures, select a picture, and click Insert or Open.
-
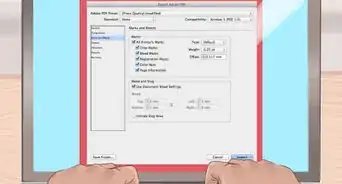
12Save your brochure. To do so:
- Windows - Click File, click Save As, double-click This PC, click a save location on the left side of the window, type your brochure's name into the "File name" text box, and click Save.
- Mac - Click File, click Save As..., enter your brochure's name in the "Save As" field, click the "Where" box and select a save folder, and click Save.


Community Q&A
-
QuestionHow can I find a brochure format on word 2007?
 Community AnswerClick the circle in the upper right corner, click "new" and search for "brochure".
 -
QuestionHow do I open a blank page in MS Word?
 Community AnswerClick File and select New. You will see a list of options, one of which will be a blank page.
 -
QuestionHow do I print it in the correct orientation?
 Community AnswerWhen you print your brochure, you should check the printing options and choose the option that best suits the look you want for your brochure.
Warnings
- Creating a brochure manually takes significantly more time and trial-and-error than does creating a brochure from a template.⧼thumbs_response⧽


About This Article
The easiest way to make a brochure with Microsoft Word is to use one of the brochure templates included with the program. Open MS Word, type "brochure" in the search bar located in the upper-left corner of the screen, then hit "enter." Once the templates display on the screen, click through them until you find one you like and select it to get started. Type your brochure's information into the provided spaces and add images, if desired. Save the completed brochure and it's ready to print. If you need to learn how to make a brochure from scratch, keep reading the article!