X
This article was co-authored by Claire Donovan-Blackwood. Claire Donovan-Blackwood is an Arts & Crafts Specialist and CEO of Heart Handmade UK, a site dedicated to helping people live a happy, creative life. With over 13 years of experience, Claire uses art as a form of therapy and focuses on mindfulness in the making of art. She makes crafting easy and accessible for those she works with. Claire received her B.A. in Photography & Visual Imagery from The University of Huddersfield.
This article has been viewed 139,417 times.
Making homemade pom poms can be fun and easy. They make great cat toys, Christmas ornaments, or presents for your young ones. This is how to make one in eight simple steps.
Steps
-
1Find a piece of thin cardboard.[1] An empty cereal box will do.
-
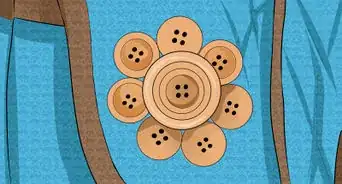
2Make a template. Cut two circles out of the cardboard.[2] Make them both about 2–3 inches (5.1–7.6 cm) in diameter. They need to be exactly the same size and shape. Use a tuna can for an outline of the circle.Advertisement
-
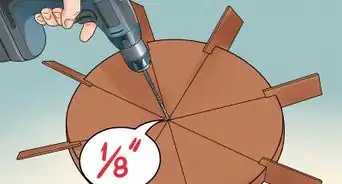
3Make the center hole. Cut a smaller circle out of the center of each circle. Leave about 1⁄2 to 3⁄4 inch (1.3 to 1.9 cm) of the larger circle, making it a thick ring. With the tuna can circle, make a cross hair to get the center point. Use the small end of a K-pod to make the size of the center hole. This will be ~1/3 of the diameter of the circle. You now have your templates. Make them any size you want, but small ones may work best for you.
-
4Strengthen the template. If you want your templates to last, you can cover them with masking tape, but you don't have to.
-
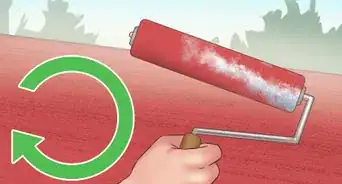
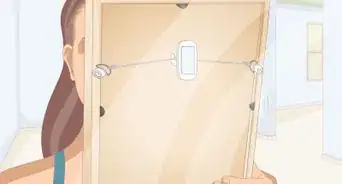
5Line up the rings on top of each other. Using any color yarn you like, wrap yarn around BOTH of the rings. Continue until you can't see the rings, then do a second layer. Continue wrapping yarn as the more layers you add, the denser your pom pom will be.
-
6Cut a tie cord. When you are finished wrapping, set aside a 1-foot length of yarn the same color as your pom pom.
-
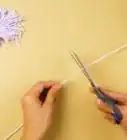
7Cut the wrapped yarn.[3] Using an exacto blade or a pair of scissors, cut along the outside edge of your rings. Put your tool under some of the threads and cut them apart. Insert your tool between the rings and begin cutting all the threads. When you are finished cutting, it will start to look more like a pom pom. Take your set-aside length of yarn and slip it in between your templates. Wrap once around the cut threads then tie a tight and secure knot.
-
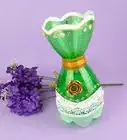
8Carefully pull templates off your pom pom. Roll the pom pom in your hands to make it even. Trim off any uneven strings, If you are making a Christmas ornament, leave the extra string hanging out of the pom pom and tie their ends together. Your finished pom pom is ready to roll!
-
9Finished.


Advertisement
Community Q&A
-
QuestionDo I have to use two rings or just one?
 Community AnswerYes, you need to use two rings, otherwise it is difficult to cut. The idea of the two rings is that you can put the scissors between them and cut the wool really quickly.
 -
QuestionDo I have to wrap masking tape around the rings of homemade pom poms?
 T. ChinsenTop AnswererThe masking tape supports the cardboard ring if your cardboard is on the thin side. A double cardboard ring is usually strong enough so that it does not bend when wrapping the yarn.
 -
QuestionHow do I use a pom pom maker?T. ChinsenTop AnswererAny purchased pom pom maker has instructions with drawings on how to use it. There are at least 4 different types of pom pom makers available at craft stores. The basic principle is the same as the article method.
Advertisement

References
- ↑ Claire Donovan-Blackwood. Arts & Crafts Specialist. Expert Interview. 3 May 2019.
- ↑ Claire Donovan-Blackwood. Arts & Crafts Specialist. Expert Interview. 3 May 2019.
- ↑ Claire Donovan-Blackwood. Arts & Crafts Specialist. Expert Interview. 3 May 2019.
- ↑ Claire Donovan-Blackwood. Arts & Crafts Specialist. Expert Interview. 3 May 2019.
- Videos provided by Esperanza y Ana Celia Rosas
About This Article

Claire Donovan-Blackwood
Arts & Crafts Specialist
This article was co-authored by Claire Donovan-Blackwood. Claire Donovan-Blackwood is an Arts & Crafts Specialist and CEO of Heart Handmade UK, a site dedicated to helping people live a happy, creative life. With over 13 years of experience, Claire uses art as a form of therapy and focuses on mindfulness in the making of art. She makes crafting easy and accessible for those she works with. Claire received her B.A. in Photography & Visual Imagery from The University of Huddersfield. This article has been viewed 139,417 times.
Co-authors: 20
Updated: December 8, 2022
Views: 139,417
Categories: Decoration Projects
Advertisement