This article was co-authored by wikiHow Staff. Our trained team of editors and researchers validate articles for accuracy and comprehensiveness. wikiHow's Content Management Team carefully monitors the work from our editorial staff to ensure that each article is backed by trusted research and meets our high quality standards.
There are 7 references cited in this article, which can be found at the bottom of the page.
This article has been viewed 70,473 times.
Learn more...
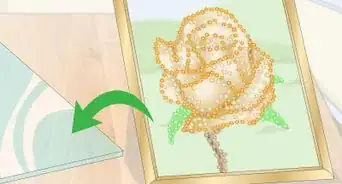
If your glass lamp shade is looking lackluster or dull, consider painting it. A quick coat of glass paint can transform any lamp shade from boring to interesting. If you have more time on your hands, you can even add a stencil. If you are feeling more adventurous, you can turn a paneled lamp shade into a faux stained glass lamp shade instead!
Steps
Painting a Lamp Shade a Solid Color
-
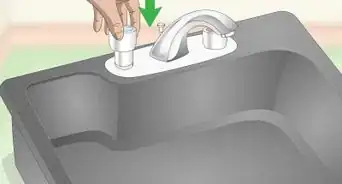
1Remove, clean, and dry the lamp shade. Remove the shade from your lamp. Wash the shade with warm, soapy water, then rinse it off. Dry the shade off with a paper towel.
-
2Wipe the surface down with rubbing alcohol. This will remove any oils or residue that might prevent the paint from sticking. From now on, only handle the lamp shade from the inside, otherwise you might get those oils on the part you're painting.Advertisement
-
3Pour your desired glass paint into a disposable container. You can find glass paint in the glass painting section of a craft store. It comes in many different finishes, including translucent, opaque, glossy, and matte. Some glass paints even have sparkles in them![1]
- A translucent finish will allow the most light to pass through while opaque will look more like acrylic paint. A matte finish will give you a sea glass effect.
- Make sure that you are using glass paint and not stained glass filler. Stained glass filler is too fluid for this.
-
4Make your own paint with glue and dye if you cannot find glass paint. Choose a decoupage glue (e.g. Mod Podge) in a finish that you like: glossy, satin, or matte. Pour enough glue to coat your lamp shade into a disposable container, then stir in 1 to 5 drops of food coloring. Keep stirring until the color is consistent and no streaks remain.[2]
- The more food coloring you add, the deeper the color will be.
- A glossy finish will look more translucent, while a matte finish will give you a sea glass effect; satin will give you something in between.
-
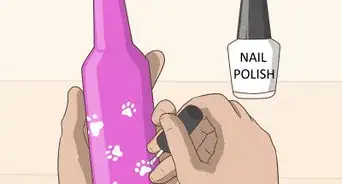
5Apply the paint to the outside of the lamp shade. Hold the lamp shade from the inside, and apply the paint with a wide, flat brush. Make all of your brushstrokes point in the same direction: up-and-down or side-to-side. Apply a light, even coat to reduce brushstrokes.[3]
- Use a brush made from synthetic taklon bristles for best results. Avoid camelhair (too soft) or boar bristle (too stiff).
-
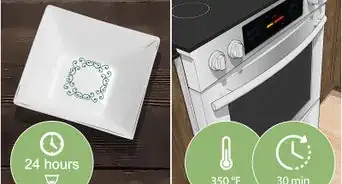
6Let the paint dry and cure in a dust-free place. How long this takes depends on the type of paint you used. Glass paint can take up to 24 hours to dry, while decoupage glue will only need a few hours. Some paints also have a curing time, so double-check the label.
- If the paint feels sticky, that means it has not finished curing. Leave it alone for a few more days.
-
7Apply a second coat of paint, if desired, and let it dry. This will give you a more opaque finish and help conceal any brushstrokes. Alternatively, you can paint the inside of the lamp shade--just be sure to wipe the inside down with rubbing alcohol first.[4] How long this takes depends on the type of paint you used, so check the bottle to be sure.
- Let this second coat or inside coat dry and cure completely.
-
8Reassemble the lamp once the paint has dried. If the paint still feels tacky, it has not finished curing yet. Let the lamp dry for a few more days before you reassemble it. If you try to put it back together too soon, the sticky paint will pick up dust and dirt.
- If you want to add a stenciled design to your lamp shade, read on to the next section before you reassemble it.


Adding Stenciled Designs
-
1Remove the lamp shade and clean it. Take the lamp shade off of the fixture. Wash it with warm, soapy water, then dry it off with a towel. Wipe the lamp shade down with rubbing alcohol to remove any oil or residue. Handle the lamp shade from the inside from now on to prevent oil transfer.
- Do not clean the lamp shade if you already painted it.
-
2Adhere a stencil over the lamp shade. You can use regular stencils or self-adhesive stencils. If you are using a regular stencil, tape down all 4 edges with painter's tape. If you are using a self-adhesive stencil, peel it off of the backing first, then press it down onto the lamp.[5]
- Choose an ornate stencil with thin lines so that the light can pass through. Flourishes, filigree, and ornate butterflies make great choices.
-
3Apply glass paint over the stencil with a pouncer. Squirt some glass paint onto a disposable plate or palette. Dip a foam pouncer into the paint, then tap it against the stencil. Work your way from the outside edges of the stencil towards the middle.
- You can use glass paint in any finish you want, but be aware that translucent glass paint may not show up well, especially against a previously-painted surface.
- If you painted your lamp shade with tinted decoupage glue, use acrylic paint. Tinted decoupage glue will be too fluid for this step.
-
4Peel the stencil off before the paint dries. Do not let the paint dry in the stencil, or you risk peeling it off. As soon as you finish applying your last stroke of paint, peel the stencil off. Avoid dragging the stencil across the lamp shape; otherwise, the paint may smear. Instead, pick the stencil up by 2 corners and lift it straight up.[6]
- If you notice any chips or gaps in the paint after you remove the stencil, fill them in using spare paint and a thin, pointed brush.
-
5Allow the paint to dry and clean your supplies. How long the paint takes to dry depends on the type of paint you used. Acrylic paint dries within minutes, but glass paint can take several hours. As the paint is drying, use this time to clean your pouncer and stencil.
- Wipe your stencil down with rubbing alcohol. If you have a self-adhesive stencil, be careful not to get anything on the back.
- Wash pounces using soapy water or brush cleaner. Be aware that it may not be salvageable and you may have to throw it out.
-
6Apply more stencils, if desired. At this point, you can repeat the process to apply more stencils for a layered look. You can also apply stencils to other parts of the lamp shade. Let the paint dry after you peel the stencil away. For example:
- If you added 1 big butterfly, you might want to add 1 or 2 smaller butterflies.
- If you added a filigree heart, a flourish to either side of it might look pretty.
- If you added a flower in 1 color, consider adding 2 more flowers in other colors.
-
7Reassemble the lamp. Once the paint has completely dried and cured, you can reassemble the lamp. If the paint still feels tacky, it has not finished curing. Give it a few more hours; double-check the label for more complete drying times.


Creating a Faux Stained Glass Lamp
-
1Choose a paneled glass lamp shade. Not only will this make your stained glass lamp look more authentic, but it will be easier to paint as well. Purchase a lamp shade with 4 or more panels set into a metal frame. Vintage lamp shades work especially well here.[7]
-
2Take apart the lamp shade. How you do this depends on the type of lamp you have. In most cases, you will have to remove the lamp shade from the fixture first, then pop the glass panels out.
-
3Spray paint the frame, if desired. Take the frame outside or into a well-ventilated area. Set it down onto a sheet of newspaper, then give it 1 to 2 coats of black spray paint. Let the paint dry 15 to 20 minutes between coats of paint.[8]
- Spray paint formulated for metal will work the best. If you can't find any, spray the frame with primer first. Let it dry, then apply your desired spray paint.
-
4Clean the glass panels with water and rubbing alcohol. Wash the panels with warm, soapy water first. Rinse them with plain water, then dry them off with a towel. Wipe them down with rubbing alcohol when you are done. This will remove any residue and oils that may keep the paint from sticking.
- From now on, try to handle the glass by the edges as much as possible, otherwise you might get oil onto it.
-
5Trace your panels onto a sheet of paper, then create your design. Place each panel onto a sheet of paper, then trace around it with a pen or pencil. Lift the panels away, then draw your design inside the panel. Make sure that all of the lines connect, just like in real stained glass.[9]
- You don't have to invent the stained glass designs yourself. Try coloring book pages or stained glass templates.
-
6Replace the panels on the paper. Set the glass panels on top of the paper, making sure to match them up with the original tracings. If you will be using glue to make the leading and paint, coat the glass panels with clear, acrylic sealer. This will give the glue something to stick to. You can do this right over the paper.[10]
- You'll be working on this project over the course of 2 to 3 days, so set up your workstation some place that won't get in the way.
-
7Outline your design with glass paint leading. Purchase a bottle of black glass paint leading from the craft store. Apply the leading straight onto the glass from the bottle's nozzle. Start from the left side if you are right-handed, and vice versa if you are left-handed; this way, you won't smear your work. Make sure that the lines connect, or the paint will bleed when you apply it.[11]
-
8Let your traced design dry for at least 6 to 8 hours. This is vital, regardless of the type of media you used: glass paint leading, puffy paint, or glue. If the outlines are still wet, then the next part won't work.[14]
- Some paint needs longer to dry. Check the label on your bottle of paint if you are not sure.
-
9Fill the spaces in your design with glass paint. Purchase bottles of glass paint from the craft store; choose the type that comes with a nozzle. Squeeze the paint into each space of your design. Make sure that the paint fills the spaces between the leading completely. You may have to spread it with the nozzle.[15]
- Mix your own glass paint by mixing clear school glue with acrylic paint. Use 1 to 2 drops of acrylic paint to 1 tablespoon of glue.[16]
- You can use stained glass filler for this step. It is thinner and more fluid than other types of glass paint. It tends to be translucent.
- Glass paint comes in different finishes. Translucent will look the most realistic, but you can try matte, opaque, or sparkly.
-
10Swirl 2 colors together if you want a marbled look. Apply your first color to 1 side of the space, and your second color to the other side. Swirl them together towards the middle with a brush.[17]
-
11Let the paint dry for at least 24 hours. The glue-and-acrylic paint mixture may dry faster, but you will need to wait at least 24 hours if you used real glass paint. Keep in mind that some brands also include a curing time, so double-check the label for complete drying and curing instructions.[18]
- If you notice any gaps in your paint, wait until the paint dries, then fill them in with a permanent marker in a matching color.[19]
-
12Reassemble the lamp. Once the paint has dried completely and is no longer tacky, put the panels back into the frame; make sure that the painted side is facing out. If the paint still feels tacky, it is not completely dry; wait a few more days for it to finish drying and curing.
- If you used glue and paint for your lamp, seal the panels with clear, acrylic spray paint first.[20]


Community Q&A
-
QuestionI have a glass lampshade with red panels. Can I paint over these with grey paint?
 Community AnswerIt'll only become darker with each coat. My suggestion would be to use the opposite of red (green) to counter and make it brown or dark.
Warnings
- Not all decoupage glue is waterproof. Do not use it on outdoor lamp shades. If you must use it outside, paint just the inside of the lamp shade.⧼thumbs_response⧽
Things You'll Need
Painting a Lamp Shade a Solid Color
- Glass lamp shade
- Rubbing alcohol
- Decoupage glue (or glass paint)
- Food coloring (or glass paint)
- Flat paintbrush, synthetic bristles
Adding Stenciled Designs
- Glass lamp shade
- Rubbing alcohol
- Stencils
- Painter's tape (if needed)
- Glass paint or acrylic paint
- Foam pouncer
Creating a Faux Stained Glass Lamp
- Paneled lamp shade
- Black glass paint leading (or puffy paint)
- Glass paint (or clear school glue and acrylic paint)
- Paintbrushes, synthetic bristles
- Black spray paint (optional, for frame)
- Clear acrylic spray sealer (optional)
References
- ↑ https://inmyownstyle.com/how-to-paint-anything
- ↑ https://www.keepingitsimplecrafts.com/turquoise-blue-pendant-lights-how-to/
- ↑ https://www.keepingitsimplecrafts.com/turquoise-blue-pendant-lights-how-to/
- ↑ https://www.keepingitsimplecrafts.com/turquoise-blue-pendant-lights-how-to/
- ↑ http://happyhourprojects.com/thrift-lamp-re-vamp-with-martha-stewart-glass-paints/
- ↑ http://happyhourprojects.com/thrift-lamp-re-vamp-with-martha-stewart-glass-paints/
- ↑ https://www.hometalk.com/14241754/make-a-faux-tiffany-lamp-from-a-thrift-store-find
- ↑ http://offbeathome.com/geeky-stained-glass-light/
- ↑ https://www.hometalk.com/14241754/make-a-faux-tiffany-lamp-from-a-thrift-store-find
- ↑ https://www.hometalk.com/641945/creating-faux-stained-glass-with-acrylic-paint-and-glue
- ↑ https://craftsbyamanda.com/faux-stained-glass-mosaic-luminary/
- ↑ http://offbeathome.com/geeky-stained-glass-light/
- ↑ https://www.hometalk.com/14241754/make-a-faux-tiffany-lamp-from-a-thrift-store-find
- ↑ https://craftsbyamanda.com/faux-stained-glass-mosaic-luminary/
- ↑ https://craftsbyamanda.com/faux-stained-glass-mosaic-luminary/
- ↑ https://www.hometalk.com/641945/creating-faux-stained-glass-with-acrylic-paint-and-glue
- ↑ https://www.hometalk.com/641945/creating-faux-stained-glass-with-acrylic-paint-and-glue
- ↑ https://craftsbyamanda.com/faux-stained-glass-mosaic-luminary/
- ↑ https://www.hometalk.com/641945/creating-faux-stained-glass-with-acrylic-paint-and-glue
- ↑ https://www.hometalk.com/641945/creating-faux-stained-glass-with-acrylic-paint-and-glue
About This Article