This article was co-authored by wikiHow Staff. Our trained team of editors and researchers validate articles for accuracy and comprehensiveness. wikiHow's Content Management Team carefully monitors the work from our editorial staff to ensure that each article is backed by trusted research and meets our high quality standards.
This article has been viewed 139,413 times.
Learn more...
Painting fiberglass is tricky because the surface is smooth. With the right preparatory steps, however, you can get a smooth, professional-looking finish. The trick is to take your time and go slowly, especially between layers of primer, paint, and topcoat (if you are using it). The exact paints you use will depend on the object you are painting and its intended purpose, be it a boat, bathtub, chair, or door.
Steps
Preparing the Surface
-
1Make sure that it is not too cold or humid. If it is too cold or too humid, the paint won't dry or cure properly. This can result in the surface turning tacky. Ideally, the humidity should be 60% or lower. The temperature should be between 65 to 90 °F (18 to 32 °C).[1]
- Check your local weather forecast to find out the humidity. If it is too humid, it would be best to save the project for another day when it is less humid.
-
2Find a well-ventilated area to work in, then cover it with newspaper. If you are working on larger project that can't fit on a table, cover the ground with a drop cloth or a cheap, plastic tablecloth, and set the object on top.[2]Advertisement
-
3Remove any hardware. This is especially necessary if you are painting a boat, sink, or door. Place all of the removed hardware into a box that you don't lose any pieces. It would be an even better idea to store small screws in a plastic bag inside the box.[3]
- Don't mask off the hardware. This won't give you a nice finish and could lead to the paint cracking or flaking.
- If the item has caulking, strip the caulking away. You will need to apply fresh caulking after the paint has cured.
-
4Clean the object with soap and water. If the object is small enough to fit in a sink, take it inside and wash it with soap and water. Rinse it clean, then allow it to air dry completely.[4]
- If you are working on a larger object, work in a bathtub instead. For especially large objects, such as tubs and boats, scrub it outside with soapy water, then rinse it with fresh water.
-
5Buff away the shine with 150- to 400-grit sandpaper. Paint doesn't stick to glossy surfaces, so you need to remove all traces of shine to help it adhere.[5] Sand the fiberglass with 150-grit sandpaper until it is no longer shiny, then work your way up to 400-grit sand paper. You want the surface to feel smooth and dull.
-
6Wipe the dust off with a tack cloth. A tack cloth is a tacky piece of fabric that picks up dust easily. You can find it in most hardware stores and well-stocked craft stores.[6] If you can't find one, you can try a microfiber cloth instead.
- For stubborn sanding dust, use a rag dipped in mineral spirits.[7]
-
7Mask any areas that you don't want to be painted with painter's tape. You can paint the entire fiberglass object, or you can paint only parts of it (i.e. stripes, zigzags, geometric shapes, etc.). Tear off strips of painter's tape, and use them to cover the areas that you do not want to be painted.[8]
- Run your fingernail across the edges of the tape to ensure a tight seal. If there are any gaps, the paint may seep underneath and give you a fuzzy line.


Applying the Paint
-
1Purchase the right type of paint for your surface. A basic spray paint or latex-acrylic paint will do just fine on a decorative piece or a door. Polyurethane or epoxy paint are better suited to surfaces that will see a lot of heavy use, such as boats, bathtubs, and sinks.[9]
- Polyurethane paint is ready to use. Epoxy paint must be mixed with a catalyst, just like epoxy resin. The catalyst is usually sold with the epoxy paint.
-
2Purchase the right type of primer and topcoat, if needed. Most polyurethane and epoxy paints do not require primers, but most spray paints and latex-acrylic paints do. If your paint requires a primer, make sure that you buy the same kind of primer and topcoat (i.e. spray paint primer for spray paint, oil-based primer and topcoat for oil-based paint, etc.).
- Check the label on the bucket or can of paint to find out if you need a primer and topcoat.
- Set the topcoat aside for later.
-
3Coat the surface with 1 to 2 coats of primer. If you are using the brush-on kind, simply apply it with a foam roller or a paintbrush. If you are using the spray-on kind, apply a light, even coat. Allow the primer to dry to the touch before applying a second coat.
- If your primer is not coming out evenly, apply it in short bursts rather than a single, sweeping, side-to-side motion.[10]
-
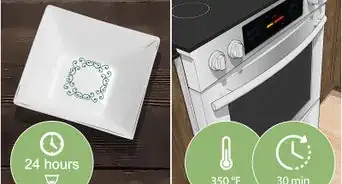
4Allow the primer to dry and cure. How long this takes depends on the product that you used. Some primers cure within a few hours while others take much longer. Just because the primer feels dry, that does not mean that it is cured and ready to be painted. Make sure to check the label.[11]
- If you apply the paint before the primer finishes curing, the final surface may be tacky.
-
5Apply your first coat of paint. If you are working with epoxy paint, you will need to mix the 2 parts together (epoxy and catalyst) first; other types of paint do not require any preparation. Apply the paint systematically, working from the right to the left (or left-to-right if you are left-handed), top-to-bottom. For more specific instructions:
- Brush-on paint: pour the paint onto a tray, then apply it with a foam roller first. Smooth it out with a fine-bristled paintbrush.[12]
- Spray paint: apply the paint in short bursts, rather than one continuous, side-to-side motion.[13]
- How much you use of each part for epoxy paint will vary from brand to brand. In most cases, it will be a 1-to-1 ratio, but read the label to be certain.
-
6Let the paint dry, then add a second layer, if needed. How long the paint takes to dry depends on the type of paint that you are using. Spray paint and latex-acrylic paint have the fastest drying times, while polyurethane and epoxy paint have the slowest. Most types of epoxy and polyurethane paint will not require a second coating, but spray paint and latex-acrylic often do.
- Apply the paint using the same method as before.
-
7Allow the paint to cure completely. Once again, just because something feels dry to the touch does not mean that it is ready to use. Read the label on your paint can. Most paints will be dry to the touch within an hour or less, but it may take several hours or even a few days before you can use the item.


Finishing the Job
-
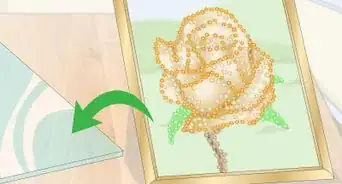
1Remove any masking tape that you applied earlier. You must remove this before adding the topcoat, otherwise you risk sealing the tape under the topcoat. Carefully peel the tape away from the surface. If you get some chips in the paint, fill them in using spare paint and a paintbrush.
- If you applied spray paint and get a chip, spray some paint onto a tray to make a puddle, then apply the paint from the puddle with a small paintbrush.
-
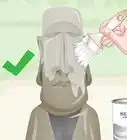
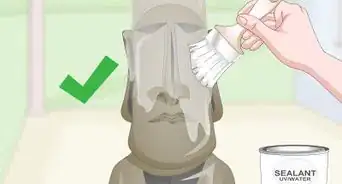
2Apply a topcoat, if necessary or desired. You can apply the topcoat the same way you applied the paint and primer: brushing or spraying. Again, make sure that the topcoat you are using is suitable for the type of paint you used on your object; an oil-based topcoat will not work on top of a water-based paint. Also, pay attention to the finish of the topcoat: glossy or matte.
- Not all paints require topcoats. Polyurethane and epoxy paints are durable and act as topcoats as well as paints. Spray paints and latex-acrylic paints do need top coats.
-
3Wait for the topcoat to dry and cure before using the object. One of the reasons paint and topcoats turn tacky is because they did not finish curing. Leave the object alone for a few days, or however long it takes for the topcoat to cure.
- Read the label on the can of topcoat to find out the exact curing time. It could be anywhere from a few hours to several days.
-
4Reassemble the hardware, if necessary. Only do this after the paint has dried and cured. If you apply it too soon, you will risk damaging the painted surface. If you stripped the caulking away earlier, you can apply fresh caulking at this time.


Warnings
- Some products advise you to wear a respirator while working with them. If your product tells you to use one, then do so.⧼thumbs_response⧽
Things You'll Need
- Newspaper or drop cloth
- 150- to 400-grit sandpaper
- Tack cloth
- Painter's tape
- Paint primer
- Paint (spray paint, latex-acrylic, polyurethane, or epoxy)
- Paintbrushes and foam rollers (not necessary for spray paint)
- Topcoat (if needed)


References
- ↑ https://feltmagnet.com/crafts/How-to-Paint-Fiberglass
- ↑ https://www.hunker.com/12001647/how-to-spray-paint-fiberglass
- ↑ http://www.yachtsurvey.com/Paint.htm
- ↑ https://www.hunker.com/12001647/how-to-spray-paint-fiberglass
- ↑ https://www.hunker.com/12001647/how-to-spray-paint-fiberglass
- ↑ https://www.hunker.com/12001647/how-to-spray-paint-fiberglass
- ↑ https://www.todayshomeowner.com/how-to-paint-exterior-fiberglass-steps/
- ↑ https://www.hunker.com/12001647/how-to-spray-paint-fiberglass
- ↑ https://feltmagnet.com/crafts/How-to-Paint-Fiberglass
About This Article

To paint fiberglass, first clean the surface thoroughly with soapy water and let it dry. Then, sand the fiberglass with medium-grit sandpaper to remove the slick finish. Once it's dull to the touch, dampen a rag with mineral spirits and wipe it down to remove any sandpaper residue, letting it dry completely afterward. Next, prime the fiberglass with an oil-based bonding primer, using a brush to cut corners, edges, and uneven surfaces. For flat surfaces, use a foam roller. Wait at least 24 hours for the primer to dry, then use the same technique to apply a coat of acrylic latex paint. Wait 24 hours for the paint to dry and then apply a second coat. Finally, once the second coat is dry, spray on a clear exterior topcoat to protect the paint and prevent chipping. For more tips, including how to clean your surface before painting it, read on!