This article was co-authored by Nicole Bolin. Nicole Bolin is a Crafting Specialist and the CEO of Stencil, a DIY Craft Studio in Phoenix, Arizona. Nicole specializes in interior design and various craft and DIY projects. Nicole holds a Certificate in Interior Design from the New York Institute of Art and Design. She opened Stencil in 2017 to teach others to create DIY projects that fit their home and lifestyle.
There are 9 references cited in this article, which can be found at the bottom of the page.
wikiHow marks an article as reader-approved once it receives enough positive feedback. This article received 12 testimonials and 96% of readers who voted found it helpful, earning it our reader-approved status.
This article has been viewed 606,720 times.
Painting on glass can be a great holiday activity for kids, as well as a fun and easy way to brighten up your home for adults. Glass gives you a smooth surface to paint on and can let light through to make some breath-taking and radiant designs. By knowing which paints to use and the right way to work with glass panes, bottles, and drinking glasses, you can start your own glass painting in no time.[1]
Steps
Choosing Paint and Brushes
-
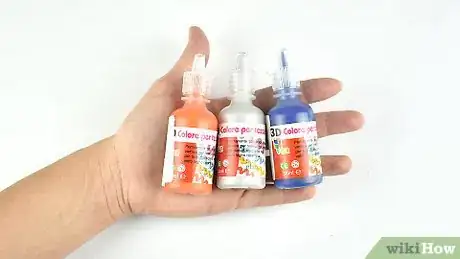
1Use enamel paint for long-lasting decoration. There are several different types of enamel paint that will give you different final appearances. All of them will take some time to dry fully but should stay on your glass for a long time once they have set. Here are a few different types of enamel paint you could choose from:[2]
-
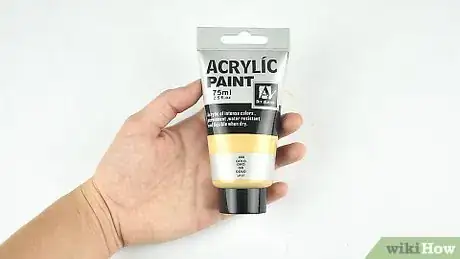
2Choose acrylic paint and gesso for a finished, matte look. Gesso is a combination of a binder and white powder that will make nearly any surface easily paintable. Use a base coat of gesso with top coats of acrylic paint for a totally opaque finished glass painting.[6]
- Gesso and acrylic paints will work best on bottles, glasses, or other containers with interesting shapes. Painting with gesso and acrylic on a flat pane of glass will look very similar to a painted canvas.
Advertisement -
3Use glass liner and water-based glass paints for a simple, stained glass look.[7] Glass liner or lead will give a dark, solid outline that you can fill with translucent and colorful paints. Building an outline and coloring it in sections will create some cool, see-through colors that look like a stained glass window.[8]
- Trace the outline of your design onto the glass before you go over it with glass liner. It’s much easier to paint over or wash off marker than it is getting rid of liner!
-
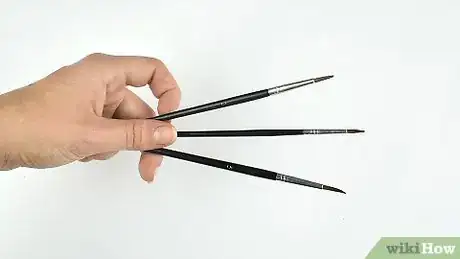
4Find the right paintbrush for your design. While you can use any type of paintbrush or paint applicator when painting onto glass, they might change the overall look of your finished design. Here are a few different types of paintbrush to choose between:[9]
- Brushes with synthetic bristles will leave visible brush marks, which can give your glass more homemade, rustic vibes. Use these for smaller, intricate designs.
- Natural bristle brushes will give you more smooth and even coverage. These will work great when painting base coats over the whole surface of your glass.
- Applicator sponges will provide an even, textured coat across the surface of the glass. Use sponges to cover the whole glass or to give a slightly frosted look.
- Make sure you use a paintbrush of the right size for your painting. Smaller, narrower paintbrushes will be better for delicate designs, whereas broader, flat brushes will work for overall coats.
Preparing the Surface
-
1Clean and dry the glass surface. Use warm water and soap to remove any oil or fingerprints left on the glass, as these can prevent the paint from sticking or being applied evenly to the glass. Be careful not to get any more fingerprints or oil on the glass as you clean it.[10]
- Wear latex gloves as you wash the glass, as this will prevent any oils from transferring from your skin back onto the glass.
- For a much more thorough clean, use a little bit of rubbing alcohol on a cotton cloth instead of warm water and soap.
-
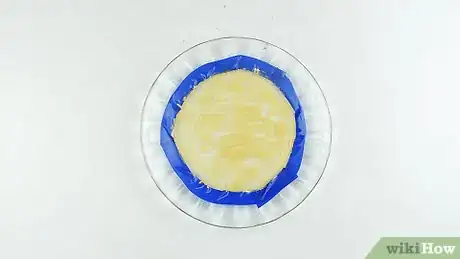
2Tape off any areas that may come in contact with your mouth. Although the paint you are using should be non-toxic, it may chip or come off with repeated use. Use a strip of masking tape to cover the top inch (2.4 cm) of the drinking glass and keep you from painting over it
- You can also use tape to cover any area you don’t want to paint over. Try making angled lines across the glass and painting across them to create some funky, transparent patterns.
-
3Paint a base coat for all-over color. Lightly dip the tip of a broad brush into the paint of your choice. Cover the entire glass surface with the paint and use the brush to smooth it out.
- If you want an opaque glass painting, use one or two layers of gesso as an initial base coat. Once the gesso has dried, you can cover it with a layer or two of the paint color of your choice.
- If you just want to add slight decorations to otherwise clear glass, you can skip this step and move directly onto outlining your design on the glass.
-
4Let the base coat dry for at least an hour. Wait until your base coat is dry to the touch before adding more paint. This will prevent the colors of your more intricate designs from bleeding into the base coat.
- Some enamel paints will instruct you to leave the paint to dry for 5 to 7 days. This is necessary to set the paint, but not needed when you’re doing multiple coats of paint.
Applying the Paint
-
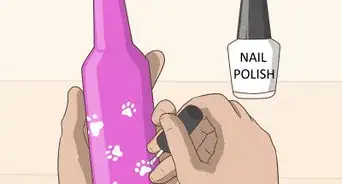
1Outline your design on the glass. Use a marker to transfer the design you want onto your glass. Choose a starting point and carefully begin tracing the outline over your glass.
- Don’t worry about the marker ruining your design once it is done. The marker will either be covered by your paint or will wash off easily.
- If you are using glass liner, follow the same method to outline your design on the glass. Lightly squeeze the bottle as you move over the outline to lay down the liner.
- If you didn't paint a matte base coat on your glass and it's still fully transparent, you can use a stencil on the inside of the glass instead of drawing on the outside. Transfer your design to a piece of paper and hold it to the inside of the glass to provide a guide that you can paint over.[11]
-
2Start painting with one color. Load a small amount of one color of your chosen paint onto the end of the paintbrush. Start on the side furthest from your paintbrush and begin painting the color onto the chosen places in your design.[12]
- Use light strokes at first and apply more pressure as you get a feel for the painting process. It's easier to add more paint than it is to remove it.
- If you make a mistake, use a paper towel to try and lift the paint away from the glass while it is still wet. For enamel paint, it may help to use a little paint thinner. Make sure you only remove the parts you want to redo!
-
3Clean the brush to remove any leftover paint. Dip the end of your paintbrush into a small cup of water and swirl it around to remove any leftover paint. Dry the paintbrush on some scrap paper before choosing your next color.[13]
- If you are using enamel paint, you might need to use some enamel paint thinner in order to clean your brush. This should be available from your local craft store, near the enamel paint.
-
4Pick another color and keep painting. Load a little paint onto the end of your clean, dry paintbrush and continue painting. Be careful as you go that you don't unintentionally blend your paint with any colors still drying on the glass. Repeat this process until your design is completely filled in.[14]
- If you're working with an intricate design or are worried about messing up your painting, wait for one color of paint to dry before moving on to another. After around an hour, it should be dry enough that you don't need to worry too much about making minor mistakes.
-
5Paint a second coat if you want your colors to stand out more. Once the first coats of paint have dried, evaluate their color for brightness and vibrancy. If you want the paint to be more visible and or brighter, use the same techniques to give your entire design a second coat of paint.
- Make sure when painting your second coat that you use the same color. If the paint is slightly transparent, the two different colors will combine and likely give a slightly muddy result.
-
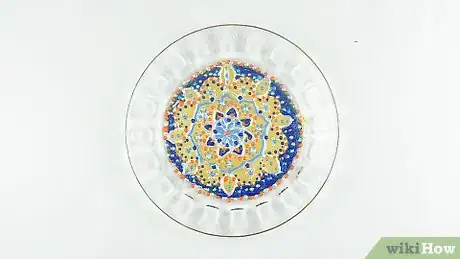
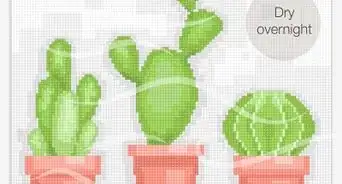
6Cure your glass paint by leaving it to dry. Some enamel and acrylic paints will only need to dry for a long time in order for the paint to fully set. Leave them somewhere warm and dry for up to a week before using or displaying your painted glass.[15]
- Always follow the manufacturer's guidelines when curing the paint. Some paints that dry to be cured can only be washed by hand with soap and warm water.
-
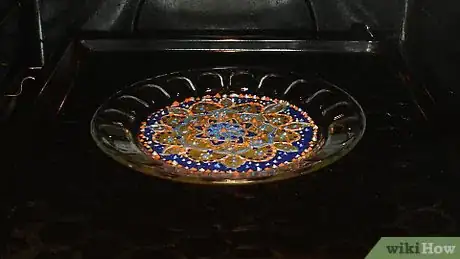
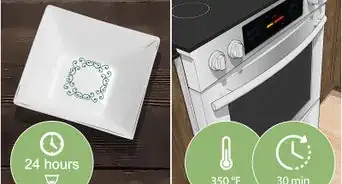
7Cure your glass paint by baking it. Some paints will require you to bake your glass to fully cure it and set the paint forever. Put your glass in the oven and set it to the temperature stated on your paint bottle. Let the glass cure for around 30 minutes, before turning the oven off and leaving it to cool before removing it.[16]
- Always put your glass into and remove it from a cool oven. Suddenly changing the temperature of the glass can cause it to break.
Expert Q&A
-
QuestionWhat kind of paint will stick to glass?
 Nicole BolinNicole Bolin is a Crafting Specialist and the CEO of Stencil, a DIY Craft Studio in Phoenix, Arizona. Nicole specializes in interior design and various craft and DIY projects. Nicole holds a Certificate in Interior Design from the New York Institute of Art and Design. She opened Stencil in 2017 to teach others to create DIY projects that fit their home and lifestyle.
Crafts & DIY Specialist Specially made glass paint is formulated to stick to glass, and there are many brands out there that make it. Other paints will not stick well, so it's best to use glass paint.
 -
QuestionAre ordinary glass jars safe for baking?
 Community AnswerFollow the instructions on the glass paint exactly. You can bake them, but have to start them out in a cold oven, bake, and then leave them inside until the oven cools down again.
 -
QuestionCan I use acrylic paint that I use on canvas to paint a glass vase?
 Community AnswerYes, but you'll need to seal it with something or the paint will come off easily.
Warnings
- If you are painting something that will be used to cook or serve food or drink, make sure you use non-toxic, food-safe paints.⧼thumbs_response⧽
Things You’ll Need
- Glass to paint
- Paint
- Paintbrushes
- Masking tape
- Oven
References
- ↑ Nicole Bolin. Crafts & DIY Specialist. Expert Interview. 9 September 2020.
- ↑ https://www.thecreativityexchange.com/2015/11/best-paint-for-glass-ceramics-and-metal.html
- ↑ https://youtu.be/_CJJuAYgc78?t=15
- ↑ https://youtu.be/_CJJuAYgc78?t=73
- ↑ https://youtu.be/_CJJuAYgc78?t=175
- ↑ https://youtu.be/ajhunyGDkK8?t=47
- ↑ Nicole Bolin. Crafts & DIY Specialist. Expert Interview. 9 September 2020.
- ↑ https://youtu.be/Lsh9zHG26YI?t=30
- ↑ https://www.bobvila.com/articles/how-to-paint-glass/
- ↑ https://www.bobvila.com/articles/how-to-paint-glass/
- ↑ https://www.bobvila.com/articles/how-to-paint-glass/
- ↑ https://www.thecreativityexchange.com/2015/11/best-paint-for-glass-ceramics-and-metal.html
- ↑ https://www.art-is-fun.com/how-to-clean-paintbrushes/
- ↑ https://www.thecreativityexchange.com/2015/11/best-paint-for-glass-ceramics-and-metal.html
- ↑ https://www.thecreativityexchange.com/2015/11/best-paint-for-glass-ceramics-and-metal.html
- ↑ https://www.thecreativityexchange.com/2015/11/best-paint-for-glass-ceramics-and-metal.html
About This Article
Before you paint glass, apply an undercoat to the surface of the glass if the paint directions require one. Draw your design with lead paint or permanent marker, or lay a sticky stencil onto the glass. Use a pipette to drop paint onto the surface for small designs, then use a paintbrush to spread the paint where you need it. Apply the paint with a sponge if you want to paint the glass all one color. Follow the directions on the paint package to determine whether to bake the glass to dry the paint. Keep reading if you want to learn which type of paint works best for your glass!

