This article was co-authored by wikiHow Staff. Our trained team of editors and researchers validate articles for accuracy and comprehensiveness. wikiHow's Content Management Team carefully monitors the work from our editorial staff to ensure that each article is backed by trusted research and meets our high quality standards.
wikiHow marks an article as reader-approved once it receives enough positive feedback. This article received 23 testimonials and 93% of readers who voted found it helpful, earning it our reader-approved status.
This article has been viewed 219,438 times.
Learn more...
Diamond painting is similar to painting by number, except that instead of using paint, you are using tiny, flat-backed rhinestones, crystals, or faceted resin diamonds. You can purchase diamond painting kits online and in some well-stocked arts and crafts stores. The process can look intimidating, but it is actually quite simple. Once you know what to do, you can find the project both relaxing and rewarding.
Things You Should Know
- Tape your canvas to a flat surface and peel off about 1 to 2 inches (2.5 to 5.1 cm) of the plastic covering.
- Dip your applicator tool in the gel or wax, touch it to a diamond, then stick the diamond to the corresponding spot on the canvas.
- Continue the process until you've completed the painting, removing the plastic covering section by section as you go.
- Cover the canvas with the provided plastic sheet and go over it with a rolling pin to secure all of the diamonds. Peel the plastic away the next morning.
Steps
Setting Up the Canvas
-
1Purchase a diamond painting kit. You can find these online although some well-stocked craft stores may also carry them. Each brand will be a little different, but most kits will contain the following: a pre-printed canvas, flat-backed diamonds also known as drills, a tray, a pen-like tool, and a packet of gel or wax.[1]
-
2Understand how to read the canvas. The canvas is composed of tiny boxes that are colored and labeled with numbers, letters and/or symbols, much like a cross-stitch canvas. Each symbol corresponds to a diamond color. The symbols are written on a chart, with the corresponding bag and drill color written below or next to it. The chart is typically printed on the side of the canvas.Advertisement
-
3Unroll the canvas and tape it down onto a flat surface. If the canvas won't lay flat, roll it back the other way, then unroll it. Spread it down onto a flat surface, then secure the edges with masking tape.
- This project can be time consuming. Consider taping the canvas to a board, which you can move out of the way easily.
-
4Peel back part of the plastic covering on the canvas. Do not peel all of the plastic away; 1 to 2 inches(2.54 to 5.08 centimeters) will be plenty. Run your fingernail along the plastic to crease it so that it doesn't roll forwards.
- Some kits come with pre-cut plastic strips. In this case, simply peel off a short section of the first strip.
-
5Pour out your first drill color into the tray. Shake the tray gently to distribute the diamonds and set them in the right direction.
-
6Look at the part of canvas you just exposed. Choose a box to start with and note the symbol in it. Match the symbol on the canvas with the chart, then find the bag with the same symbol.
-
7Open up the bag, and pour out some of the diamonds onto the tray that came with your kit. Gently shake the tray to settle the drills and set them upright.
- Some kits come with multiple trays. You can use the other trays for the other colors in that section.


Applying the Diamonds
-
1Dip your pen tool into the gel or wax that came with your kit. Open up the packet of gel/wax that came with your kit and dip the metal end of the pen into the gel/wax to pick some up. This will make it possible for the pen to pick up the drills.
- Some kits come with a special wax pencil that you have to sharpen instead. In this case, sharpen the pencil using a pencil sharpener.
- Some pens will have a wide end too, which you can use to pick up to three drills at one time. This will also need to be dipped in the gel/wax first.
-
2Use the pen to pick up a diamond. Gently press the tip of the pen against the top, faceted part of the drill. Lift the pen away from the tray; the drill should be stuck to it.
- Keep the tray just below the edge of your canvas; this will make it easier to access.[2]
-
3Gently press the drill onto the corresponding square. Pull the pen away; the crystal should be stuck against the canvas. If you are just starting out, it might be a good idea to press lightly at first. This way, if the drill is off-set, you can nudge it back into place, then press down on it to secure it.
- This is exactly like painting by number, except that you are using drills instead.
-
4Fill the rest of the squares in that section. Work one color at a time and refill the pen with wax as needed. When you finish filling in all the squares with the same symbols, move onto the next color. This will help you work faster and stay organized.[3]
- Avoid resting your hand against the canvas; the more you touch the sticky surface, the less tacky it will become.
-
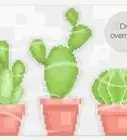
5Peel away more of the plastic covering, and fill in more squares. Continue filling in the canvas using the same technique as before. Work in 1 to 2-inch (2.54 to 5.08-centimeter) wide sections, one color at a time. When you completely fill in a section, move on to the next one.
- Do not peel the entire plastic covering away, or the adhesive on the canvas will get dirty and lose its tack.
- Always replace the covering when you’ve finished for the day to protect the still open sections.


Finishing the Diamond Painting
-
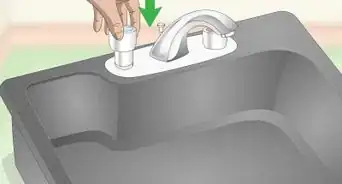
1Cover the canvas with the plastic sheet that it came with. If you discarded the sheet, you can cover it with a piece of parchment paper; avoid using any kind of paper especially wax paper on the open canvas.
-
2Go over the canvas with a rolling pin. This will press down any loose diamonds and secure them.[4] If you don't have a rolling pin, you can use a can or jar instead. You can also gently rub the canvas with your hands instead.
-
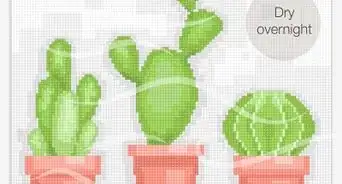
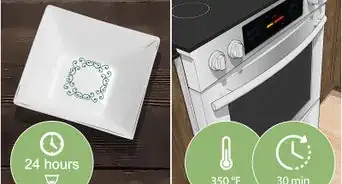
3Stack some heavy books on top of the canvas overnight. This will help further adhere the diamonds to the canvas and ensure that they bond properly. If you don't have any books large enough to cover the canvas, you can use another flat, heavy object, such as a box or cutting board.
-
4Peel the tape away. Lift the books off first, then peel the plastic covering off. Peel the tape from the corners of the canvas.
-
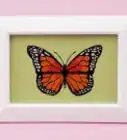
5Frame the canvas. Remove the glass from the frame first, then insert the canvas into the frame. Fold the excess edges down, then place the backing into place.[5]
- For a fancier touch, place the canvas behind a mat first; this will give the canvas an additional border within the frame. Choose a color that complements the diamonds.


Community Q&A
-
QuestionHow do I get creases out of canvas?
 Community AnswerI have found that the easiest to remove creases is to pull back the cover and then reapply it. If it's a large painting, have someone help you smooth it out, and the wrinkles should disappear.
 -
QuestionHow can I get diamonds apart if they are stuck together?
 Community AnswerRub the crystals and the tray with a dryer sheet. It helps with static cling.
 -
QuestionDoes the flat side go up or down on the canvas when diamond painting?
 Community AnswerThe flat side goes down. If you put the drill flat side up, use the tweezers to remove it and turn it over.
Warnings
- Don't remove the plastic covering all at once, or the glue on the canvas will get dirty and lose its stickiness.⧼thumbs_response⧽
- Don’t put any sort of paper on the sticky canvas except for parchment paper. If you do get paper stuck to the canvas. Remove as much of it as you can then take a baby wipe and gently start peeling the paper away. You should be able to get all of it and the stickiness should remain on the canvas.⧼thumbs_response⧽
- Do not clean the canvas in the washer/drier.[12]⧼thumbs_response⧽
Things You'll Need
- Diamond painting kit
- Masking tape
- Rolling pin (optional)
- Heavy books

References
- ↑ https://www.herrschners.com/topic/intro+to+diamond+painting.do
- ↑ https://www.youtube.com/watch?v=YwAzU4VgH7Y
- ↑ https://www.youtube.com/watch?v=YwAzU4VgH7Y
- ↑ https://www.herrschners.com/topic/intro+to+diamond+painting.do
- ↑ https://www.herrschners.com/topic/intro+to+diamond+painting.do
- ↑ https://www.herrschners.com/topic/intro+to+diamond+painting.do
- ↑ https://www.herrschners.com/topic/intro+to+diamond+painting.do
- ↑ https://www.herrschners.com/topic/intro+to+diamond+painting.do
- ↑ https://www.herrschners.com/topic/intro+to+diamond+painting.do
About This Article

To diamond paint, start by pouring out your first diamond color into the tray that came with your set. Then, dip your pen tool into your gel or wax, which you need to stick the diamonds to your picture. Then, pick up a diamond with your pen and press it into a square that matches the color’s number. Fill in the squares one color at a time until you’ve finished the whole picture. When you’re done, cover your picture with the sheet it came with and use a rolling pin or jar to go over it, which will help secure any loose diamonds. For more tips, including how to figure out which colors to fit in which squares, read on!