This article was co-authored by wikiHow Staff. Our trained team of editors and researchers validate articles for accuracy and comprehensiveness. wikiHow's Content Management Team carefully monitors the work from our editorial staff to ensure that each article is backed by trusted research and meets our high quality standards.
There are 17 references cited in this article, which can be found at the bottom of the page.
This article has been viewed 42,152 times.
Learn more...
Kakashi is a popular character from the anime and manga Naruto. Getting his silver, spiky hair will be easier with a wig, but you can get a similar look using your real hair if you are daring enough to bleach and cut it first. Styling the spikes are going to be more or less the same, whether you are going to use a wig or your real hair. The setup, however, is going to be very different.
Steps
Styling a Wig
-
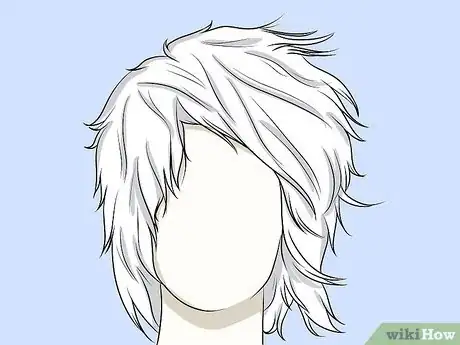
1Get a short, silvery wig with plenty of volume on top. A skin-top wig would not be a good idea for this because it will be harder to spike. The wefting may also show. A short, spiky, "Rocker" or "Punk" style wig would be a better choice because of how voluminous it is. Any color between white, pale silver, and medium silver will work well for Kakashi. Look for a wig that is at least 4 inches (10 cm) long.
- Buy a high-quality wig from a costume shop, a cosplay supply store, or a wig shop.
- Don't buy a cheap wig from the party or Halloween store. It won't be thick enough and it will be hard to style.
-
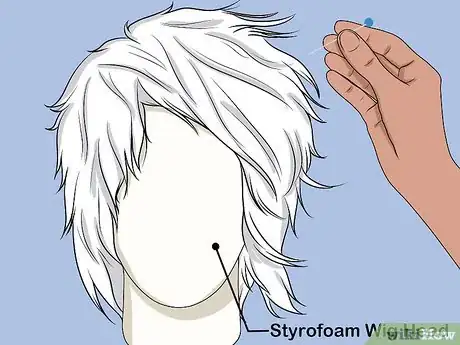
2Pin the wig to a Styrofoam wig head. Set the wig head onto a wig stand, then pin it around the edges. Do not pin the top. You can find Styrofoam wig heads in wig shops, costume shops, well-stocked arts and crafts stores, and online. You can find wig stands online and in well-stocked wig shops.
- If you can't find a wig stand, set the wig head on top of a dowel, then insert the dowel into a Christmas tree stand.
Advertisement -
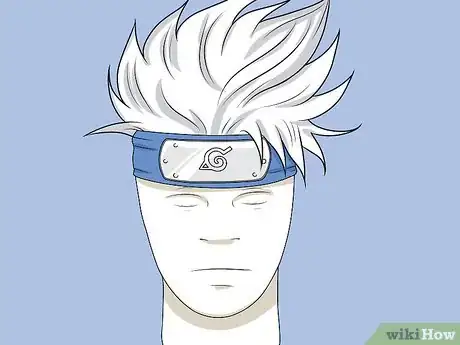
3Put the headband onto the wig. Get out the headband that you will be wearing with your cosplay and pull it over the top of the wig. Make sure that the top edge of the headband is slightly overlapping the front hairline of the wig. Pull all of the hair that is above the top edge of the headband out from underneath it. Let the hair fall over the headband.
- Make sure that the metal plate of the headband is on the front of the wig.
- Wig heads tend to run small. Secure the headband to the wig head with pins, if needed.
-
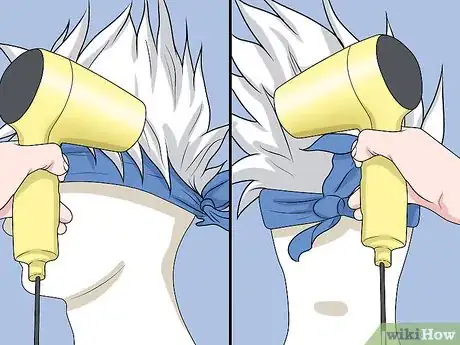
4Train the sides and back of the wig, if needed. Kakashi has hair that's spiky on top and smooth on the back and sides. Many Rocker and Punk style wigs are poofy all around, so you'll need to train the strands to lay flat. You can do this by blasting them with a hairdryer on a cool setting while tugging the hair strands downwards.
- If you have a heat-resistant wig, try the warm setting instead.
- Do not use a flat iron. You will melt the wig.
-
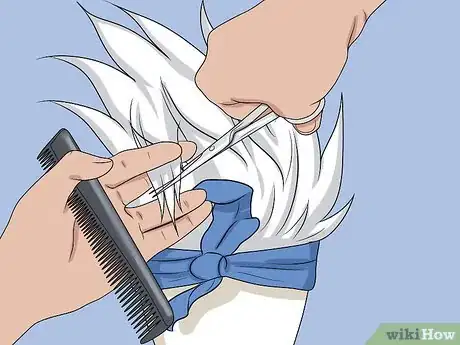
5Trim and feather the back of the wig. Comb the hair down, starting from where the head begins to curve downward (back of crown). Pinch the ends of a thick strand between your fingers. Point the scissors downwards, then run them down the length of the strand while opening and closing them. Try to get the hair about 2 inches (5.1 cm) long.[1]
- Keep working on finger-thick strands, row-by-row until you finish the back.
-
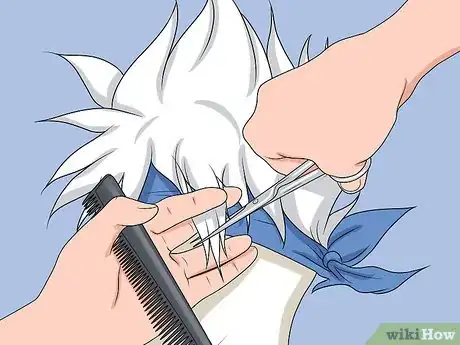
6Cut the hair in front of the ears into a point long enough to cover them. Figure out where your ears will be when wearing the wig. Pin everything behind the ears out of the way with bobby pins. Working one side at a time, gather the hair in front of the ears, and trim it down to a triangular point.[2]
- Point your scissors downward while running them along the edge of the hair section, opening and closing them slightly. This will create a feathered edge.
-
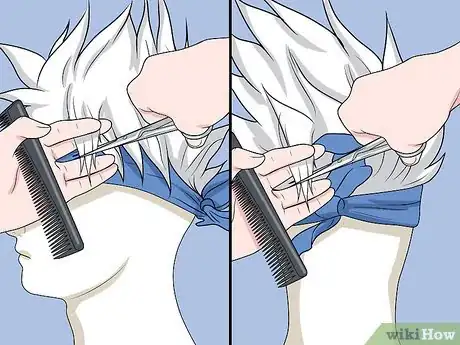
7Blend the sides into the back, if needed. Remove the pins holding the rest of the hair back. Note any long strands of hair between the side and the back sections, and trim them down to match the back.
-
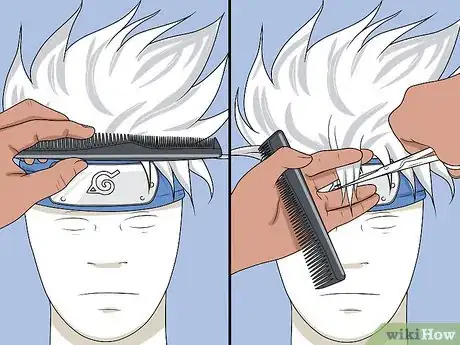
8Comb a chunk of hair forward and trim it into spiky bangs. Gather a chunk of hair that spans the width of the forehead. Pull it forward and train it with your hairdryer, if necessary. Pluck a thick strand of hair, pinch it between your fingers, and run the scissors down the sides of the strand, just like you did previously. Do this for the entire front section.[3]
- Make some spikes thicker/longer, and thinner/thicker than others.
- The front section needs to be long enough to swoop over your eyes when you wear the wig. The shortest spikes should touch the bottom of the headband/your eyebrows.[4]
-
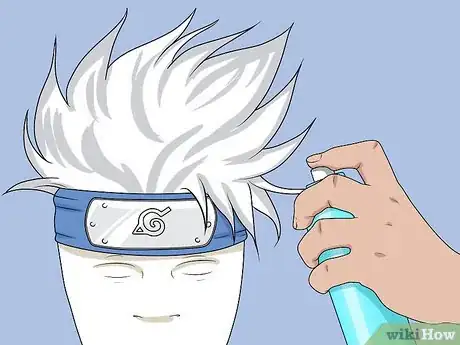
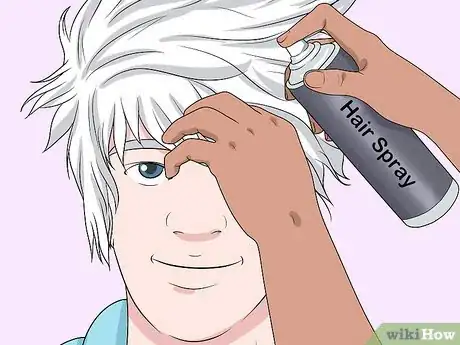
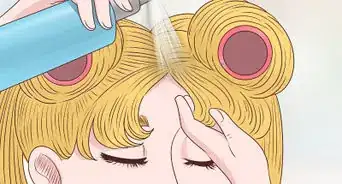
9Shape the spikes with hairspray. Mist a spike with hairspray, then pinch the end with your fingers. Give the tip a twist, then shape more spikes the same way. Angle all of the spikes to the left.[5]
-
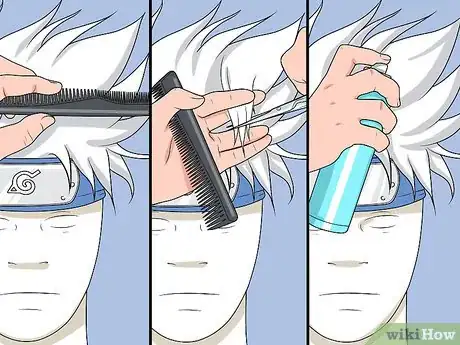
10Spike the rest of the hair on top using the same method. Continue grabbing chunks of hair and trimming them down into spike shapes. Mist the spikes with hairspray and pinch the tips to shape them. Once again, make sure that all of the spikes angle to the left.[6]
- Make some chunks thicker/thinner than others. Anything between one finger and two fingers thick would be ideal.
-
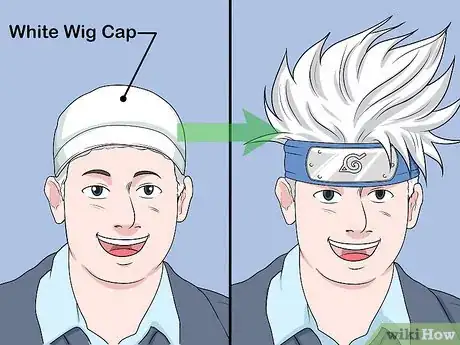
11Wear the wig with a white wig cap. Even if the wig has a lot of volume to it, there is a chance that part of your hair might show through.[7] Even though the headband will help keep the wig secure, you'll still want to use bobby pins along the front hairline, sides, and back of the wig.
- If you cannot find a white wig cap, get a nude one instead.
- Reach under the headband, if possible, in order to pin the wig. If you can't, don't worry about it.
- If the wig needs to be pinned, but the headband gets in the way, sew some wig combs into the wig.
Cutting and Coloring Real Hair
-
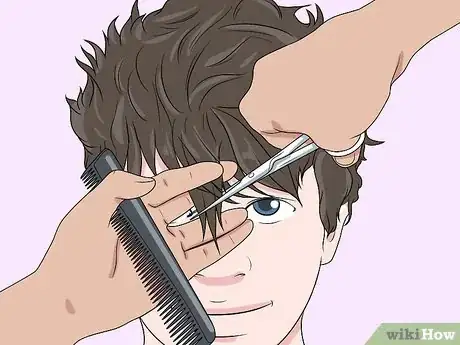
1Start with the right cut. Kakashi's hair is longer on the top and shorter on the sides and back. Your hair on the sides of your head needs to be long enough to cover your ears, and the hair in the back needs to be about an inch (2.5 cm) long. The hair on the top of your head needs to be several inches/centimeters long. It needs to span the width of your forehead, starting at the hairline and ending at the back of your crown.
- The style is not the same as an undercut; it is longer.
- If you are going to a hair stylist, bring real life reference pictures of Kakashi wigs and/or hair done by other cosplayers. Don't bring screenshots from the anime.
-
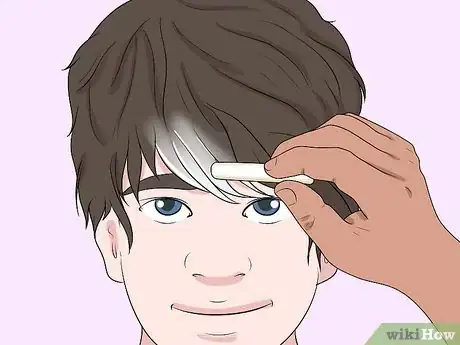
2Chalk-dye your hair for a temporary option. You will need to apply white hair chalk to damp hair, let it dry, then set it with a straightener. This will be time-consuming, but worth it. Work in thin, horizontal layers, just like straightening your hair. Colored hairspray is not a good option at this point because it will cause your hair to clump together.
- You can style your hair using white or silver hairspray to make it the right color, however. Skip ahead to the styling method, and use colored hairspray instead.
- Be aware that hair chalk tends to rub off on things. It may stain your cosplay.
-
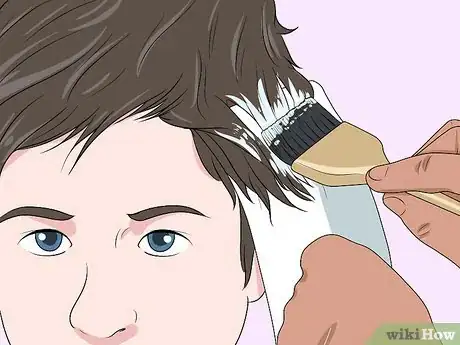
3Bleach your hair for a more permanent option. The darker your hair is, the higher volume developer you will need to use. If your hair does not end up light enough, wait at least a day before bleaching again. Never leave bleach on your hair longer than the recommended time on the package.[8]
- If you have black hair, consider leaving the roots dark. This will give your hair more depth and dimension.
- Don't worry if your hair looks yellow or orange-ish. The next step will fix it.
-
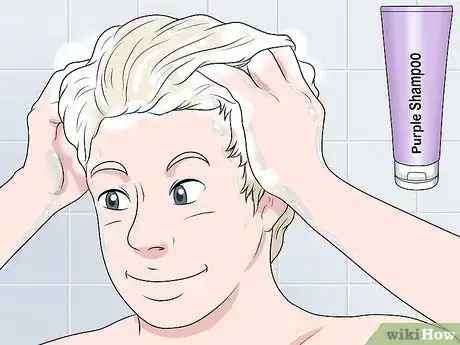
4Tone your hair with purple shampoo if you bleached it. Get your hair wet and apply the purple shampoo to it. Leave the shampoo on your hair for the time recommended on the bottle, then wash it out. Afterwards, your hair will look white or grey, depending on how light you were able to get it in the first place.
- If you have a lot of orange in your hair, opt for a dark blue/indigo shampoo instead.[9]
- If you have very dark hair, it may be impossible for you to get white or light gray hair. You may have to settle for medium or dark gray.
Styling Real Hair
-
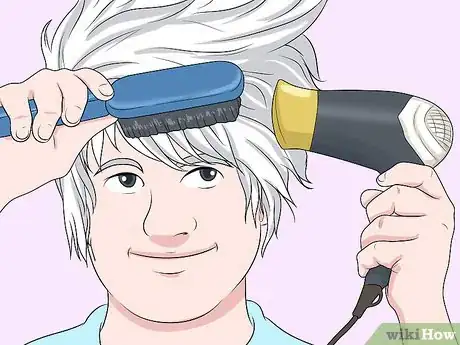
1Blow-dry your hair straight. Use a brush or comb to pull the hair downwards on the hairline (bangs), sides, and back. When you get to the top section of your head, pull the hair upwards. This will help give you extra volume. Use a narrow nozzle attachment on your hairdryer to make your hair smoother.
- The top section spans from eyebrow to eyebrow, from the front hairline to the back of the crown.
- If you have curly hair, blow-drying it straight may not be enough. In this case, straighten your hair again with a flat iron. Be sure to use a heat protection spray first!
- If you chalk-dyed your hair, skip this step. If you'll be using colored hairspray, you should do this step.
-
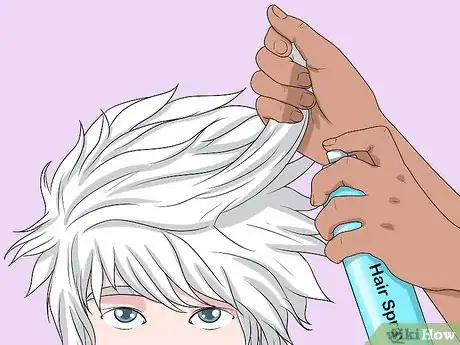
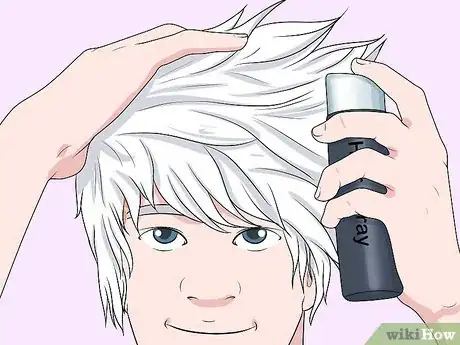
2Hold the strands in the top section upwards and mist the roots with hairspray. It's okay if you get some hairspray onto the actual strands, but try to focus on the roots themselves. This will give your hair volume and lift without weighing it down. Leave the hair on your hairline/bangs along for now.[10]
- Angle the strands so that they point upwards and to the left, like Kakashi's.
- Use a lightweight, strong-hold hairspray.
- If you want to use colored hairspray, now is the time to do so. Be sure to coat the entire strand. Use colored hairspray for the rest of this method.
-
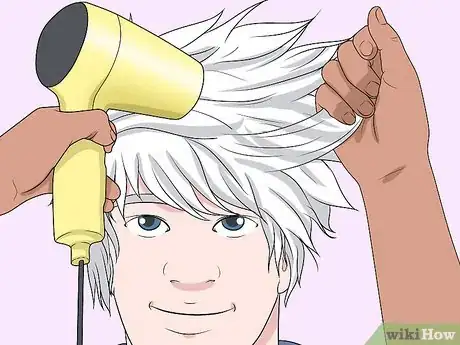
3Blow-dry the roots, angling them to the left. This will help set the style and hairspray. If you need to, take this time to blow-dry the hair on the back, front (bangs), and sides downward.[11]
-
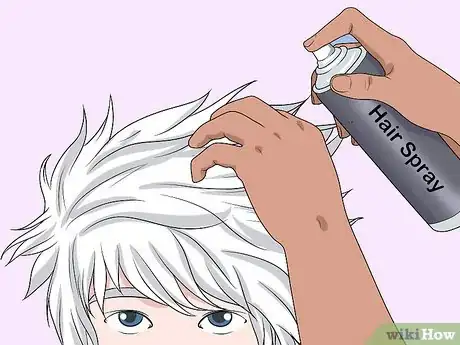
4Spike the top of your hair using your fingers and hairspray. Mist the long strands you just finished blow-drying with more hairspray. Pluck random strands of hair and pinch the ends to form spikes. Vary the spikes, making some thick and others thin. If you need to, give the ends a slight twist to help hold the shape better.[12]
- Give your spikes a final misting of hairspray when you are done.[13]
-
5Touch up and spike the bangs. Mist the bangs (hairline) with more hairspray. Use your fingers to separate the hair into several triangular spikes. Pinch and twist the ends with your fingers, just like you did for the top. Keep the bangs flat against your forehead. You can angle them to the left, but don't pull them upward.[14]
- Use this time to spike some of the shorter hairs on the side of your head, right before the longer strands begin. This will help blend everything together.
-
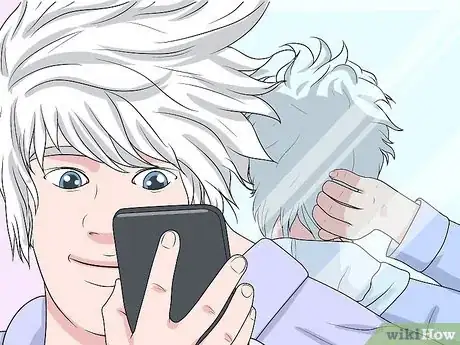
6Use a mirror to spike and style the back. Turn your back to the mirror and hold a smaller mirror in front of you. Use your fingers or a brush to comb the hair on the back of your head upward. Mist the hair with hairspray and brush it upward some more. Create a few spikes where the short hair on the back transitions to the long hair on the top.[15]
-
7
Community Q&A
-
QuestionWhat should I do if my hair is too short?
 Community AnswerIf your hair is too short for your cosplay, then you could buy hair extensions or a wig!
 -
QuestionCan you make one for Itachi?
 QuestionsfromSushiCommunity AnswerYou could just use a longer wig and style it like his hair. Be careful when bringing it back into the ponytail though I've had hair literally come out of wigs while I was trying to tie it back.
Warnings
- Hair chalk and colored hairspray tends to rub off on clothing and stain a little. It may ruin your cosplay.⧼thumbs_response⧽
- Bleaching your hair can be damaging. If your hair is already dry and brittle, consider using a temporary option or a wig.⧼thumbs_response⧽
Things You'll Need
Styling a Wig
- Silver spiky wig
- Styrofoam wig head
- Wig stand (improvised is fine)
- T-pins or sewing pins
- Scissors
- Hairspray
Styling Real Hair
- Bleaching kit, hair chalk, or colored hairspray
- Toning shampoo (if bleaching)
- Hairspray
- Comb
- Hairdryer
- Bobby pins
- White wig cap
- Sewing pins or T-pins
References
- ↑ https://www.youtube.com/watch?v=R0ysmyvjEOI&feature=youtu.be&t=20s
- ↑ https://www.youtube.com/watch?v=R0ysmyvjEOI&feature=youtu.be&t=50s
- ↑ https://www.youtube.com/watch?v=R0ysmyvjEOI&feature=youtu.be&t=1m22s
- ↑ https://www.youtube.com/watch?v=R0ysmyvjEOI&feature=youtu.be&t=2m15s
- ↑ https://www.youtube.com/watch?v=R0ysmyvjEOI&feature=youtu.be&t=3m18s
- ↑ http://www.youtube.com/watch?v=R0ysmyvjEOI&feature=youtu.be&t=2m52s
- ↑ https://www.youtube.com/watch?v=dsZaJGBxnhc&feature=youtu.be&t=42s
- ↑ https://www.youtube.com/watch?v=dIrs0prKZAA&feature=youtu.be&t=4m
- ↑ http://www.cosmopolitan.com/uk/beauty-hair/hair/a9603063/how-to-fix-hair-dye-gone-wrong/
- ↑ https://www.youtube.com/watch?v=UFBvPhmIuW8&feature=youtu.be&t=1m1s
- ↑ https://www.youtube.com/watch?v=UFBvPhmIuW8&feature=youtu.be&t=1m20s
- ↑ https://www.youtube.com/watch?v=UFBvPhmIuW8&feature=youtu.be&t=1m49s
- ↑ https://www.youtube.com/watch?v=UFBvPhmIuW8&feature=youtu.be&t=1m55s
- ↑ https://www.youtube.com/watch?v=UFBvPhmIuW8&feature=youtu.be&t=2m15s
- ↑ https://www.youtube.com/watch?v=UFBvPhmIuW8&feature=youtu.be&t=2m50s
- ↑ https://www.youtube.com/watch?v=UFBvPhmIuW8&feature=youtu.be&t=3m33s
- ↑ https://www.naturallycurly.com/curlreading/hair_color/brass-be-gone-diy-purple-toner/



-Step-12.webp)
