This article was co-authored by wikiHow Staff. Our trained team of editors and researchers validate articles for accuracy and comprehensiveness. wikiHow's Content Management Team carefully monitors the work from our editorial staff to ensure that each article is backed by trusted research and meets our high quality standards.
There are 14 references cited in this article, which can be found at the bottom of the page.
This article has been viewed 69,446 times.
Learn more...
Lemon pickles can be a very tasty addition to a variety of foods, especially Indian and Middle Eastern dishes. There are a couple of types of pickled lemons you can choose to make. Luckily, both are delicious condiments that are really easy to prepare at home. Make your own lemon pickles with a little effort, a bit of time, and a few easily available ingredients.
Ingredients
- 10 to 12 small lemons
- 1/4 cup (68 grams) pickling, kosher, or sea salt
- 1 tablespoon (2 grams) of dry seasonings, such as chili powder, black pepper seeds, mustard seeds, coriander seeds, and carom (ajwan) seeds
- 2 tablespoons (9 grams) of fresh seasonings, such as garlic and fresh chilis
- 1 tablespoon (13 grams) of canola oil, if necessary
- 2 to 8 lemons, depending on the size jar you are using
- 1 tablespoon (17 grams) of pickling, kosher, or sea salt for each lemon you are using
Steps
Making Spicy Lemon Pickles
-
1Gather 10 to 12 small ripe lemons. You can use any type of lemons that you like, including conventional or organic. Many people even like to use Meyer lemons, which are a cross between a lemon and a mandarin orange, although they can be difficult to get your hands on.
- Whatever type of lemon you choose, make sure they are nice and ripe so that they have a lot of juice inside. Squeeze each lemon and make sure that it gives a little. This shows that it is nice and juicy.[1]
-
2Sterilize a quart-size (1 liter) canning jar. When pickling lemons, it's important to use a clean container that will not introduce bacteria into the food. To avoid this, clean your jar and lid well with soap and hot water and then submerge them in boiling water for 10 minutes.[2]
- If you don't have a quart-size (1 liter) canning jar on hand, a smaller one or a different type of jar will work. However, you will just have to cut down your ingredients to fit the size you have.
- Once the jars and lids have been boiled, lay them out on a clean towel to dry.
Advertisement -
3Clean the outside of the lemons. Scrub the lemons so that you remove any wax, pesticides, or residue that is on the surface. You can simply rinse them under running cold water, scrub them with baking soda or vinegar, or use a commercial fruit and vegetable wash.[3]
- You can use a kitchen scrubber or brush to clean the lemons.
-
4Slice the lemons into 1⁄4 to 1⁄2 inch (0.64 to 1.27 cm) slices. Cut each lemon in half horizontally. Place the flat cut surface on your cutting board so you can easily cut off the stems and dispose of them. Then make 1⁄4 to 1⁄2 inch (0.64 to 1.27 cm) slices all along the length of each piece.[4]
-
5Remove all the lemon seeds. Look over each piece and use the tip of your knife or your fingers to take out all of the seeds. The seeds are not good for eating and should not be included in the pickle.[5]
-
6Mix the lemons slices with salt. Put the lemons in a bowl and pour in 1/4 cup (68 grams) of salt. Stir the salt and lemons together until all of the lemons are coated.[6]
- You can use any type of salt you have in your kitchen. However, pickling salt is good because it doesn't have additives that can cloud up your pickle. On the other hand, sea salt and kosher salt contain natural minerals that can enhance flavor.[7]
- As the lemons are coated with salt, they will begin to give off more liquid. This is normal and nothing to worry about.
-
7Let the lemons sit in the jar on your counter for about a week. Put your coated lemons into your prepared jar and put on the lid. Keep the lemons at room temperature to start the pickling process. When the whites of the rinds are beginning to become translucent, you can move on with the process.
- Shake the jar a few times daily to ensure that all of the lemons are coated in the salt and are beginning to pickle.
- The number of days you let the lemons sit can vary. Some people let the lemons sit for only a few days. Just remember that the goal is to let the pickling process start without any seasonings added, which can hinder the lemons absorbing the salt.[8]
-
8Cook your seasonings in a dry pan on low heat. Gather about 1 tablespoon of dry seasonings and 2 tablespoons of any garlic and chilis you want to add. To bring out the flavor of the dry seasonings, cook them in a dry pan on low heat until you can start to smell them. Seasonings that really do well with this type of treatment include mustard seeds, coriander seeds, and carom (ajwan) seeds.[9]
- If you are adding fresh garlic and chilis to your lemon pickle, cook them in a small amount of canola oil to bring out their flavor and reduce the heat of the chilis a bit.
- Cool the seasonings to room temperature before adding them to your jar.
-
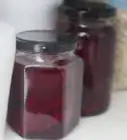
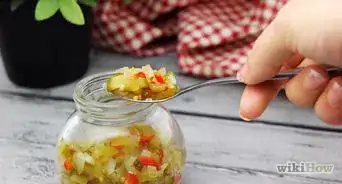
9Stir the seasonings into the jar and place it in the refrigerator. Pour your room temperature seasonings into the jar of lemons. Then stir everything together until it is well blended. At that point, put the lid back on the jar and put it in the fridge for several more weeks. Once your lemons have turned translucent and are soft and pliable, they are done and ready to eat.
- Some people keep the jar at room temperature, since the amount of salt in the lemons keeps them from spoiling. However, it is a better food handling process to keep them cold in the refrigerator just in case pieces of lemon are not fully submerged in the salty liquid.
Tip: Use your lemon pickle within a year.

Creating Simple Preserved Lemons
-
1Get enough lemons to fill your jar, plus a few extras. When making simple preserved lemons, you will pack the lemons into a jar tightly. This means that the minimum number of lemons you will need is as many as you can fit into the jar you are using. However, you may need some extra lemon juice to fill up the space in the jar, so getting a few more than you think you'll need is a good idea.
- For example, if you are using a jar that can hold about a cup (236 mL) of liquid, you will need about 2 to 3 lemons to fill it up, depending on the size of each lemon.
- Many people use pint (473 mL) mason jars for preserving lemons. These will take about 5 to 8 lemons to fill.
- It is better to get too many lemons than to have too few. Packing the jar tightly helps to keep out air and gives you more finished preserved lemons to use.
-
2Choose ripe conventional or Meyer lemons. The type of lemons you use solely depends on your personal preference. Whatever type of lemon you use, lemon pickles should be made with ripe lemons so that there is a lot of juice for the lemon rinds to be submerged in. To ensure that your lemons are ripe, squeeze potential lemons slightly and make sure they give a little. Ripe lemons should also be brightly colored and not shriveled.[10]
- Meyer lemons are a bit sweeter than conventional lemons because they are thought to be a cross between a lemon and a mandarin orange.[11]
-
3Sterilize your jar and lid. Clean the jar and lid with soap and hot water, making sure to rinse all soap out of it. Then submerge both pieces in boiling water for at least 10 minutes.[12]
- To make sure that no bacteria grows in your lemons and that the jar isn't holding onto any scents from what was in it previously, it's important to sterilize it.
-
4Wash the outside of your lemons. Preserved lemons include the rind, so it's important to make sure they are clean before cutting them up. Simply rinse and scrub the lemons under running water to get rid of any pesticides or residue on the surface.[13]
- You can use a kitchen scrubber or brush to clean the surface of the lemons.
- Don't use soap on the lemon. However, if you have baking soda, vinegar, or a product made to wash produce, you can use one of them to really clean the surface of the rind.
-
5Cut an "x" through the end of each lemon almost to the bottom. Look for the stem end of the lemon and hold it with that end up and the other end down on the cutting board. Use your knife to cut down the middle of the lemon, stopping about 1⁄2 inch (1.3 cm) before the bottom. You want the end of the lemon to stay connected. Then take your knife and make a second cut down the middle of the lemon, but moving your knife position 90 degrees and keeping the bottom intact again.[14]
- When you are done, the top of the lemon will be cut into quarters but the bottom will still be totally connected.
-
6Fill each lemon with salt. Open each lemon slightly where you cut it and pour salt into its core. Keep adding salt until it is flowing out the sides and the top.[15]
- Use whatever type of salt you have on hand. In general, pickling salt is pure sodium chloride, while sea salt and kosher salt have natural minerals in them, which can enhance flavor.[16]
- There is no exact amount of salt you will use for this, although each lemon will usually take more than a tablespoon (17 grams) of salt to fill.
-
7Add a thin layer of salt to the bottom of the jar. You only need to add about a tablespoon if you are using a pint mason jar. If you are using a smaller container, use a teaspoon or 2. This extra salt will help pickle the lemons in the jar.[17]
- If you had extra salt that fell out of the lemons when you were filling them, feel free to use that to cover the bottom of the jar.
-
8Push the lemons tightly into the jar. Put the first lemon in the jar with the solid end down. Then pack the next couple with the cut side down, so the the pieces stick down into the cut end of the first lemon. Continue packing the lemons until they are tightly packed.[18]
- Don't worry about breaking apart the lemons. It's more important to pack them tightly than to keep them whole.
-
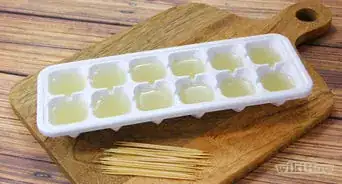
9Fill any empty space with fresh lemon juice. As you pack the lemons, they will release their juice. This juice should fill up most of the extra space in the jar. However, there may be some space at the top that is just air. Add fresh juice until there is only a 1⁄2 inch (1.3 cm) gap at the top of the jar.
-
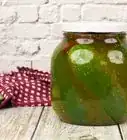
10Let the jar sit at room temperature for 3 to 4 weeks. Once the jar is packed, seal it with the lid. Then, every day or so, shake the jar to ensure that the salt is evenly distributed and that all of the lemons are getting pickled. You will know the preserved lemons are done when the white parts of the rinds have turned clear, which usually takes several weeks.[20]
- When the whites of the rinds have become clear, this means they have become soft, pliable, and ready to add to your favorite dish.
Tip: After the lemons are done, put the jar straight into the refrigerator and use the pickles within a year.


Things You'll Need
Making Spicy Lemon Pickles
- Knife
- Cutting board
- Bowl
- Sterilized jar
- Cooking pan, if necessary
- Wooden spoon, if necessary
Making Simple Preserved Lemons
- Knife
- Cutting board
- Sterilized jar
- Lemon juicer, if necessary


References
- ↑ https://www.thekitchn.com/want-the-best-lemons-and-limes-144887
- ↑ https://nchfp.uga.edu/how/can_01/sterile_jars.html
- ↑ https://extension.umaine.edu/publications/4336e/
- ↑ https://www.seriouseats.com/2014/04/knife-skills-how-to-cut-citrus-fruit-into-wedges-slices-and-supremes.html
- ↑ https://www.jamieoliver.com/recipes/fruit-recipes/lemon-pickle/
- ↑ https://www.saveur.com/article/recipes/nimbu-ka-achar-spicy-lemon-pickle
- ↑ https://www.healthline.com/nutrition/different-types-of-salt
- ↑ https://subbucooks.com/2018/02/02/lemon-pickle-no-oil/
- ↑ https://www.fermentingforfoodies.com/archives/1362
- ↑ https://www.thekitchn.com/want-the-best-lemons-and-limes-144887
- ↑ https://www.seriouseats.com/2011/03/in-season-meyer-lemons-choosing-picking-storing-20110304.html
- ↑ https://nchfp.uga.edu/how/can_01/sterile_jars.html
- ↑ https://extension.umaine.edu/publications/4336e/
- ↑ https://www.epicurious.com/recipes/food/views/preserved-lemons-231570
- ↑ https://www.splendidtable.org/recipes/preserved-lemons
- ↑ https://www.healthline.com/nutrition/different-types-of-salt
- ↑ https://www.epicurious.com/recipes/food/views/preserved-lemons-231570
- ↑ https://www.splendidtable.org/recipes/preserved-lemons
- ↑ https://www.splendidtable.org/recipes/preserved-lemons
- ↑ https://www.splendidtable.org/recipes/preserved-lemons
- ↑ https://www.foodrepublic.com/2015/07/27/indian-pickle-is-the-greatest-condiment-on-the-subcontinent/
- ↑ https://www.thekitchn.com/what-is-pickling-salt-do-you-really-need-it-193108
About This Article

To make spicy lemon pickles, start by rinsing 12 lemons under water to remove any bacteria or residue. Set the lemons aside, then put a jar in boiling water for 10 minutes, which will sterilize it. Then, slice each lemon into 1/4 inch pieces and remove all of the seeds. After you’ve removed all of the seeds, combine the slices in a bowl with 1/4 cup of salt until all of the lemon pieces are coated. Place the lemon slices into your jar and leave them at room temperature. After a week, fry spices, like mustard seeds and coriander seeds, with garlic and chilis in a pan over a low heat. Let your seasonings cool to room temperature, then stir them into the jar. Finally, put the jar in the fridge for 2 to 3 weeks so the lemons can absorb the spices. For tips on how to make preserved lemons, keep reading!