wikiHow is a “wiki,” similar to Wikipedia, which means that many of our articles are co-written by multiple authors. To create this article, 26 people, some anonymous, worked to edit and improve it over time.
This article has been viewed 390,614 times.
Learn more...
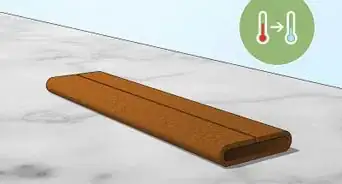
In the cold winter months, your feet can catch a chill just from walking around your home. Park yourself in front of the fire and make yourself a pair of moccasins to warm up your feet, keep comfy, and stay stylish while you're hanging out indoors. Follow the steps below to make a pair of basic leather moccasins.
Steps
Making Your Template
-
1Find a paper grocery bag and cut it open so that it is at its largest possible surface area. You need to surface of the paper bag to be large enough to trace both of your feet.
-
2Take a pen or pencil and trace your left foot with a seam allowance of about 1/8 of an inch.Advertisement
-
3Keep your foot on the paper and trace your fingers straight down from the high inside arch of your foot, marking dots where they connect to the paper. Use a pen or pencil to draw a straight line by connecting the dots you just marked.
-
4Lift your foot off of the template and continue the line you just created down to the heel of the outline and extend it one inch past the end of the heel. This outline will be the sole of your moccasin and should look like a foot with a T-shape near the middle.
-
5Put your palms face down on the paper and place the tips of your thumbs on the top of the T-shape with your nails and top knuckles touching.
-
6Squeeze your fingers together and bring the index fingers to touch. Trace the outside edge of your hands onto the template.
-
7Start at the side of the template where you just marked the outside of your palms and draw lines to the tip of the foot outline and the base of the heel to create a triangular shape with a rounded peak. Leave 1⁄2 inch (1.3 cm) of space between the rounded peak of the triangle and your toes, and one inch of space between the base of the triangle and your heel.
-
8Cut the entire triangle out. This is your template for your left foot. If you flip it over, you have a template for your right foot. Be careful when cutting, you have to get it exactly right, otherwise it might be too big or too small


Transferring Your Template
-
1Take a large piece of leather at least 20 inches (50.8 cm) by 16 inches (40.6 cm) and trace the entire triangular left foot template on the inside of the leather using a pencil. Write a "L" on the inside of the foot to remind yourself that this piece will be for your left moccasin and put a dot where the T intersects.
-
2Flip the template over and repeat the previous step for your right foot. Write a "R" on the inside of the leather and again, mark a dot where the T intersects.
-
3Once you've transferred both triangle templates, cut out the foot outline from the paper template. You are only cutting out the sole template, which looks like a rough outline of your foot.
-
4Trace the left sole onto a new piece of the leather and write "L" on the inside to remind yourself that this outline is for the left sole.
-
5Flip the sole template over and repeat the previous step for your right foot, being sure to mark a "R" on the inside of the leather.
-
6Cut out all four pieces from the leather using scissors.


Sewing Your Moccasins Together
-
1Take a Glover's needle and thread it with the artificial sinew thread leaving a one-inch tail. You will need to have a long enough piece of thread to sew the entire shoe together. One arm-span length will be enough.
-
2Place the left triangular piece on top of the left sole piece with the rough sides facing one another. The rounded top of the triangular piece should match up with the toes of the sole outline.
-
3Begin at the middle of the toes and start to sew the edges of the sole and the triangular piece together with a simple stitch of your choice. A whip stitch works well for moccasins. Complete a whip stitch by tying a knot in the end of the sinew and starting at the bottom of the fabric, poking the needle up through both layers, and back down in an equal line with the upward stitch to create a tight stitch that hugs the outside of the two pieces of leather together. Continue to poke the needle through the two layers at a slight angle, coming up next to the previous stitch.[1]
- Work from the top of the toes around to the heel and back to the front toes.
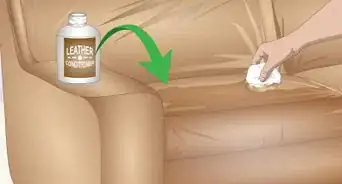
- For a more polished look, plan for a larger seam allowance and fold the edges of the leather template inward before sewing.
-
4Fold the moccasin in half and sew up the back of the heel where your Achilles tendon would be. Cross-stitches add a nice touch when sewing the back heel.
-
5Grab your scissors and cut a slit about one to two inches thick from the top of the ankle stitch inward to the dot you made earlier where the T-shape intersects with the leather. Do not cut this piece entirely off, it will act as the tongue of your shoe.
-
6Repeat for the right foot using the same exact process.
-
7Trim any loose threads and make sure your stitches are tight and you're finished!


Adding Embellishments
-
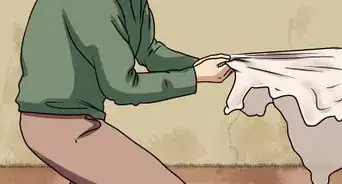
1Include a leather fringe on the top of your moccasin. Take a piece of leather about three inches thick and long enough to cover the rim of the top of your moccasin.
- Cut out the rectangle using scissors and proceed to snip the leather with your scissors into strips, leaving about one inch of solid, uncut leather on top. You can make each fringe the same size or alternate random widths.
- Take the fringed leather piece and trace the solid part of the leather around the rim of the moccasin with the fringe facing outward. Be sure to have the two sides of the leather rectangle meet in the back of the shoe so that the fringe seam matches the heel seam.
- Thread your Glover's needle with enough artificial sinew to stitch the entire rim of the moccasin. A piece as long as the distance from your fingers to your elbow will be more than enough.
- Sew on the fringed piece of leather to the top rim of the moccasin, using whatever creative stitch you desire. You can also use a different type of thread such as colored silk to personalize your moccasins even further.
- Repeat with the other moccasin.
-
2Bead your fringe. If you want to add beads of any color, shape, or size to your moccasins, the fringe is a perfect and simple place to add them. Simply thread the beads onto the ends of the fringe and tie a knot at the end to keep the beads from falling off.
- If you want to be absolutely sure that your beads won't come off, you can add a bit of hot glue to the center of the knot to prevent it from unravelling.


Expert Q&A
-
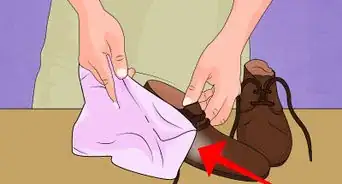
QuestionWhat do moccasins look good with?
 Carla NelsonCarla Nelson is a Personal Stylist and the Founder of A Creative Cliché. With more than seven years of experience, she specializes in empowering entrepreneurs and executives through personal styling and shopping, image consulting, and wardrobe edits. She has worked with many brands, including Woman’s World Magazine and L.L. Bean. Carla holds a Bachelor’s degree from Simmons University.
Personal StylistAim to keep a cleaner look by pairing your moccasins with an ankle length pant or one just “kissing” the moccasins in regards to length. Be very careful in regards to the length of the pieces you will be wearing. -
QuestionCan I use denim instead of leather?
 Community AnswerYes, you can.
 -
QuestionWhere can I find the materials for this project?Community AnswerCraft stores like Hobby Lobby, Michael's, etc., should carry the materials.
Things You'll Need
- Artificial sinew
- Glover's needles
- A paper bag
- Leather (at least 20 inches by 16 inches)
- Pen or pencil
- Scissors
- Extra leather for fringe (optional)
- Beads (optional)
- Hot glue (optional)

About This Article
To make moccasins, start by tracing your feet to make templates of them. Then, cut out the templates and trace them onto a piece of leather so you have four pieces in total. Next, cut out the four pieces of leather and sew them together using a glovers needle and artificial sinew thread. When you're finished, add embellishments to your moccasins, like leather fringe and beads. To learn how to make the templates for your moccasins, keep reading!