This article was co-authored by Mallika Sharma. Mallika Sharma is a Certified Leather Care Technician and the Founder of The Leather Laundry, a niche spa service for luxury leather gear in India. Mallika specializes in leather cleaning, coloring, repairing, and restoring for shoes, handbags, jackets, wallets, belts, and sofas. She holds a Master’s degree in Finance and Investment from the University of Edinburgh Business School. Mallika is a certified Professional Leather Care Technician and trained with the globally reputed leather care company, LTT in the United Kingdom.
There are 17 references cited in this article, which can be found at the bottom of the page.
This article has been viewed 201,395 times.
Cracks often happen when leather dries out or is exposed to sunlight. The fibers in the leather abrade one another. Although the damage is permanent, many cracks are easy to hide by rehydrating the leather with a good conditioner. Deeper cracks need to be filled in or treated with a dye to blend them into the leather’s coloring. With proper treatment, you can revitalize a precious piece of leather.
Steps
Rehydrating Leather with a Conditioner
-
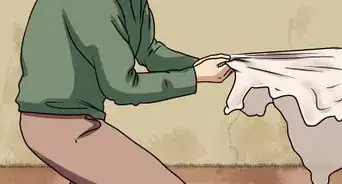
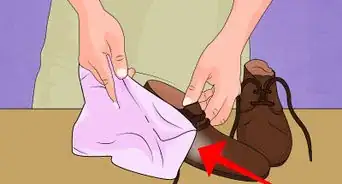
1Wipe off the leather with a cleaner and a microfiber cloth. Using a store-bought leather cleaner is the easiest way to prepare the cracked surface for repairs. Spray the cleaner on the cloth, then wipe away any grime on the leather. Rub along the leather’s grain to avoid deepening the cracks.[1]
- If you don’t have a commercial cleaner, mix together 1 part mild soap with 8 parts distilled water. Use baby soap or a liquid dish or hand soap.
- Using a small amount of water is a safe way to rinse off soap. Dampen the microfiber cloth, wringing out the excess moisture, then wipe the leather along its grain.
-
2Wait for the leather to dry before treating it. Touch the leather to check its condition. Cracks form when leather dries out, so your item most likely will feel dry within 5 to 10 minutes. To speed up the drying process, wipe the leather with a microfiber cloth.
- Make sure the surface feels dry to the touch so the soap or cleaner doesn’t get in the way of the conditioner.
Advertisement -
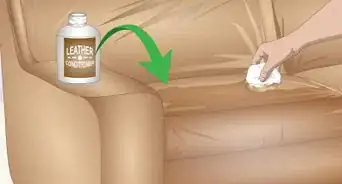
3Dab a strong leather conditioner onto the cracks. Select a bottled conditioner designed to restore and rehydrate leather. Put a small dollop of the conditioner on your finger or a soft applicator like a sponge or cloth. Then, rub the conditioner directly into the cracks in order to clean out the fabric’s pores and prepare them for deeper conditioning.
- Leather conditioner is available wherever leather items are sold, particularly online, at general stores, and at some clothing shops.
- The leather will absorb the cleaner right away. This happens with items that have dried out over time. Regular conditioning keeps leather soft and pliable.
-
4Smooth out the cracked areas with additional conditioner. Apply a generous amount of conditioner to the applicator pad. This time, scrub over the cracks and the areas around them. Continue scrubbing along the grain. The leather will become a more consistent color, hiding the cracks.
- If the leather hasn’t been conditioned in a while, consider treating the entire item now. Conditioning it prevents new cracks from forming elsewhere.
-
5Let the leather rest for 2 hours until it feels dry to the touch. Check the manufacturer’s instructions for the recommended drying time. The leather needs plenty of time to absorb all of the conditioner. Wait until it feels dry to the touch before continuing to treat it.
- If you have the time, let the leather dry overnight. Waiting a little longer gives the conditioner plenty of time to rehydrate the leather.
-
6Condition the leather again if the cracks are still visible. Depending on the conditioner, you may need to treat the leather multiple times. Spread more conditioner on an applicator pad and scrub it across the cracks. Check the leather again the next morning after giving it plenty of time to dry.
- Continue treating the leather until the cracks are gone or the leather stops absorbing the conditioner. If it stops absorbing the conditioner but the cracks are still visible, you will need to try a filler or dye.


Sealing Cracks with a Leather Filler
-
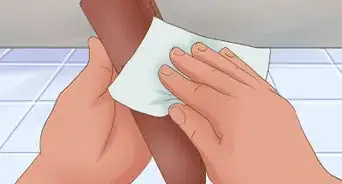
1Wash grime off the leather with soap or a leather cleaner. Select a bottled specialty leather cleaner or a mild soap. Baby soaps and mild dish and hand soaps are safe on leather. Make sure the soap isn’t designed for harsh surfaces or grease. Put the cleaner on a microfiber cloth and wipe up any dirt and debris still on the leather.[2]
- If you use soap, mix it into distilled water first. Then, lightly dampen a cloth with the soapy water.
-
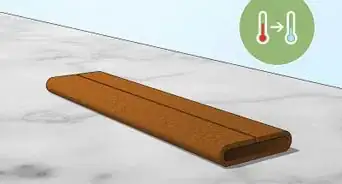
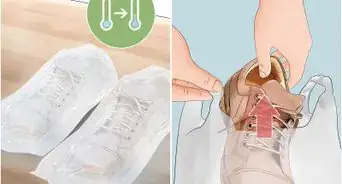
2Wait overnight for the leather to dry completely. Any moisture on the leather will prevent the filler from settling into the cracks. To encourage the leather to dry faster, wipe it off with a clean microfiber cloth. Make sure the leather looks free of grime and feels dry to the touch before attempting to treat the scratches.[3]
- Cleaning up leftover soap with water is fine, but use a lightly dampened cloth. Too much water exposure damages leather other time.
- Store your item in open air away from direct sunlight. Exposure to harsh heat and sunlight damages and fades colored leather.
-
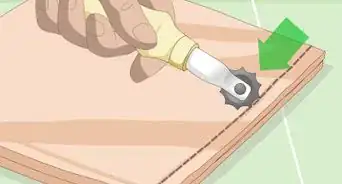
3Smooth the cracks with a piece of 600-grit super fine sandpaper. Apply gentle pressure while treating the cracks. Keep wearing them down until the leather feels uniformly smooth to the touch. Then, wipe it off with a dry microfiber cloth. Make sure the cloth removes all of the dust from the cracks so you can fill them in.[4] [5]
- Using higher grit or ultra fine sandpaper is safe, but avoid harsher sandpapers. Lower-grit papers are coarser and more likely to leave noticeable scratches.
-
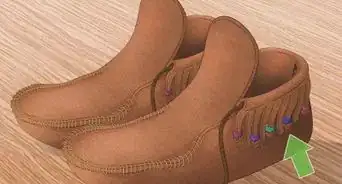
4Spread a leather filler over the cracks.[6] Leather fillers are paste-like products that come in small tubs. Pick up some of the paste with a palette knife, then brush it onto the cracks to fill them with a thin layer of paste. Apply additional paste until all the cracks appear filled.[7]
- Palette knives are thin and fairly blunt, making them a great choice for spreading the paste. If you don’t have one, use another blunt object like a credit card. Avoid sharp knives or other objects that will scratch the leather.
- Leather fillers are available online and at some general stores. They are often sold in kits that may include a sanding pad and an applicator knife.
-
5Remove excess paste with the edge of the knife. After spreading the filler, you will probably have a fair amount outside of the cracks. Tilt the palette knife sideways, then scrape its edge gently over the leather. It will pick up the remaining paste. Continue removing the paste until you can no longer see it outside of the cracked areas.[8]
- Place the excess filler in the cracks, back in the container, or wash the knife off in water as needed to remove it.
-
6Let the leather dry for 6 hours until the filler solidifies. Leave the filler exposed to open air so it dries faster. To protect your leather item, keep it out of direct sunlight and away from extreme heat.[9]
- Heat sources like heaters and ovens run the risk of drying out the leather, causing it to crack further.
-
7Apply more coatings of filler as needed to even out the cracks. The filler shrinks as it dries, so you will need to apply a second layer. Spread more filler with a palette knife or a similar blunt object. Scrape up the excess, then wait for then new layer to dry. When the leather is repaired, the cracks will no longer be distinguishable.[10]
- Depending on how deep the cracks are, you may need to apply additional layers of filler. Some cracks require as many as 5 coatings. Repeat the treatment until the cracks are well-filled.


Blending Cracks with a Leather Dye
-
1Treat cracks with leather filler to blend the coloring in better. If you don’t use filler first, you apply the dye or paint directly to the leather. This is enough to repair most cracks, but they may still be easy to spot. Filler is colorless, so it does a better job of permanently hiding bad cracks.
- For particularly deep or ugly cracks, add filler first so they don’t stand out as much.[11]
-
2Sand the leather with 600-grit sandpaper and wipe it clean. Smooth out the cracks to prepare them for the dye. Press the sandpaper or sanding pad down gently and rub along the leather’s grain. Make sure the leather feels smooth to the touch. Wipe up the dust with a clean microfiber cloth.[12]
- Use the cloth to clear out any dust that falls into the cracks. Leftover dust prevents the leather from absorbing the coloring evenly.
-
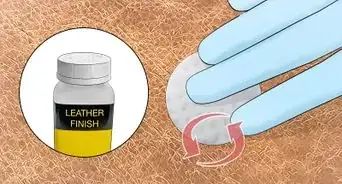
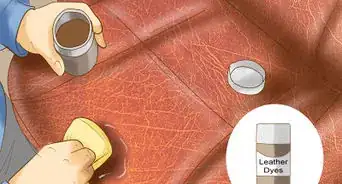
3Spread a thin coat of leather dye over the cracks with a sponge. Leather dye comes in a variety of colors, so choose a bottle that matches your item. Then, pour a little bit of the dye on a sponge or applicator pad. Rub the cracks to spread the dye into them.[13]
- Leather dye is available online or at some craft and general stores. They are sometimes sold in kits that include sandpaper and applicator pads.
- Another way to color cracks is with spray paint and lacquer thinner. Get a matching color of spray paint safe for use on leather. Spray some of the paint on a cloth, then pour the lacquer on the cloth. Rub the cloth against the cracks to color them.[14]
-
4Dry the dye for 2 minutes with a hairdryer set to high. Plug in the hairdryer and point it directly at the dyed areas. Move the heater back and forth across the cracks to prevent the leather from drying out. After you’re done, the layer of dye will be dry to the touch.[15]
- If you don’t have a hairdryer, try an alternative heat source, such as a heat gun. Be careful, since heat guns can easily burn leather. Move the gun around to prevent any spots from overheating.
-
5Blend the cracks with multiple coats of dye as needed. Cracks generally require 2 to 5 treatments before they look repaired. Spread more of the dye over the leather. This time, dab some of the dye directly into the crack, then rub the area around the cracks to blend them together.[16]
- Dry the dye each time with a hairdryer. Keep applying dye until the cracks are indistinguishable from the rest of the leather.
-
6Treat the cracks with a leather sealer to protect the dye. Spray the sealer onto a clean sponge or applicator pad. Then, rub the cracked area, applying a second coating as needed to cover all of the dye. The sealer acts as a conditioner that also protects the cracked area from stains and further damage.[17]
- Purchase a bottle of leather sealer online or at your local general store.
-
7Heat the sealer with a hair dryer for 2 minutes to cure it. Activate the dryer one last time to finish the repair. Hold the heater close to the leather, pointing it directly at the treated area. Move the heater back and forth to prevent the leather from overheating. Once the leather feels dry to the touch, check it to make sure it looks as good as new.[18]


Community Q&A
-
QuestionCan I use acrylic paint to repair faux leather?
 Community AnswerUse shoe polish, preferably the color close to it or a shoe dye. Then seal it with mink oil rubbed over it when dried. Buff it off, it should look very nice.
Warnings
- Leather is delicate, so any treatment may permanently damage it. If you are worried about damaging a valuable piece of leather, test the treatment in an inconspicuous location first.⧼thumbs_response⧽
Things You’ll Need
Rehydrating Leather with a Conditioner
- Leather
- Microfiber cloth
- Water
- Leather cleaner or soap
- Leather conditioner
- Applicator pad, sponge, or cloth
Sealing Cracks with a Leather Filler
- Leather
- Microfiber cloth
- Water
- Leather cleaner or soap
- Leather filler
- Palette knife
Blending Cracks with a Leather Dye
- Leather filler for tough cracks
- Leather dye
- Sponges or applicator pads
- Hairdryer
- Leather sealer


References
- ↑ https://www.youtube.com/watch?v=VZgl3AAxPcc&feature=youtu.be&t=104
- ↑ https://www.youtube.com/watch?v=OwgyAADe7q4&feature=youtu.be&t=15
- ↑ https://www.youtube.com/watch?v=Doa0gzfpQCw&feature=youtu.be&t=200
- ↑ https://www.youtube.com/watch?v=k7CoEgzoJlI&feature=youtu.be&t=32
- ↑ Mallika Sharma. Certified Leather Care Technician. Expert Interview. 14 May 2021.
- ↑ Mallika Sharma. Certified Leather Care Technician. Expert Interview. 14 May 2021.
- ↑ https://www.youtube.com/watch?v=BwL8O-LZb_k&feature=youtu.be&t=273
- ↑ https://www.youtube.com/watch?v=Doa0gzfpQCw&feature=youtu.be&t=405
- ↑ https://www.youtube.com/watch?v=Doa0gzfpQCw&feature=youtu.be&t=432
- ↑ https://www.youtube.com/watch?v=BwL8O-LZb_k&feature=youtu.be&t=376
- ↑ https://www.youtube.com/watch?v=Doa0gzfpQCw&feature=youtu.be&t=618
- ↑ https://www.youtube.com/watch?v=k7CoEgzoJlI&feature=youtu.be&t=33
- ↑ https://www.youtube.com/watch?v=HvvGLMMTyFw&feature=youtu.be&t=1227
- ↑ https://www.youtube.com/watch?v=gI04exWUkKI&feature=youtu.be&t=33
- ↑ https://www.youtube.com/watch?v=HvvGLMMTyFw&feature=youtu.be&t=1240
- ↑ https://www.youtube.com/watch?v=HvvGLMMTyFw&feature=youtu.be&t=1277
- ↑ https://www.youtube.com/watch?v=_bIuO2Fqs7k&feature=youtu.be&t=130
- ↑ https://www.youtube.com/watch?v=Doa0gzfpQCw&feature=youtu.be&t=1133
About This Article

If your leather has cracked, the damage may be permanent, but you can hide it by rehydrating the leather with a good conditioner. Start by wiping off the leather with a leather cleaner and a microfiber cloth. Rub along the leather’s grain to avoid deepening the cracks. Once the leather feels dry to the touch, which takes 5 to 10 minutes, dab a strong leather conditioner onto the cracks with your finger or a sponge. Rub the conditioner directly into the cracks, then apply more conditioner to scrub the surrounding areas so the color is consistent. Let the leather rest for 2 hours, or until it feels dry to the touch, then treat it again if the cracks are still visible. To learn how to seal cracks with a leather filler, keep reading!