This article was co-authored by wikiHow Staff. Our trained team of editors and researchers validate articles for accuracy and comprehensiveness. wikiHow's Content Management Team carefully monitors the work from our editorial staff to ensure that each article is backed by trusted research and meets our high quality standards.
This article has been viewed 102,329 times.
Learn more...
If you are looking to give your cards and notes a more personal touch, consider making your own stationery. With supplies that are readily available, you can make cards, notes, and other paper products that send a message while also reflecting your taste and artistic ability. Get your hands on the right kind of paper, get creative with your designs, and get to work.
Steps
Making the Cards
-
1Get the right paper. For your own stationery, you will need to get certain kinds of paper to give it a special look, and handle any decorations you come up with. Look for high-quality typewriter paper or specially designated craft paper. You should be able to find some at craft stores, and even some office supply stores.[1] [2]
-
2Set up your workstation. Before doing any work on paper, or later decorations, make sure you have an area to work. Find somewhere with plenty of space for you to operate and place all of your supplies within easy reach.[3]
- Make sure you cover your workspace with newspaper to prevent stains from things like paint or glue.
- If you are using chemicals with a particularly strong odor, work in a ventilated area or go outside.
Advertisement -
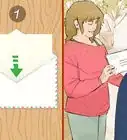
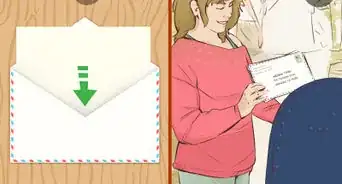
3Print your text. If you are going to include specific writing on your stationery, you may want to print it directly on to the paper. This can be helpful if you have a lot of text, or are making a lot of stationery. Typing and printing will help fit the text on your paper, make sure it fits, and give you a more consistent look.
- If you are printing, make sure your printer is able to handle the paper you intend to use for your stationery. If not, consider getting your notes professionally printed.[4]
- This can be a good step for big jobs like wedding invitations, where you have a lot of information to include and a large quantity of pages to print.
-
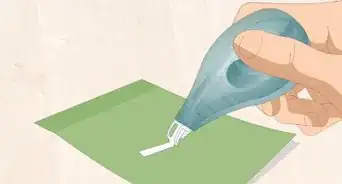
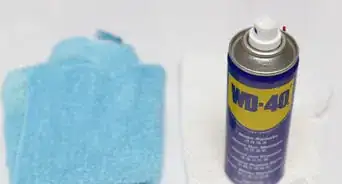
4Treat the paper. If you are going to add outside materials like paint, stamps, or other things, consider giving your paper some treatment so they are better prepared to paint and other liquids from leaking through paper and ruining any text on the inside. Spray a fixative to prevent smudging, like Krylon, over the outside, and let it dry before doing other decoration work.[5]
- To give the paper an aged look, soak it in coffee or black tea, then hang it to dry.


Decorating Your Stationery
-
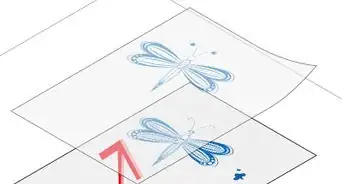
1Use a monogram. One simple and classy addition to your own stationery is the addition of letters, such as your initials, or maybe just the first letter of your first or last name. Using a linoleum block, you can make a nice stamp with your initials. You should be able to find all the tools for this stamp in a craft store.[6]
- Sketch out your monogram or design it in a word-processing program.
- Trace a pencil over your printed monogram, then lay it face down on a linoleum block.
- Scribble over the block to transfer those pencil lines to the block.
- Use a linoleum knife to cut the shape into the block (deep, but not all the way through), then cut the monogram out of the block to create a stamp.
-
2Put on pictures. Placing a picture or photograph on the front of a card can make more personal, especially if the picture has some meaning to both you and the recipient. Print out a picture of your choosing, and glue it to the front of a card.[7]
- You may want to avoid high-quality glossy photo paper, especially if you are making a lot of cards, as it can be quite expensive.
- To make a frame, cut out colored paper and place that underneath your picture.
-
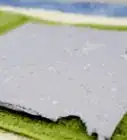
3Make a leaf stamp. Using bright green leaves you can find in nature, you can add a natural look to paper. Place the leaf on your paper with a lightweight white paper towel on top. Gently hammer the spot where the leaf is until you see the green soak through the paper towel. Pull off the towel, gentle remove the leaf from the paper, and let it dry.[8]
- Experiment with different leaves until you get a shade and shape that you like.
-
4Sew on fabric. To add a touch of color, you can add small squares of fabric to the front of your cards. Cut out a square of fabric, making sure it is not bigger than your actual card. Stich it to the card using sewing machine or sewing by hand.
- This is a great way to get rid of excess fabric without throwing it away.
- If you do this, keep in mind that you'll probably end up with a number of cards that look slightly different from each other.
-
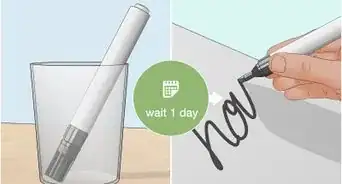
5Add scents. You can also add some slight scents to make your correspondence stand out and be a pleasant surprise for the recipient. Take some cotton pads, and add a few drops of a scent you like, such as scented oils or perfume. Put the cotton pads at the bottom of a plastic container, then cover the pads with a piece of cardstock. Spread your stationery on top of the cardstock and close the top for 24 hours. You can repeat by adding more oil to the cotton pads to get a stronger scent.[9]
- The cardstock is important because you don’t want the oils to get directly on your paper and damage it. All you want is the smell, not the liquid.


References
- ↑ http://www.motherearthnews.com/diy/personalized-stationery-zmaz82jfzglo.aspx
- ↑ http://www.thesimpledollar.com/homemade-gift-series-8-personalized-cards-and-stationery/
- ↑ http://www.motherearthnews.com/diy/personalized-stationery-zmaz82jfzglo.aspx
- ↑ http://www.papersource.com/howto/print_templates/print-help.html
- ↑ http://www.motherearthnews.com/diy/personalized-stationery-zmaz82jfzglo.aspx
- ↑ http://www.designsponge.com/2010/11/diy-project-monogram-stationery-set.html
- ↑ http://www.thesimpledollar.com/homemade-gift-series-8-personalized-cards-and-stationery/
- ↑ http://www.delightedmomma.com/2012/08/how-to-leaf-stamp-and-make-your-own.html
- ↑ http://www.linesacross.com/2015/10/diy-scented-stationary.html/
About This Article