This article was co-authored by Sam Hubbard. Sam Hubbard is a Professional Carpenter and the Owner of Hubbard Carpentry and Remodeling. He has over 19 years of experience in the industry. Sam specializes in kitchen remodels, home woodworking, cabinetry, and handyman services.
There are 11 references cited in this article, which can be found at the bottom of the page.
This article has been viewed 21,382 times.
Even experts need extra help to make quality cuts with a circular saw. If you need to make a straight cut through a length of wood, don’t guess. Instead, make a guideline with a ruler or guide the saw with a straight edge. A straight edge allows you to make quicker, more accurate cuts, and you can also build a similar tool to make cross cuts along a board’s width.
Steps
Making Long Freehand Cuts
-
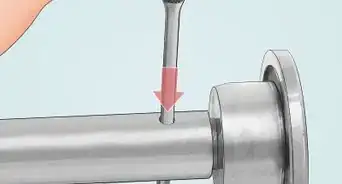
1Nail the board ends to saw horses. Saw horses make cutting very easy, since they provide stability for the board while you focus on the controlling the saw. Spread the saw horses out in your workspace, letting the board rest over them. Make sure the part of the board you wish to cut is accessible, then hammer a pair of 1.5 in (3.8 cm) nails into the opposite end.[1]
- Along with the wood and any other supplies needed, you can buy saw horses at most home improvement and tool stores.
- If you don’t have saw horses, you can use a workbench or another flat surface. Clamp the wood in place before cutting it.
-
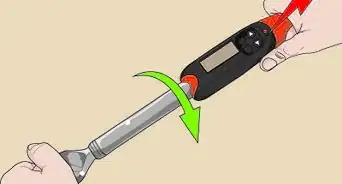
2Draw a cutting guideline with a square and a pencil. You will need a speed square, combination square, or a similar tool. These tools are basically rulers you use to plan out cuts before you make them. Mark or trace the guideline as evenly along the board as possible.[2]
- A combination square is a little similar to a circular saw. It has a fence you press to the side of the wood board to keep the ruler straight. Use this tool to create accurate guidelines on long pieces of wood.
Advertisement -
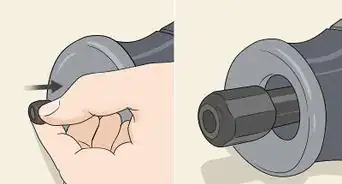
3Position your thumb and index finger around the board and saw’s shoe. Bring the circular saw over to the part of the board you wish to cut. Every circular saw has a metal frame around the blade called the shoe. Press your thumb firmly against the tab on the saw’s shoe in front of the blade. Place your index finger underneath the board, then squeeze your fingers together to hold the saw in place.[3]
- The saw's shoe tab will be opposite of the blade. If you have a right-handed tool, it will be on the left side. For a left-handed tool, it will be on the right.
- Make sure the saw’s handle side faces you. The saw blade will be on the opposite side, a safe distance from your fingers.
-
4Position the blade 1 in (2.5 cm) behind the guideline. Keep the blade in the section of wood you plan on cutting off. When you cut freehand, the blade can stray. If it cuts past the line, your entire board is ruined.
- If your fingers are within 3 in (7.6 cm) of the saw’s blade, such as on very short boards, do not cut this way. The same applies if the board’s edge is rough and splintered. Use a straight edge to avoid injuries.
-
5Guide the saw along the board with your fingers. Start your saw and begin cutting into the board. Keep pinching the saw's shoe to the board. As the saw cuts, slide your index finger along the board to keep the saw moving. Watch the saw carefully and pull it back if it begins to go off course.[4]
- When you notice the saw moving away from the guideline, stop cutting. Move the saw back to where it first began to stray. Align the blade again, then restart the cut.


Constructing and Using a Straight Edge
-
1Cut 1⁄4 in (0.64 cm)-thick plywood to form the straight edge’s base. For an average-sized jig, cut the board about 10 in (25 cm) wide and 4 ft (1.2 m) long. Make the base longer as needed for the circular saw cuts you plan on making. You can use your circular saw for this. Don’t worry about how rough the cuts turn out. You will have an opportunity to correct them later.[5]
- You can use a store-bought straight edge to skip making your own. However, the straight edge needs to be at least as long as the cut you plan on making or else it won’t work.
-
2Saw 3⁄4 in (1.9 cm)-thick plywood for the straight edge’s fence. The fence needs to be the same length as the piece you cut for the base. To determine how wide the fence board needs to be, measure the circular saw from the edge of its base to the end of the motor. Mark these dimensions with a pencil as needed, then cut the board to size.[6]
- Make use of factory-cut edges on the wood if your board has them. Try to preserve 1 of the long edges. The smoother the edge is, the better your straight edge will be. The other edges can be roughly cut to size.
-
3Align the boards and fasten them together with glue and nails. Set the thinner fence board down on a flat surface. Position the base board on top of it, aligning the top, bottom, and side edges of each board. Then, spread wood glue between the boards. Finish up with a series of 3⁄4 in (1.9 cm) flat-head wood screws.[7]
- Place the screws about 12 in (30 cm) along the length of the base board. Make sure they are on the aligned side, not the side where the base extends past the fence board.
- Choose the smoother edge of the fence board to face the center of the base board. Align the rougher edge with the base board’s edge. This will give you smoother cuts when you eventually use the straight edge.
-
4Clamp the straight edge and trim it with a circular saw. Pin it down against a flat surface like a workbench. Make sure the base board is on the bottom with the overhanging edge facing you. Then, put your saw on the board, pushing its base against the fence board. Hold it steady against the fence board as you cut excess wood off the base board.[8]
- To get a clean cut, use a sharp carbide-tipped or plywood cutting blade in your saw.
-
5Raise and measure the board you wish to cut with the straight edge. Place the wood board down on a flat surface, then slide scrap blocks underneath the ends. Make sure the blocks aren’t too close to the area you want to cut or else they can get in the saw’s way. Use a pencil and a tool such as a square to indicate where the cut will begin and end.[9]
- You don’t need to sketch out an entire guideline, but you can if you want to. The straight edge itself serves as the guideline.
-
6Line up the straight edge base with the marks and clamp it in place. Position the long end of the base, the side without the fence board, against the measurement marks. Secure the boards together to prevent the straight edge from slipping out of position.[10]
- Check your saw to determine where the straight edge needs to be. Standard circular saws have their blade on the left side, so the fence board will be to the right of the marks you made. For right-blade saws, the fence board needs to be to the left of the marks.
-
7Cut the board with a circular saw. Press the saw’s base against the fence board, similar to what you did while trimming the straight edge. Then, activate the saw and push it along the straight edge. As long as the straight edge is clamped securely in place, the saw won’t go off course and you get the straightest cut possible.[11]
- Maintain pressure on the saw to keep it against the straight edge. If you pull the saw back towards you, you can still end up with a jagged cut.


Assembling and Using a Cross Cut Jig
-
1Saw 3⁄4 in (1.9 cm)-thick plywood for the jig’s fence. Make the board 25 in (64 cm) long and about 10 in (25 cm) wide. The board’s edges need to be square, so cut them carefully with a circular saw or another tool.[12]
- Make sure the fence is at least the same length as the cut you plan on making.
-
2Cut 3⁄4 in (1.9 cm)-thick solid wood for the jig stop. Make the stop out of something strong like pine rather than plywood. Measure the board and mark it to be 14 in (36 cm) long and 3⁄4 in (1.9 cm).[13]
- The stop holds the fence tight against any board you cut. Make it longer than the fence board’s width.
-
3Align the fence’s edge with the side of the stop. Lay the stop down on a flat surface, then place the larger fence board over it. Position the fence so 1 of the longer edges is over the top edge of the stop. Make sure the top and side edges are square before fastening the boards together.[14]
-
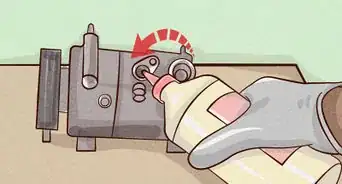
4Countersink holes in the boards and screw them together. Screwing the boards this way keeps them level and secure. To start, wrap tape 1 1⁄2 in (3.8 cm) above the end of a power drill. Drill down through the boards no further than the tape. Then, drill down again into the center of the pilot holes with a 1 1⁄2 in (3.8 cm) drill bit before adding 1 1⁄2 in (3.8 cm) flat-head wood screws.[15]
- Make the holes about every 3 1⁄2 in (8.9 cm) along the edge of the fence board. Position the screws about 1⁄2 in (1.3 cm) away from the edge.
- The second hole you drill will be wider than the pilot holes, providing a stable fit for the screws.
-
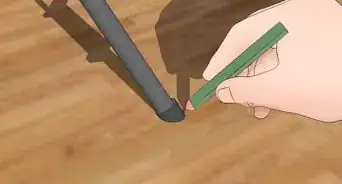
5Mark the board you wish to cut. Now that your jig is done, you can use it to make a straight cross cut on any board. Place the board on a flat surface, then use a square to measure out where you need to make the cut.[16]
- Make pencil marks to indicate the beginning and end of the cut. You don’t need to draw an entire guideline.
- Raise the board with scrap wood as needed to keep the saw from cutting into your work surface.
-
6Position the jig and cut the board with a circular saw. The thin stop board is meant to rest along the side of the board. The fence board will rest on the marks you made when measuring the cut. Place the circular saw so its blade is right up against the fence. Then, operate the saw as normal to slice the wood.[17]
- Hold the jig and board in place to prevent them from moving while you operate the saw.


Warnings
- Operating a saw can be dangerous. Always wear protective eyeglasses to guard against wood fragments. Consider wearing a dust mask as well. Avoid gloves and long clothing that can get caught in the saw.⧼thumbs_response⧽
- Avoid making long freehand cuts on short boards. If your fingers are too close to the blade, get a straight edge.⧼thumbs_response⧽
Things You’ll Need
Making Long Freehand Cuts
- Saw horses or flat surface
- Hammer
- 2 1.5 in (3.8 cm) nails
- Combination square
- Pencil
- Board
- Circular saw
Constructing and Using a Straight Edge
- 1⁄4 in (0.64 cm)-thick plywood
- 3⁄4 °F (−17.4 °C)-thick plywood
- Measuring tape
- Wood glue
- 3⁄4 in (1.9 cm) flat-head wood screws
- Clamp
- Combination square or speed square
- Pencil
- Board
- Circular saw
Assembling and Using a Cross Cut Jig
- 2 3⁄4 in (1.9 cm)-thick plywood boards
- Power drill
- Power screwdriver
- Masking tape
- Tape measure
- 1 1⁄2 in (3.8 cm) wood screws
- 1 1⁄2 in (3.8 cm) drill bit
- Combination square or speed square
- Pencil
- Board
- Circular saw


References
- ↑ https://www.bobvila.com/articles/975-how-to-cut-straight-lines-with-a-circular-saw/
- ↑ https://www.bobvila.com/articles/975-how-to-cut-straight-lines-with-a-circular-saw/
- ↑ https://www.youtube.com/watch?v=uIt4i8g7ZAc&feature=youtu.be&t=254
- ↑ https://www.youtube.com/watch?v=uIt4i8g7ZAc&feature=youtu.be&t=279
- ↑ http://www.woodworkersjournal.com/making-straight-cuts-with-a-circular-saw/
- ↑ http://www.woodworkersjournal.com/making-straight-cuts-with-a-circular-saw/
- ↑ https://www.youtube.com/watch?v=HdR8I5--WfY&feature=youtu.be&t=141
- ↑ https://www.woodmagazine.com/woodworking-tips/techniques/sawing-solutions/circular-saw
- ↑ http://www.woodworkersjournal.com/making-straight-cuts-with-a-circular-saw/
- ↑ https://www.youtube.com/watch?v=y0IcTl8D91Q&feature=youtu.be&t=289
- ↑ https://www.youtube.com/watch?v=HdR8I5--WfY&feature=youtu.be&t=217
- ↑ http://www.woodworkersjournal.com/making-straight-cuts-with-a-circular-saw/
- ↑ http://www.woodworkersjournal.com/making-straight-cuts-with-a-circular-saw/
- ↑ https://www.youtube.com/watch?v=l0xkvxMUE7M&feature=youtu.be&t=471
- ↑ http://www.woodworkersjournal.com/making-straight-cuts-with-a-circular-saw/
- ↑ https://www.youtube.com/watch?v=l0xkvxMUE7M&feature=youtu.be&t=515
- ↑ https://www.youtube.com/watch?v=l0xkvxMUE7M&feature=youtu.be&t=530
About This Article