This article was co-authored by wikiHow staff writer, Amy Bobinger. Amy Bobinger has been a writer and editor at wikiHow since 2017. She especially enjoys writing articles that help people overcome interpersonal hurdles but frequently covers a variety of subjects, including health and wellness, spirituality, gardening, and more. Amy graduated with a B.A. in English Lit from Mississippi College in 2011 and now lives in her hometown with her husband and two young sons.
There are 15 references cited in this article, which can be found at the bottom of the page.
This article has been viewed 20,323 times.
Learn more...
Making your own bath mat is a fun, inexpensive way to add a new look to your bathroom. In addition, it's a great way to use up fabric that you might not need anymore, like old towels, sheets, or T-shirts. For instance, you can braid strips of fabric to make a coiled rug, or you can knot them to make a shaggy bath mat. However, you can also upcycle other items into rugs for a fun, eco-friendly option!
Steps
Braiding a Bathroom Mat
-
1Cut 3 towels into strips about 3 in (7.6 cm) long, removing any trim. Choose 3 towels in colors that fit your bathroom decor. Measure across the short side of the towel, making marks every 3 in (7.6 cm) inches. Then, cut the towels into long strips using a pair of scissors or a rotary cutter and a mat.[1]
- Trim off the seams at the ends of the towels, along with any trim or decorative stitching.
- This project is a great way to use old towels that you don't want to throw away, but you can purchase new towels, if you'd like!
-
2Stack 3 strips of towels together and sew the ends together. If you're using multiple colors of towels, lay one strip of each color in a stack. Then, use a needle and thread to sew the tops of the strips together, leaving the other end free.[2]
- This will help hold the strips together as you're braiding them.
Advertisement -
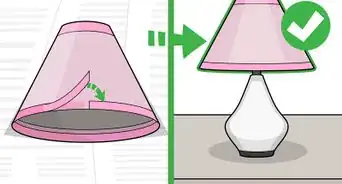
3Fold the end of the top strip in toward the center, then fold it in half. Take the top strip on the stack and fold it longways so both of the outside edges meet in the center of the strip. Then, fold the strip in half longways down the center.[3]
- This will keep the edges of the towel strips from unraveling as you braid them.
-
4Push pins through the strip every 2–4 in (5.1–10.2 cm), then repeat for the other strips. After you fold the first strip, slide straight pins through the material so it doesn't unfold itself. Space them out about 2–4 in (5.1–10.2 cm), and go down the entire length of the strip.[4]
- When you're finished, repeat this for the middle strip, then the bottom one.
Tip: Try keeping count of how many pins you use in each strip. For instance, you might use 10 pins in each strip to stay consistent. When you remove the pins, count them again to ensure you don't accidentally leave any in the rug!
-
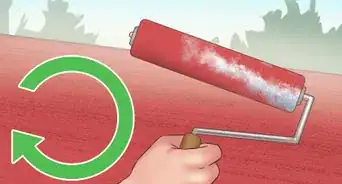
5Braid the strips together, pressing them flat. Once you have each strip folded, begin braiding them loosely by crossing the left side over the middle, then the right side over the original left strip, which should now be in the middle. Press the strips with your hand as you braid to keep the braid as flat as possible, and keep braiding until you get about 3 in (7.6 cm) from the end of the fabric.[5]
- The braid should be secure, but not tight. If you pull the strips together too tightly, the fabric will bunch up into more of a rope shape, rather than laying flat. However, if you braid it too loosely, the fabric won't hold.
- Remove the pins from the braid as you work. Be very careful to remove all of the pins from the material. Otherwise, someone could be injured by stepping on a pin when the mat is finished.[6]
-
6Sew the ends of the next set of strips to the first set. Match up the strips color-to-color, then stitch the ends together with your needle and thread. That way, you'll be able to create one long braided rope for your rug.[7]
-
7Continue pinning, braiding, and sewing all of the strips. After you pin on the next set of strips, fold them, insert the pins, and braid them together in exactly the same way you did the first set. Sew on new strips and repeat the process until you've used them all.[8]
- Don't forget to take out the pins as you go!
-
8Coil up the braid and sew the coils together. Take the top end of your braid and start rolling it into a long circular coil, pressing it to ensure it lays as flat as possible. Keep wrapping the braid around itself in a snug spiral to create the shape of your round rug. Then, use your needle and thread to sew the edges of the coil together where they touch side-by-side, adding a stitch every 2–3 in (5.1–7.6 cm) or so.[9]
- The closer together the stitches, the more secure the rug will be.
- This can be a time-consuming process. However, when you're finished, you'll have an eco-friendly braided rug to enjoy!


Knotting a Shabby-Chic Rug
-
1Purchase a piece of gridded matting the size of your finished rug. Get a large piece of gridded matting, which may also be called rug canvas. Then, use a pair of scissors or a rotary cutter to cut the matting to the size you want your bath mat to be.[10]
- If you want to make a contour bath rug to go around your toilet, try cutting the rug base so there's a square dip in the center top.
- You can find gridded matting at many fabric stores, big-box stores, and online.
-
2Cut your fabric into strips 3⁄4 in × 5 in (1.9 cm × 12.7 cm) long. Gather up a stack of old towels, T-shirts, bed sheets, or any other material. Use scissors to cut the material into 5 in (13 cm) pieces, then cut those pieces into strips about 3⁄4 in (1.9 cm) wide.[11]
- The amount of fabric you'll need will depend on the size and thickness of your finished rug. However, about 2 or 3 bath towels should be enough to make a thick rug that measures 18 in × 24 in (46 cm × 61 cm).[12]
- You can use any material you have on hand for this project, and as many different colors as you'd like. However, the rug will look best if you use all of one type of fabric, rather than mixing them.
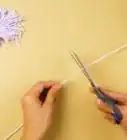
Tip: To make a DIY bath mat with yarn, make bundles by looping the yarn around your hand 9-10 times. Tie the yarn in the center, then tie the tail to the rug base. Continue across the whole rug.[13]
-
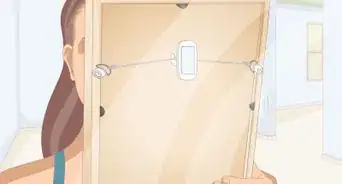
3Tie a fabric strip through a corner hole in the rug base. Once you've cut all of your fabric strips, take one strip and slide it down into one of the corner holes in the gridded matting. Then, pull the same strip up through one of the adjacent holes, and tie the material into a double knot.[14]
- You should have two short pieces of fabric sticking up once you tie the knot. This is what will create the shabby-chic look when the rug is finished.
-
4Continue knotting fabric strips all along the rug. Work your way either vertically or horizontally along the gridded matting, tying knots with your fabric strips as you go. If you're using two or more colors, alternate them. Once you've covered the entire piece of matting, your new rug will be finished![15]
- Knot the fabric along every line in the mat for a shaggy, thick rug, or skip every other line of holes if you want to make a thinner mat.[16]
- This project is simple, but it can be time-consuming. However, the finished result is an adorable rug for a fraction of the cost of buying one new!


Upcycling Items into a Rug
-
1Sew strips of fabric together to make an easy, machine-washable mat. If you want a quick take on an upcycled DIY bath mat, try cutting old towels, sheets, or T-shirts into long strips. Then, sew the strips together side-by-side to make a super-simple rug that you can toss into the washing machine any time you need to. While this mat will be on the thinner side, it can be a fun, easy way to change up the look in your bathroom![17]
- Try mixing multiple colors and patterns for a fun, eclectic look!
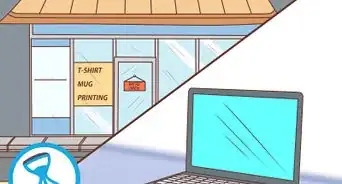
- To make a T-shirt bath mat, try cutting out the logos from your favorite worn-out tees. Then, sew those together side-by-side!
-
2Cut water-resistant memory foam to size for a super-plush bath mat. To make a DIY memory foam bath mat, use an electric knife to cut the foam to size for use as a bath mat. The electric knife will help you get smooth, even cuts, and you'll love the way the foam feels under your feet when you get out of the shower![18]
- If you're concerned the rug won't stay in place, glue a piece of non-slip shelf backing to the bottom of the memory foam.
- If you use water-resistant foam, the mat should not become waterlogged. However, regular memory foam will likely absorb too much water to be useful as a bath rug.
Try this fun alternative: To make a unique moss shower mat, use a craft knife to cut holes in the foam, then press fresh moss into the holes. The water from your feet when you get out of the shower will help keep the moss alive!
-
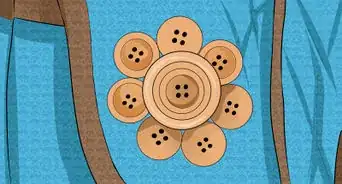
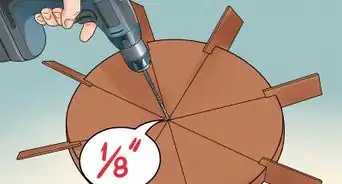
3Turn wine corks into a unique rug for a natural look. Gather about 150-200 wine corks and cut them in half with a sharp knife. Then, brush white wood glue onto the cut side of each cork and lay it onto a piece of non-slip shelf liner. Work in sections and let each area dry fully before you move to the next one. When you're finished, trim away any excess liner from the edges of the mat.
- It may be easier to cut the corks if you place them in boiling water first for about 2-3 minutes. Remove the corks carefully and cut them right away, then them let dry completely before you assemble the mat.[19]


Things You'll Need
Braiding a Bathroom Mat
- 3 towels
- Scissors or rotary cutter and mat
- Ruler or tape measure
- Straight pins
- Needle and thread
Knotting a Shabby-Chic Rug
- Gridded matting
- Scissors or rotary cutter and mat
- Fabric (e.g. 2-3 old towels)

References
- ↑ https://youtu.be/8-Y9Ao5qA-I?t=171
- ↑ https://youtu.be/8-Y9Ao5qA-I?t=200
- ↑ https://youtu.be/8-Y9Ao5qA-I?t=220
- ↑ https://youtu.be/8-Y9Ao5qA-I?t=223
- ↑ https://youtu.be/8-Y9Ao5qA-I?t=237
- ↑ https://youtu.be/8-Y9Ao5qA-I?t=251
- ↑ https://youtu.be/8-Y9Ao5qA-I?t=254
- ↑ https://youtu.be/8-Y9Ao5qA-I?t=254
- ↑ https://youtu.be/8-Y9Ao5qA-I?t=306
- ↑ http://www.finecraftguild.com/eco-friendly-bath-mat-fun-diy-project-to-do-in-the-easter-break/
- ↑ http://www.myloveofstyle.com/2013/04/10/diy-shag-rag-rug-tutorial/
- ↑ http://www.finecraftguild.com/eco-friendly-bath-mat-fun-diy-project-to-do-in-the-easter-break/
- ↑ https://youtu.be/MWCMkpW4NAg?t=9
- ↑ http://www.myloveofstyle.com/2013/04/10/diy-shag-rag-rug-tutorial/
- ↑ http://www.myloveofstyle.com/2013/04/10/diy-shag-rag-rug-tutorial/
- ↑ http://www.finecraftguild.com/eco-friendly-bath-mat-fun-diy-project-to-do-in-the-easter-break/
- ↑ https://www.fullhomeliving.com/diy-bath-mats/
- ↑ https://youtu.be/1j0UurpIKAA?t=37
- ↑ https://sustainmycrafthabit.com/diy-wine-cork-bath-mat/
About This Article