This article was co-authored by wikiHow Staff. Our trained team of editors and researchers validate articles for accuracy and comprehensiveness. wikiHow's Content Management Team carefully monitors the work from our editorial staff to ensure that each article is backed by trusted research and meets our high quality standards.
This article has been viewed 35,174 times.
Learn more...
Reins are an important part of horseback riding. They connect the rider to the horse and allow the rider to give it commands. While you can always buy reins from an equestrian-supply shop, making your own is easy. Best of all, you can choose your own colors to suit your tastes. Paracord is a great choice, due to its strength, durability, and vast range of colors, but you can try another material if you really want to.
Steps
Using Conway Buckles
-
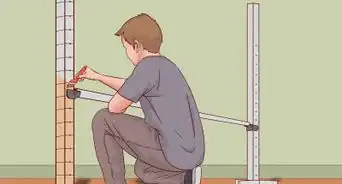
1Cut 9 strands of paracord twice the length you want your reins to be. Measure and cut one cord first, then use it as a guide for cutting the others. You can use however many colors you want, but keep the color combination in mind.[1]
- If you want a thinner set of reins, cut 6 strands instead.
- Most packs of paracord will be close to the right length. If they are too long by 12 or 24 inches (30.48 or 60.96 centimeters), you don't have to cut them.
-
2Arrange the cords side-by-side. If you are using more than one color, arrange the cord in the combination you want. For example: green-black-green, blue-black-blue, purple-black-purple.[2]Advertisement
-
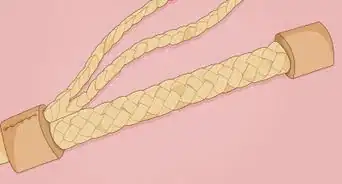
3Heat-seal the ends together with a lighter or heating tool. Seal the cords in groups of 3 first, then join the groups together. Keep the cords flat as you seal them; do not bundle or clamp them together.[3]
- If you are making a 6-cord braid, seal the cords in groups of 2 first.
- A stick lighter will work better than a regular lighter. You can also use a heating tool, such as a hot knife.
-
4Clamp a large binder clip over the heat-sealed ends. Hang the binder clip from a hook or nail. Make sure that it is at a comfortable working height for you.[4]
-
5Divide the cords into three groups. The first three cords on the left will be your first group. The three cords in the middle will be your second group. The last three cords on the right will be the third group.[5]
- If you used six cords, then separate the cords into groups of two.
-
6Braid the groups together. Take the 3-cord group on the left. Cross it over the middle group. Next, take the 3-cord group on the right, and cross it over the middle as well. Keep braiding like this until you are close to the end of your desired length.[6]
- Keep the groups flat at you braid them. Do not twist and turn them. Make sure that all of the colors are visible.
-
7Clamp, cut, then burn the ends. When you reach the desired length, place another binder clip over the cords. Cut the cords just below the clip, then heat-seal them as before. Once the cords cool, remove the clip.[7]
-
8Feed the braided rope through the conway buckle. Turn the buckle so that the pin/needle is facing up. Feed the braid up through one end of the buckle. Loop it loosely over the pin, then back down through the other end. Do not press the braid into the pin yet.[8]
-
9Slip the end through a trigger snap hook, then feed it back through the buckle. Make sure that you are feeding the braid between the existing braid and the buckle itself. You want the end of the braid to be caught between the buckle/pin and the rest of the rope.[9]
-
10Push the braids down into the pin. Repeat the process on the other end of the braid with another conway buckle and trigger snap hook.[10]


Without Using Conway Buckles
-
1Cut four strands of paracord. The first two strands need to be twice the length you want your finished reins to be. The next two strands need to be four times the length.[11]
-
2Heat-seal the first two strands of paracord together. Take the ends of the two short paracords. Heat both of them up with a lighter, then quickly press them together, end-to-end, so that you have a longer cord.[12]
-
3Feed the cord through the eye of a trigger snap in a slip knot. Push the jointed end of the paracords through the eye of your trigger snap hook by about 1 inch (2.54 centimeters). Feed the tail ends through the loop, then tug down on them to tighten the knot.[13]
-
4Slip the other two cords through the eye of the hook as well. Take the two longer cords, and feed them through the eye as well, but don't tie them in a slip knot. You want the cords to be centered and even on both sides. You'll have two strands on each side of the slip knot.[14]
-
5Separate the cords into thee groups. The first two strands on the left will be your first group. The next two strands in the middle will be your second group. The last two strands on the right will be your third group.[15]
-
6Braid the strands together. Take the 2-strand group on the left, and cross it over the 2-strand group in the middle. Take the last, 2-strand on the right, and cross it over the middle one as well. Continue braiding the cords until your reins are the length you want them to be.[16]
- Keep the strands flat as you braid them. Don't let them twist or flip.
-
7Feed the ends through another trigger snap hook, then weave them back in. Feed all of the cords through the eye of your second trigger snap hook. Take the group on the left, and weave it back into the braid. Repeat the process with the other groups.[17]
- Follow the pattern of the braid as best you can.
- Do this for about 4 to 6 inches (10.16 to 15.24 centimeters).
-
8Trim and burn the ends. Cut any excess paracord off, as close to the braid as you can. Heat the ends of the cords, then press them flat against the braid.[18]
- It will be easiest to do this with a heat tool, such as a hot knife, rather than a lighter.


Community Q&A
-
QuestionWhat size are conway buckles?
 ReebokBeebokCommunity AnswerThey can come in a variety of sizes, the most common being: 13mm, 16mm, 19mm, and 25mm, That's the same as 1/2", 5/8", 3/4" and 1".
Things You'll Need
Using Conway Buckles
- Paracord
- Scissors
- Binder clip
- Lighter
- 2 trigger snap hooks
- 2 conway buckles
Without Using Conway Buckles
- Paracord
- Scissors
- Binder clip
- Lighter
- 2 trigger snap hooks


References
- ↑ https://www.youtube.com/watch?v=ibiyKC1JilY
- ↑ https://www.youtube.com/watch?v=ibiyKC1JilY
- ↑ https://www.youtube.com/watch?v=ibiyKC1JilY
- ↑ https://www.youtube.com/watch?v=ibiyKC1JilY
- ↑ https://www.youtube.com/watch?v=ibiyKC1JilY
- ↑ https://www.youtube.com/watch?v=ibiyKC1JilY
- ↑ https://www.youtube.com/watch?v=6Z8ozpKCNsg
- ↑ https://www.youtube.com/watch?v=6Z8ozpKCNsg
- ↑ https://www.youtube.com/watch?v=6Z8ozpKCNsg
- ↑ https://www.youtube.com/watch?v=ibiyKC1JilY
- ↑ https://www.youtube.com/watch?v=q6-s1hFTaoo
- ↑ https://www.youtube.com/watch?v=q6-s1hFTaoo
- ↑ https://www.youtube.com/watch?v=q6-s1hFTaoo
- ↑ https://www.youtube.com/watch?v=q6-s1hFTaoo
- ↑ https://www.youtube.com/watch?v=q6-s1hFTaoo
- ↑ https://www.youtube.com/watch?v=q6-s1hFTaoo
- ↑ https://www.youtube.com/watch?v=q6-s1hFTaoo
- ↑ https://www.youtube.com/watch?v=q6-s1hFTaoo
About This Article

To make a braided horse rein, start by cutting 2 strands of paracord that are twice the length you want your finished rein to be and 2 strands that are 4 times the length. Then, burn the ends of the 2 shorter paracord strands together with a lighter. Next, feed the joined ends of the paracords through the eye of a trigger snap hook, and feed the tail ends through the loop to make a slipknot around the hook. Once you've done that, feed the ends of the other 2 paracord strands through the eye of the hook so you have 2 strands on each side of the slipknot. Now, separate the strands into 3 groups of 2, and braid them together until you reach your desired length. When you reach the end, feed the strands through a second trigger snap hook, and weave the ends back into the braid. Finally, cut the excess paracord off, and burn the ends with a lighter. To learn how to make a braided horse rein using conway buckles, keep reading!